
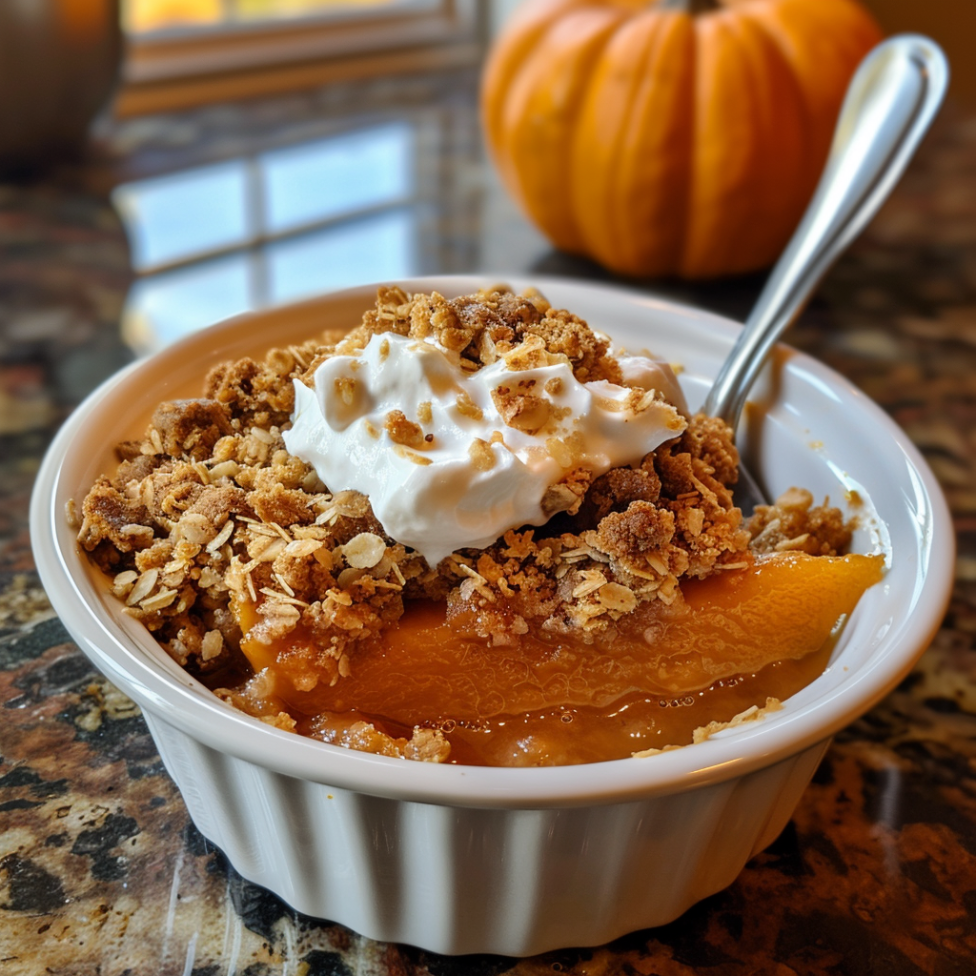
As the leaves start to change color and the air turns crisp, there’s nothing quite like enjoying a warm, comforting dessert that embodies the essence of autumn. Pumpkin Crisp, with its rich, creamy filling and crunchy topping, is the perfect treat to savor during this cozy season. Whether you’re hosting a festive gathering, looking for a delightful finish to a family dinner, or simply indulging in a seasonal snack, this Pumpkin Crisp recipe is sure to impress.
Ingredients:
To make this mouth-watering Pumpkin Crisp, you’ll need:
For the Filling:
- 1 (15 oz.) can of pumpkin puree
- 1 cup heavy cream
- 3/4 cup granulated sugar
- 1/2 cup packed brown sugar
- 2 large eggs
- 1 tsp vanilla extract
- 2 tsp ground cinnamon
- 1/2 tsp ground nutmeg
- 1/2 tsp ground ginger
- 1/4 tsp ground cloves
- 1/4 tsp salt
For the Topping:
- 1 cup all-purpose flour
- 1 cup old-fashioned oats
- 2/3 cup packed brown sugar
- 1/2 cup unsalted butter, melted
- 1/2 tsp ground cinnamon
- Pinch of salt
Instructions:

Step 1: Preheat and Prepare
- Begin by preheating your oven to 350°F (175°C). Grease an 8×8 inch baking dish with butter or non-stick spray.
Step 2: Mix the Filling
- In a large mixing bowl, combine the pumpkin puree, heavy cream, granulated sugar, brown sugar, eggs, vanilla extract, cinnamon, nutmeg, ginger, cloves, and salt. Whisk these ingredients together until smooth and well combined. Pour the filling into the prepared baking dish.
Step 3: Make the Topping
- In a separate bowl, mix together the flour, oats, brown sugar, melted butter, cinnamon, and a pinch of salt until the mixture is crumbly. Sprinkle this topping evenly over the pumpkin filling.
Step 4: Bake
- Place the baking dish in the oven and bake for 45-50 minutes, or until the topping is golden brown and the filling is set.
Step 5: Cool and Serve
- Allow the Pumpkin Crisp to cool slightly before serving. This dessert can be enjoyed warm or at room temperature. For an extra touch of indulgence, serve with a scoop of vanilla ice cream or a dollop of whipped cream.
Nutritional Information:
Pumpkin is not only delicious but also packs a punch of health benefits. It’s rich in vitamins, minerals, and antioxidants, while being low in calories. This makes Pumpkin Crisp a somewhat guilt-free dessert, especially if enjoyed in moderation.
Why You’ll Love This Recipe:
- Seasonal Flavor: This Pumpkin Crisp captures the quintessential flavors of fall.
- Ease of Preparation: Simple ingredients and straightforward steps make this recipe accessible to bakers of all levels.
- Comforting and Satisfying: The creamy filling and crunchy topping provide a satisfying texture and taste that’s hard to beat.
Conclusion:
Embrace the spirit of autumn with this easy and delicious Pumpkin Crisp. It’s the perfect dessert to complement any meal or occasion during the fall season. With pumpkin spice permeating your kitchen, this dessert not only tastes great but also creates a warm, inviting atmosphere. Bake it today and enjoy the best flavors fall has to offer!
Serving and Storage Tips for Pumpkin Crisp
Pumpkin Crisp is a delightful dessert that combines the creamy texture of pumpkin pie with the crunchy goodness of a crumble topping. To ensure that you get the most out of this seasonal treat, here are some essential serving and storage tips.
Serving Tips:
- Temperature: Pumpkin Crisp can be enjoyed warm or at room temperature. To warm it up, simply place it in a preheated oven at 350°F (175°C) for about 10 minutes or give it a quick zap in the microwave.
- Accompaniments: Elevate your Pumpkin Crisp by serving it with a scoop of vanilla ice cream, a dollop of whipped cream, or a drizzle of caramel sauce. These additions not only add flavor but also create a lovely textural contrast with the crisp topping.
- Presentation: Serve your Pumpkin Crisp in a pretty dish or individual ramekins for a more personalized touch. Garnish with a sprinkle of cinnamon or nutmeg to enhance its visual appeal and hint at the flavors inside.
Storage Tips:
- Refrigeration: Pumpkin Crisp should be stored in the refrigerator if not consumed immediately. Cover the dish with plastic wrap or aluminum foil, or transfer individual servings to an airtight container. It will keep for up to 5 days.
- Freezing: For longer storage, Pumpkin Crisp can be frozen. First, allow the crisp to cool completely. Then, wrap it tightly with a layer of plastic wrap and follow with a layer of aluminum foil to protect it from freezer burn. Stored this way, it can last for up to 3 months. Thaw overnight in the refrigerator before reheating.
- Reheating: When ready to enjoy your Pumpkin Crisp again, reheat it in the oven at 350°F (175°C) for about 15-20 minutes or until heated through. This method helps to preserve the texture of the topping better than the microwave.
By following these simple serving and storage tips, you can enjoy your Pumpkin Crisp at its best, whether it’s fresh out of the oven or as a treat days later. This makes Pumpkin Crisp not only a delicious choice for immediate enjoyment but also a convenient make-ahead option for holiday gatherings and cozy nights in.
1. Can I use fresh pumpkin instead of canned pumpkin puree for Pumpkin Crisp?
Yes, you can use fresh pumpkin to make Pumpkin Crisp. To do so, choose a small variety of pumpkin intended for cooking, such as Sugar Pie pumpkins. Cut the pumpkin in half, remove the seeds, and roast it cut-side down at 400°F (200°C) until tender. Once cooled, scoop out the flesh and puree it in a blender until smooth. Measure out the amount needed for your recipe. Keep in mind that fresh pumpkin may be more watery than canned puree, so you might need to strain it or reduce other liquid ingredients slightly to achieve the desired consistency of the filling.
2. How can I make a gluten-free version of Pumpkin Crisp?
To make a gluten-free Pumpkin Crisp, substitute the all-purpose flour in the topping with a gluten-free all-purpose flour blend. Additionally, ensure that your oats are certified gluten-free, as oats can often be cross-contaminated with wheat during processing. The rest of the ingredients are naturally gluten-free, but always check labels to be safe, especially with processed ingredients like vanilla extract.
3. What are some tips for getting the crispiest topping on my Pumpkin Crisp?
For a crispier topping on your Pumpkin Crisp, ensure that your butter is melted and mixed thoroughly with the dry ingredients to create small clumps. These clumps turn into delightful crispy bits as they bake. Also, avoid covering the baking dish while it’s in the oven, as covering it can trap steam and soften the topping. If you find the topping getting too brown before the filling is set, you can lightly cover it with foil towards the end of the baking time.
4. Is Pumpkin Crisp suitable for freezing, and if so, how should I thaw and reheat it?
Pumpkin Crisp is suitable for freezing and can be a great make-ahead dessert option. To freeze, cool the crisp completely, then wrap it tightly in plastic wrap followed by a layer of aluminum foil. Freeze for up to 3 months. To serve, thaw the crisp in the refrigerator overnight. Reheat in an oven preheated to 350°F (175°C) for about 15-20 minutes or until warmed through. This method helps maintain the texture and flavor of the Pumpkin Crisp.
Pumpkin Crisp
- Prep Time: 10 minutes
- Cook Time: 45 minutes
- Total Time: 55 minutes
- Yield: 6–8 servings 1x
- Category: Dessert
- Method: Baking
- Cuisine: American
Description
This Pumpkin Crisp is a warm, spiced pumpkin filling topped with a buttery, crunchy streusel. It’s like pumpkin pie meets crisp—perfect for fall gatherings, Thanksgiving, or anytime you’re craving a cozy dessert!
Ingredients
For the Pumpkin Filling:
- 1 (15 oz) can pumpkin purée
- 3/4 cup evaporated milk (or heavy cream)
- 1/2 cup granulated sugar
- 1/4 cup brown sugar, packed
- 2 large eggs
- 1 teaspoon vanilla extract
- 1 teaspoon cinnamon
- 1/2 teaspoon nutmeg
- 1/2 teaspoon ginger
- 1/4 teaspoon cloves
- 1/4 teaspoon salt
For the Crisp Topping:
- 1 cup all-purpose flour
- 3/4 cup old-fashioned oats
- 1/2 cup brown sugar, packed
- 1/2 teaspoon cinnamon
- 1/2 cup unsalted butter, melted
- 1/2 cup chopped pecans (optional)
Instructions
- Preheat oven to 350°F (175°C). Grease a 9×9-inch baking dish.
- Make the pumpkin filling – In a large bowl, whisk together pumpkin, evaporated milk, sugars, eggs, vanilla, cinnamon, nutmeg, ginger, cloves, and salt until smooth. Pour into the prepared dish.
- Prepare the crisp topping – In a separate bowl, mix flour, oats, brown sugar, cinnamon, and pecans. Stir in melted butter until crumbly.
- Assemble & bake – Sprinkle the crisp topping evenly over the pumpkin filling. Bake for 40-45 minutes, until golden brown and set.
- Cool & serve – Let cool for at least 15 minutes before serving. Enjoy warm with vanilla ice cream or whipped cream!
Notes
- Crunchier Topping: Use chopped walnuts or almonds instead of pecans.
- Dairy-Free Option: Swap evaporated milk for coconut milk and butter for vegan butter.
- Make Ahead: Prepare and refrigerate the filling and topping separately, then assemble and bake fresh.