
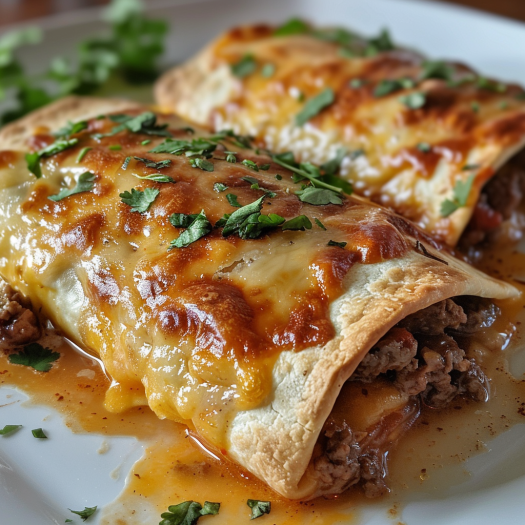
Looking for a hearty meal that packs a flavorful punch? Look no further than these mouth-watering Beef and Cheese Chimichangas. This recipe combines juicy, seasoned beef with melty cheese, all wrapped up in a crispy tortilla. Perfect for a family dinner, game day, or any time you’re in the mood for something satisfying and delicious. Follow this step-by-step guide to make the best Beef and Cheese Chimichangas right at home!
Ingredients You’ll Need:
- 1 lb ground beef: Choose lean ground beef for the best flavor and texture.
- 1 onion, chopped: Adds sweetness and depth to the beef filling.
- 2 cloves garlic, minced: For that essential punch of flavor.
- 1 teaspoon ground cumin: Gives a warm, earthy note.
- 1 teaspoon chili powder: Adds a bit of spice.
- Salt and pepper to taste: For seasoning the beef perfectly.
- 1 cup of shredded cheese (cheddar or Monterey Jack): For that gooey, cheesy goodness.
- 4 large flour tortillas: Acts as the perfect wrap for your filling.
- Vegetable oil for frying: Ensures a golden, crispy exterior.
- Sour cream, salsa, and guacamole (optional): Perfect for serving.
Step-by-Step Instructions:
- Cook the Beef Filling:
- Heat a large skillet over medium heat. Add the ground beef and cook, stirring and breaking up the meat with a spoon, until browned and crumbly. Drain any excess fat.
- Add the chopped onion and minced garlic to the skillet with the beef. Cook until the onions are soft and translucent, about 5 minutes.
- Stir in the cumin, chili powder, salt, and pepper. Cook for an additional 2 minutes to let the flavors meld. Remove from heat and let cool slightly.
- Prepare the Chimichangas:
- Lay a flour tortilla on a flat surface. Sprinkle a portion of the shredded cheese in the center of the tortilla, leaving enough space around the edges to fold.
- Add a generous scoop of the beef mixture over the cheese. Fold the sides of the tortilla in, then roll up from the bottom to enclose the filling completely.
- Repeat with the remaining tortillas.
- Fry the Chimichangas:
- In a large, deep skillet, heat about half an inch of vegetable oil over medium-high heat.
- Carefully place the chimichangas seam-side down in the hot oil. Fry until golden brown and crispy, about 2-3 minutes per side. Use tongs to turn them gently.
- Drain on paper towels to remove excess oil.
- Serve and Enjoy:
- Serve your Beef and Cheese Chimichangas hot, accompanied by sour cream, salsa, and guacamole if desired.
Tips for Perfect Chimichangas:
- Seal them well: Ensure the ends of your chimichangas are tucked in securely to prevent the filling from leaking out during frying.
- Use the right oil temperature: If the oil is too hot, the outside will burn before the inside is heated through. Too cool, and your chimichangas will be greasy.
- Customize your fillings: Feel free to add beans, rice, or other vegetables to the beef mixture for a different twist.
Serving and Storage Tips for Beef and Cheese Chimichangas
Once you’ve mastered the art of making Beef and Cheese Chimichangas, you’ll want to ensure they are served at their best and know how to store any leftovers properly. Here are some essential tips to help you enjoy your chimichangas to the fullest:
Serving Tips:
- Serve Hot: Chimichangas are best served hot, right after frying. This ensures that the tortilla remains crispy and the cheese inside is deliciously melted.
- Accompaniments: Offer a variety of toppings and sides to complement the chimichangas. Traditional options include sour cream, salsa, guacamole, and a fresh salad. These add freshness, creaminess, and extra flavor.
- Presentation: For a visually appealing presentation, cut the chimichangas in half diagonally and arrange them on a plate with the cut side facing up, allowing your guests to see the delicious filling.
- Spicy Options: For those who enjoy a bit more heat, serve with a side of jalapeños or a spicier salsa to add a kick.
Storage Tips:
- Cool Before Storing: Allow any leftover chimichangas to cool to room temperature before storing to prevent condensation that can make them soggy.
- Refrigerate Properly: Wrap individual chimichangas tightly in aluminum foil or plastic wrap, or place them in an airtight container. They will keep in the refrigerator for up to 3 days.
- Freezing: For longer storage, chimichangas can be frozen. Wrap each one in foil, then place them in a freezer bag or airtight container. They can be frozen for up to 2 months. When ready to eat, you can reheat them directly from frozen or let them thaw overnight in the refrigerator.
Reheating Tips:
- Oven Method: To reheat, preheat your oven to 350°F (175°C). Remove any plastic wrap and rewrap chimichangas in foil if they aren’t already. Heat for about 15-20 minutes if thawed, or 30-40 minutes from frozen, until heated through.
- Air Fryer Method: This is a great way to keep the chimichangas crispy. Reheat at 350°F for about 10 minutes if thawed, checking periodically to ensure they don’t burn.
- Microwave Method: Although not ideal for keeping the tortillas crispy, you can use the microwave for a quick reheat. Unwrap the chimichanga and place on a microwave-safe plate. Heat on high for 1-2 minutes, just until heated through.
With these serving and storage tips, you can make your Beef and Cheese Chimichangas a highlight of any meal, while also making the most out of any leftovers. Enjoy your delicious creation anytime, maintaining that freshly-cooked taste and texture!
FAQ 1: What kind of beef is best for chimichangas?
Answer: For chimichangas, it’s best to use lean ground beef, as it offers a good balance of flavor and texture while ensuring the filling isn’t too greasy. Ground chuck or ground sirloin are excellent choices due to their flavor and relatively low fat content. If you prefer a different texture, you can also use shredded beef brisket or chuck roast that has been cooked and pulled.
FAQ 2: Can I make chimichangas in an air fryer instead of frying them?
Answer: Yes, you can absolutely use an air fryer to make chimichangas. This method reduces the oil needed and provides a healthier version while still achieving a crispy texture. To air fry, brush your chimichangas lightly with oil, and cook them at 400°F for about 8 minutes, flipping halfway through. Check them frequently to ensure they don’t burn.
FAQ 3: Are there any vegetarian options for chimichangas?
Answer: Definitely! For a vegetarian version, you can substitute the ground beef with cooked and seasoned lentils, black beans, or a meat substitute like textured vegetable protein (TVP) or tempeh. You can also add rice, corn, and diced vegetables such as bell peppers and zucchini to make the filling hearty and flavorful.
FAQ 4: How do I keep my chimichangas from becoming soggy when reheating?
Answer: To prevent soggy chimichangas when reheating, avoid the microwave if possible, as it tends to steam the tortillas. The best methods are either using an oven or an air fryer. If using an oven, wrap the chimichangas in aluminum foil and reheat at 350°F until they are warm throughout. For the air fryer, no wrapping is necessary; just heat them at 350°F until they are crispy and hot. These methods help maintain the crispy texture of the tortillas.