
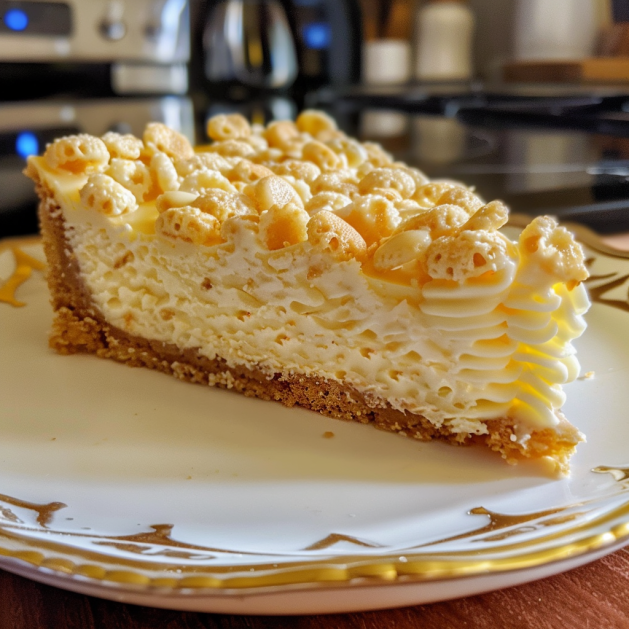
If you’re in the mood for a dessert that combines nostalgic childhood treats with the elegance of a classic dessert, look no further than this Rice Krispie Treat Cheesecake recipe. This delightful fusion marries the gooey, marshmallow goodness of Rice Krispie treats with the creamy, smooth texture of cheesecake. Perfect for parties, family gatherings, or as a unique addition to your dessert repertoire, this cheesecake is sure to impress. Here’s how you can make it at home.
Ingredients Needed:
- For the Rice Krispie Crust:
- 6 cups Rice Krispies cereal
- 5 tablespoons butter
- 40 regular-sized marshmallows (or 5 cups of mini marshmallows)
- For the Cheesecake Filling:
- 24 oz (3 packages) cream cheese, softened
- 1 cup granulated sugar
- 1 teaspoon vanilla extract
- 3 large eggs
- 1/2 cup sour cream
- For the Topping (optional):
- Additional whipped cream
- Mini marshmallows
- Rice Krispies cereal
Equipment:
- 9-inch springform pan
- Mixing bowls
- Electric mixer
- Saucepan
Directions:

- Prepare the Crust:
- In a large saucepan, melt the butter over low heat. Add the marshmallows and stir until completely melted. Remove from heat.
- Stir in the Rice Krispies cereal until they are well coated with the marshmallow mixture.
- Press the mixture into the bottom and up the sides of a greased 9-inch springform pan to form a crust. Set aside to cool and harden.
- Make the Cheesecake Filling:
- Preheat your oven to 325°F (160°C).
- In a large mixing bowl, use an electric mixer to beat the cream cheese until smooth and creamy.
- Gradually add sugar and vanilla, and beat until smooth.
- Add eggs one at a time, beating just until blended after each addition.
- Stir in sour cream until the mixture is smooth.
- Pour the filling into the prepared Rice Krispie crust.
- Bake the Cheesecake:
- Bake in the preheated oven for about 50-55 minutes or until the center is set and the edges are lightly browned.
- Turn off the oven and let the cheesecake sit in the oven with the door closed for 1 hour.
- Remove from the oven and let it cool completely on a wire rack.
- Chill and Serve:
- Once cooled, refrigerate the cheesecake for at least 4 hours, preferably overnight.
- Before serving, you may top the cheesecake with whipped cream, a sprinkle of Rice Krispies cereal, and some mini marshmallows for an extra touch of whimsy.
Tips for the Perfect Cheesecake:
- No Cracks: To avoid cracks in your cheesecake, ensure all ingredients are at room temperature before you begin mixing. Additionally, avoid overmixing once you add the eggs.
- Smooth Slicing: For clean slices, dip your knife in hot water and wipe it dry between cuts.
- Variations: Feel free to add a drizzle of chocolate or caramel sauce for an extra layer of flavor.
This Rice Krispie Treat Cheesecake is an innovative dessert that blends crunch with creaminess, making it a guaranteed hit for any occasion. Whether you’re looking to surprise your family with a special treat or need a standout dessert for a gathering, this cheesecake promises to deliver both in taste and presentation. Enjoy crafting this delightful sweet treat that’s sure to bring smiles and requests for a second slice!
Serving and Storage Tips for Rice Krispie Treat Cheesecake
Creating a delicious Rice Krispie Treat Cheesecake is just the beginning. To ensure you make the most out of this unique dessert, it’s important to know the best ways to serve and store it. Here are some tips to help you enjoy your cheesecake while maintaining its texture and flavor.
Serving Tips:
- Serve Chilled: This cheesecake tastes best when served chilled. Remove it from the refrigerator just before serving to maintain its firmness and ease of slicing.
- Adding Toppings Just Before Serving: If you’re using whipped cream, marshmallows, or any additional toppings like a sprinkle of Rice Krispies or drizzles of chocolate or caramel, add them right before serving. This ensures the toppings are fresh and maintain their texture, preventing them from getting soggy.
- Pre-Slice for Ease: If you’re serving this at a gathering, consider pre-slicing the cheesecake before guests arrive. This makes it easier for guests to help themselves without having to cut through the firm crust each time.
- Pairing: Pair this dessert with a warm beverage like coffee or tea, which complements the sweet and creamy characteristics of the cheesecake. The warmth of the beverage contrasts nicely with the coolness of the cheesecake, enhancing the overall dining experience.
Storage Tips:
- Refrigerating: Cheesecake needs to be stored in the refrigerator. Cover the cheesecake with plastic wrap or store in an airtight container to keep it from absorbing odors from other foods in the refrigerator. Properly stored, it can last up to 5 days.
- Freezing: If you want to extend the life of your cheesecake, freezing is a great option. Wrap the entire cheesecake or individual slices tightly in plastic wrap and then in aluminum foil. Properly wrapped cheesecake can be stored in the freezer for up to 2 months. Thaw in the refrigerator overnight before serving.
- Maintaining the Crust: Since the crust is made from Rice Krispies, it can lose its crispiness over time, especially if exposed to moisture. To help maintain some of the crust’s texture, keep the cheesecake well-covered and consume within a few days.
- Avoiding Condensation: When thawing a frozen cheesecake, condensation can form on the surface, which might make the top layer slightly soggy. To minimize this, unwrap the cheesecake after it’s partially thawed in the refrigerator, which allows the condensation to evaporate more effectively.
By following these serving and storage tips, you can ensure that your Rice Krispie Treat Cheesecake remains as delightful to eat as it was to make. Enjoy your culinary creation at its best, whether serving it at a festive party or enjoying a slice as a sumptuous treat.
1. Can I use low-fat or non-dairy alternatives for the cheesecake ingredients?
Yes, you can substitute lower-fat versions of cream cheese, sour cream, and other dairy ingredients with their low-fat or non-dairy counterparts. Keep in mind that altering the type of cream cheese, for example, using a non-dairy version, may change the texture and flavor of the cheesecake slightly. It’s important to choose high-quality alternatives to ensure the cheesecake sets properly and maintains a creamy consistency.
2. How can I prevent the cheesecake from cracking?
Cheesecakes often crack due to sudden temperature changes or overbaking. To prevent this, make sure all ingredients are at room temperature before you start mixing. Avoid overmixing, especially after adding the eggs. Also, you can bake the cheesecake in a water bath to help regulate the oven’s heat and provide moisture, which minimizes the risk of cracking. After baking, let the cheesecake cool gradually in the oven with the door slightly ajar for about an hour.
3. Can I make this cheesecake ahead of time for an event?
Absolutely! In fact, making your cheesecake a day or two in advance can even improve its flavor and texture. After cooling, cover the cheesecake and store it in the refrigerator until you’re ready to serve. Just add any fresh toppings right before serving to maintain their texture and freshness.
4. Is it necessary to use a springform pan?
While a springform pan is ideal for cheesecakes because it makes removing and serving the cheesecake easier, you can use a regular round cake pan if you don’t have a springform. Just make sure to line it with parchment paper or a well-greased foil to help lift the cheesecake out once it’s set and chilled. Keep in mind, however, that the presentation might not be as perfect as with a springform pan.