
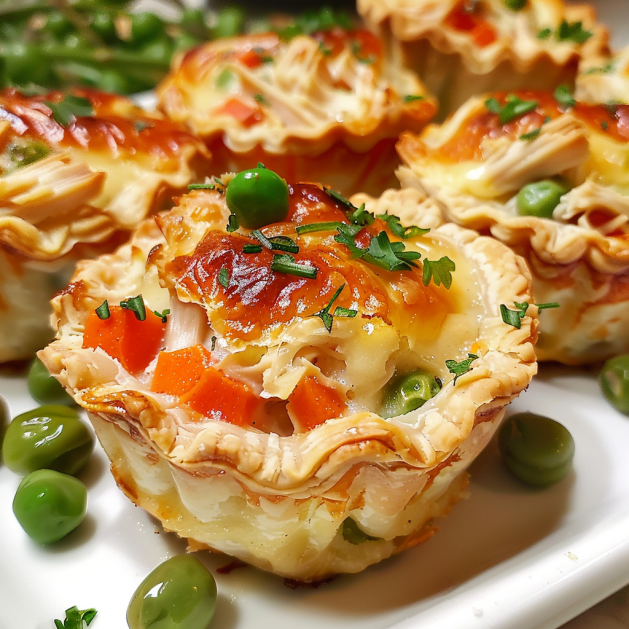
Are you looking for a comforting snack that packs all the flavors of a classic home-cooked meal into a bite-sized treat? Look no further than these delicious Mini Chicken Pot Pie Muffins. Perfect for gatherings, kids’ parties, or simply as a tasty snack, these mini muffins are easy to make and sure to please any crowd. Here’s a step-by-step guide on how to make these delightful treats, along with some tips to ensure they come out perfectly every time.
Ingredients:
- 1 tablespoon olive oil
- 1 small onion, finely chopped
- 1 cup mixed vegetables (carrots, peas, and corn), frozen or fresh
- 1 cup cooked chicken, diced
- Salt and pepper to taste
- 1/2 teaspoon thyme
- 1 cup chicken broth
- 1 tablespoon all-purpose flour
- 1/4 cup cream or milk
- 1 package (about 14.1 ounces) refrigerated pie crusts
- 1 egg, beaten for egg wash
Instructions:

- Preheat Your Oven:
Begin by preheating your oven to 375 degrees Fahrenheit (190 degrees Celsius). This ensures your mini pot pies will bake evenly and come out with a perfectly golden crust. - Prepare the Filling:
Heat olive oil in a skillet over medium heat. Add the chopped onion and sauté until translucent. Incorporate the mixed vegetables and cook for about 5 minutes until they’re tender. Add the diced chicken, sprinkle with salt, pepper, and thyme, mixing well. Sprinkle flour over the mixture and stir to coat the ingredients. Slowly pour in the chicken broth and cream, stirring continuously until the sauce thickens. Remove from heat and set aside to cool slightly. - Prepare the Muffin Pan:
Lightly grease a muffin tin. This prevents the mini pot pies from sticking and makes removal much easier after baking. - Cut the Pie Crusts:
Roll out the refrigerated pie crusts and cut them into rounds slightly larger than the muffin cups. Press these pie crust rounds into the bottom and up the sides of each muffin cup, forming a small bowl. - Fill the Pie Crusts:
Spoon the chicken and vegetable mixture into the crust-lined muffin cups. Be careful not to overfill to avoid spilling during baking. - Add the Top Crust:
Cut additional rounds from the pie crusts to form the top layer for each muffin cup. Place these on top of the filled cups and press the edges to seal. Make a small slit in the center of each top crust to allow steam to escape during baking. - Apply Egg Wash:
Brush the top of each pie with beaten egg. This gives the crust a beautiful golden color and a professional-looking finish once baked. - Bake:
Place the muffin tin in the preheated oven and bake for about 25-30 minutes, or until the crust is golden brown and the filling is bubbly. - Cool and Serve:
Allow the mini chicken pot pies to cool in the pan for about 10 minutes before removing. This resting period helps them set and makes them easier to take out of the tin.
Serving Suggestions:
These Mini Chicken Pot Pie Muffins can be served as a delightful appetizer, a convenient lunchbox addition, or a comforting dinner with a side salad. They’re a great way to use up leftover chicken and can be frozen and reheated for a quick meal or snack.
Conclusion:
Mini Chicken Pot Pie Muffins are not only a charming and convenient way to enjoy the classic comfort of a chicken pot pie, but they also offer versatility in how they can be served and enjoyed. By following this simple recipe, you can create a delicious treat that brings comfort food to your fingertips. Try making them today and watch them disappear in no time!
Serving and Storage Tips for Mini Chicken Pot Pie Muffins
Mini Chicken Pot Pie Muffins are a delightful treat that can be enjoyed on numerous occasions. To maximize their flavor and freshness, here are some essential tips on how to serve and store them effectively.
Serving Tips:
- Temperature: These mini muffins are best served warm. If they have been set aside or cooled down, simply reheat them in the microwave for 20-30 seconds, or in the oven at 350 degrees Fahrenheit for about 5-10 minutes until they are warm throughout.
- Accompaniments: While these mini muffins are delicious on their own, you can enhance their appeal by serving them with a side of creamy gravy for dipping. Additionally, a light side salad or some steamed vegetables make for a balanced meal.
- Presentation: Serve them on a platter with some fresh herbs sprinkled on top for a touch of color and freshness. If serving at a party, consider using mini forks or picks for easy eating and a fun presentation.
Storage Tips:
- Refrigeration: Once cooled to room temperature, the Mini Chicken Pot Pie Muffins can be stored in an airtight container in the refrigerator for up to 3-4 days. Make sure they are tightly covered to avoid absorbing other flavors from the fridge.
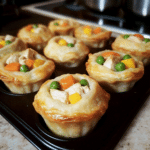
- Freezing: For longer storage, these mini muffins freeze exceptionally well. Place them in a single layer on a baking sheet to freeze initially. Once they’re solid, transfer them to a freezer-safe bag or container. This will prevent them from sticking together, allowing you to remove as many as you need at a time. They can be kept frozen for up to 2 months.
- Reheating: To reheat refrigerated mini muffins, place them in the oven at 350 degrees Fahrenheit for about 10 minutes or until heated through. For frozen mini muffins, you can either thaw them overnight in the refrigerator and then reheat as directed above, or bake them straight from the freezer at 350 degrees Fahrenheit for about 15-20 minutes.
Thawing and Reheating Tips:
- Microwave: If you’re in a hurry, the microwave is a convenient option. For a single muffin, heat for about 30-45 seconds from refrigerated or 1-2 minutes from frozen. Be careful not to overheat as the pastry can become soggy.
- Oven: Reheating in the oven is recommended to maintain the crispness of the pie crust. Cover the muffins with aluminum foil to prevent the crust from burning.
Following these serving and storage tips will help ensure that your Mini Chicken Pot Pie Muffins remain as delicious as they were when first baked, providing a delightful and convenient meal or snack option anytime.
1. Can I use store-bought cooked chicken for this recipe?
Yes, you can definitely use store-bought cooked chicken, such as rotisserie chicken, for these mini chicken pot pie muffins. It’s a great time-saver and adds a rich flavor to the pies. Just make sure to dice the chicken into small pieces to ensure it distributes evenly within the muffins.
2. What can I substitute for the vegetables listed in the recipe?
You can customize the vegetable mix according to your preferences or what you have on hand. Good substitutes include diced bell peppers, mushrooms, or broccoli. Just ensure that harder vegetables are pre-cooked or finely diced to ensure they cook through during the baking process.
3. How do I prevent the pie crust from becoming soggy?
To prevent a soggy pie crust, make sure that the filling is not too watery before spooning it into the crust-lined muffin tins. The flour in the filling mixture helps thicken it, but make sure it’s cooked down enough before assembly. Additionally, you can pre-bake the bottom crusts for about 5-7 minutes before adding the filling to help them set.
4. Are Mini Chicken Pot Pie Muffins suitable for freezing and reheating?
Yes, these mini muffins are perfect for freezing and can be reheated easily. To freeze, allow the muffins to cool completely after baking, then place them in a single layer on a baking sheet to freeze individually. Once frozen, transfer them to a freezer-safe bag or container. When you’re ready to enjoy them, you can reheat them directly from frozen in the oven at 350 degrees Fahrenheit for about 15-20 minutes, or until heated through. This makes them a convenient option for meal prepping or for having a quick meal on hand.
Mini Chicken Pot Pie Muffins
- Prep Time: 15 minutes
- Cook Time: 18 minutes
- Total Time: 33 minutes
- Category: Appetizer, Main Dish
- Cuisine: American
Description
These Mini Chicken Pot Pie Muffins are a fun and delicious twist on the classic comfort food. Perfectly portioned and easy to make, they’re ideal for appetizers, snacks, or family dinners.
Ingredients
Makes 12 muffins:
-
For the filling:
- 2 cups (300 g) cooked shredded chicken (rotisserie chicken works great)
- 1 cup (150 g) frozen mixed vegetables (peas, carrots, corn, etc.), thawed
- 1 can (10.5 oz / 298 g) condensed cream of chicken soup
- 1/2 teaspoon garlic powder
- Salt and black pepper, to taste
-
For the muffins:
- 1 (16 oz / 450 g) can refrigerated biscuit dough (12 biscuits)
-
Optional garnish:
- Chopped fresh parsley
Instructions
-
Preheat the oven:
- Preheat your oven to 375°F (190°C). Grease a standard 12-cup muffin tin or line it with muffin liners.
-
Prepare the filling:
- In a medium bowl, mix the shredded chicken, thawed vegetables, cream of chicken soup, garlic powder, salt, and pepper until well combined.
-
Prepare the biscuit dough:
- Separate the biscuit dough into 12 pieces. Flatten each piece with your hands or a rolling pin to create a 4-inch circle.
-
Assemble the muffins:
- Press each biscuit circle into a muffin cup, making sure it comes up the sides to form a cup.
- Spoon about 2 tablespoons of the chicken filling into each biscuit cup.
-
Bake the muffins:
- Bake in the preheated oven for 15-18 minutes, or until the biscuits are golden brown and cooked through.
-
Serve:
- Allow the muffins to cool in the pan for 5 minutes before carefully removing them. Garnish with chopped parsley if desired and serve warm.
Notes
- For extra flavor, add shredded cheddar cheese to the filling or sprinkle it on top before baking.
- These can be prepared ahead of time and reheated in the oven or microwave.
- Leftovers can be stored in an airtight container in the refrigerator for up to 3 days.