
When it comes to homemade sweets, nothing beats the rich, decadent taste of chocolate fudge. Aunt Teen’s Creamy Chocolate Fudge is a beloved recipe that has been passed down through generations, known for its smooth texture and deep chocolate flavor. This delightful treat is perfect for holidays, special occasions, or simply as a comforting snack. In this article, we’ll share the secrets to making this creamy, dreamy chocolate fudge, along with tips and variations to ensure it comes out perfect every time.
Ingredients:
Before you start, gather all the necessary ingredients for making Aunt Teen’s signature fudge:
- 3 cups of sugar
- 3/4 cup of butter
- 2/3 cup of evaporated milk
- 12 ounces of semi-sweet chocolate chips
- 7 ounces of marshmallow creme
- 1 cup of chopped nuts (optional)
- 1 teaspoon of vanilla extract
Equipment Needed:
- Medium saucepan
- Wooden spoon
- 9×13 inch baking dish
- Wax paper or non-stick spray
Instructions:
- Prepare the Pan:
- Line a 9×13 inch baking dish with wax paper or lightly grease it with non-stick spray. This helps in easy removal of the fudge once it’s set.
- Combine Sugar, Butter, and Milk:
- In a medium saucepan over medium heat, combine the sugar, butter, and evaporated milk. Stir continuously until the mixture comes to a full rolling boil.
- Boil:
- Keep the mixture at a rolling boil, stirring constantly, for about 5 minutes or until a candy thermometer reads 234 degrees Fahrenheit (soft-ball stage). The constant stirring is crucial to prevent the mixture from scorching.
- Add Chocolate and Marshmallow:
- Remove the pan from the heat and quickly stir in the chocolate chips and marshmallow creme until smooth and fully incorporated. This is the key step for achieving the creamy texture.
- Add Nuts and Vanilla:
- Stir in the chopped nuts (if using) and vanilla extract. Mix well until everything is evenly distributed.
- Pour and Cool:
- Pour the fudge mixture into the prepared baking dish. Spread it out evenly with a spatula. Allow the fudge to cool completely at room temperature; this could take several hours. Do not refrigerate as it can cause the fudge to become too hard.
- Cut the Fudge:
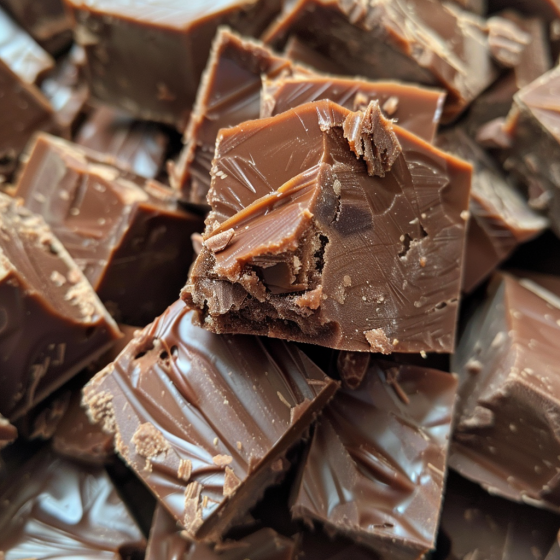
- Once the fudge is set, lift it out of the pan using the edges of the wax paper as handles. Cut the fudge into small squares with a sharp knife. If the fudge is too soft, chilling it briefly can make cutting easier.
Tips for Perfect Fudge Every Time:
- Temperature Accuracy: Using a candy thermometer helps in achieving the perfect texture. Make sure it doesn’t touch the bottom of the pan when measuring.
- Quality Ingredients: Use good quality chocolate chips and real butter for the best flavor.
- Variations: Customize your fudge by adding different types of nuts, a swirl of peanut butter, or even a sprinkle of sea salt on top for a gourmet touch.
Conclusion:
Aunt Teen’s Creamy Chocolate Fudge is not just a treat; it’s a journey into the warmth of a family kitchen. Whether you’re making it for a festive occasion or as a heartfelt gift, this fudge is bound to impress. By following these simple steps, you’ll be able to recreate a family favorite that stands the test of time. Indulge in the creamy, chocolatey goodness and share the love with every bite. Happy cooking!
Serving and Storage Tips for Aunt Teen’s Creamy Chocolate Fudge
Once you’ve mastered the art of making Aunt Teen’s Creamy Chocolate Fudge, you’ll want to ensure it is served at its best and stays fresh for as long as possible. Here are essential tips on serving and storing your homemade fudge to maintain its delightful texture and flavor.
Serving Tips:
- Room Temperature is Best: Fudge tastes best when served at room temperature. Serving it straight from the refrigerator can make it too hard, which affects its texture and flavor profile. Take your fudge out of the fridge about an hour before you plan to serve it to allow it to come to room temperature.
- Cutting Perfect Pieces: Use a sharp knife to cut your fudge into squares. If the fudge sticks to the knife, lightly grease the blade with butter or spray with non-stick cooking spray. For clean, even cuts, rinse the knife under hot water and wipe it dry between cuts.
- Creative Presentation: For a special touch, place each fudge square in a mini cupcake liner. This not only adds a colorful flair but also makes them easier to handle and serve, especially at parties or gatherings.
- Pairing: Pair the chocolate fudge with a cup of hot coffee or a glass of cold milk to complement its rich flavor. Fudge also pairs well with a scoop of vanilla ice cream for a more decadent dessert.
Storage Tips:
- Cool Before Storing: Allow the fudge to completely cool and set before storing it. This prevents condensation inside the container, which can make the fudge soggy.
- Refrigeration for Short-Term: For short-term storage, place the fudge in an airtight container and keep it in the refrigerator. The fudge will stay fresh for about 2 weeks when refrigerated properly.
- Freezing for Long-Term: If you want to keep the fudge for a longer period, freezing is an excellent option. Wrap the fudge pieces individually in wax paper and then place them in a freezer bag or airtight container. Fudge can be frozen for up to 3 months. Thaw overnight in the refrigerator before serving.
- Keep Away from Strong Odors: Since fudge can absorb odors, keep it away from strongly scented foods in the refrigerator or freezer.
- Moisture Control: To prevent the fudge from drying out, you can place a piece of wax paper directly on the surface of the cut fudge before sealing the container. This helps maintain its moisture.
By following these simple serving and storage tips, Aunt Teen’s Creamy Chocolate Fudge will maintain its perfect consistency and irresistible flavor, making it a go-to choice for satisfying your sweet tooth or sharing with loved ones on any occasion.
FAQ 1: Can I make Aunt Teen’s Creamy Chocolate Fudge without nuts?
Answer: Absolutely! While nuts add a nice crunch and flavor to the fudge, they are entirely optional. If you prefer nut-free fudge or are catering to allergies, simply omit the nuts from the recipe. The fudge will still be deliciously creamy and chocolatey.
FAQ 2: Why did my chocolate fudge not set properly?
Answer: There are a few reasons why fudge might not set correctly. One common issue is not cooking the sugar mixture to the right temperature. It’s important to bring it to a full rolling boil and maintain that boil for about 5 minutes, or until it reaches the soft-ball stage (234 degrees Fahrenheit) on a candy thermometer. Undercooking can prevent the fudge from setting, while overcooking might make it too hard.
FAQ 3: How can I add more flavor to my chocolate fudge?
Answer: If you want to enhance your fudge, consider adding different extracts such as almond, mint, or orange for a hint of extra flavor. You can also mix in other ingredients like peanut butter, crushed cookies, or swirl caramel or white chocolate into the mixture before it sets for a delightful twist.
FAQ 4: Is it possible to make this fudge dairy-free?
Answer: Yes, you can adapt Aunt Teen’s Creamy Chocolate Fudge to be dairy-free with a few substitutions. Replace the butter with a dairy-free alternative like margarine or coconut oil. Use a dairy-free chocolate chip option, and swap out the evaporated milk for a non-dairy evaporated milk substitute, which is available in some health food stores or online. Keep in mind that changes in ingredients might slightly alter the texture and taste.