
When it comes to finding the perfect treat that combines sweet, creamy, and utterly delectable, look no further than King’s Hawaiian Cheesecake Danishes. This delightful fusion brings together the soft, fluffy texture of King’s Hawaiian rolls with the rich, creamy indulgence of cheesecake, creating a unique pastry that’s perfect for breakfast, brunch, or a sweet snack. Here’s how you can make these heavenly treats at home and impress family and friends with your baking prowess.
What You’ll Need
To start, gather the following ingredients:
- 1 package King’s Hawaiian Rolls (12 count)
- 1 cup cream cheese, softened
- 1/4 cup granulated sugar
- 1 teaspoon vanilla extract
- 1 large egg, separated
- Zest of 1 lemon
- 1/4 cup powdered sugar (for dusting)
- Optional: fruit preserves or fresh fruits for topping
Instructions
1. Preheat and Prep
Begin by preheating your oven to 350 degrees Fahrenheit (175 degrees Celsius). Lightly grease a baking sheet or line it with parchment paper to prevent sticking.
2. Prepare the Cheesecake Filling
In a medium bowl, blend the softened cream cheese with granulated sugar, vanilla extract, and lemon zest until smooth and creamy. Add the egg yolk (save the white for later) and mix until well incorporated. This mixture will be the rich cheesecake filling that brings your Danishes to life.
3. Prepare the Rolls
Take your King’s Hawaiian rolls and slice each one in half without cutting all the way through, creating a pocket. Spoon a generous amount of the cheesecake filling into each roll.
4. Egg Wash
In a small bowl, whisk the reserved egg white until frothy. Brush this lightly over the rolls. This will give them a beautiful golden sheen as they bake.
5. Bake to Perfection
Place the filled rolls on the prepared baking sheet. Bake in the preheated oven for about 15-20 minutes or until the rolls are golden brown and the cheesecake filling is set.
6. Add Finishing Touches
Allow the Danishes to cool slightly on a wire rack. Dust with powdered sugar before serving. If you like, top each Danish with a dollop of fruit preserves or fresh fruits to add an extra layer of flavor and texture.
Why Try King’s Hawaiian Cheesecake Danishes?
Versatile and Delightful: Whether you’re serving them up as part of a lavish brunch spread or enjoying them as a mid-day treat, these Danishes are sure to captivate and satisfy with their delightful texture and flavor.
Easy to Make: With simple ingredients and straightforward steps, even novice bakers can achieve fantastic results. Plus, using King’s Hawaiian rolls cuts down on prep time and ensures a sweet, soft base every time.
Customizable: The basic recipe is just a starting point. Feel free to experiment with different fillings like chocolate chips, nut spreads, or various fruit preserves to tailor them to your taste preferences.
Conclusion
King’s Hawaiian Cheesecake Danishes represent a delightful twist on classic bakery treats, combining the irresistible pull-apart sweetness of Hawaiian rolls with the decadent creaminess of cheesecake. Easy to prepare and even easier to enjoy, these treats are set to become a favorite in your recipe collection. Perfect for any occasion, from lazy weekend mornings to festive gatherings, they offer a sweet escape into culinary bliss.
Whether you’re a seasoned baker or just starting out, these Danishes promise to deliver not just great taste but a memorable baking experience. So, why not preheat your oven and start spreading the joy—one delicious Danish at a time?
Serving and Storage Tips for King’s Hawaiian Cheesecake Danishes
Once you’ve mastered the art of making King’s Hawaiian Cheesecake Danishes, knowing how to serve and store them will ensure they remain as delightful as when they first came out of the oven. Here are some essential tips to maximize both flavor and freshness.
Serving Tips:
- Best Served Warm: These Danishes are most indulgent when served warm. If they’ve cooled down, you can reheat them gently in the microwave for a few seconds or in the oven at 300 degrees Fahrenheit for about 5-10 minutes. This will revive the fluffy texture of the rolls and the creamy softness of the cheesecake filling.
- Dust Before Serving: If you’re dusting with powdered sugar, do it right before serving to maintain the beautiful, snowy appearance. Powdered sugar tends to dissolve after a while, especially on warm pastries.
- Add Freshness with Toppings: Offering a variety of toppings like fresh berries, fruit preserves, or a drizzle of caramel or chocolate sauce can elevate the Danishes. Set these toppings out alongside the Danishes and let guests customize their treats.
- Pairing with Drinks: Pair these sweet treats with coffee, tea, or a glass of cold milk to balance the richness. For a brunch setting, sparkling juices or a mimosa could add a celebratory touch.
Storage Tips:
- Cool Completely Before Storing: Ensure that the Danishes are completely cool before you store them. This prevents condensation inside the container, which could make the rolls soggy.
- Refrigerate Properly: Since the filling contains cream cheese and egg, it’s best to store any leftover Danishes in the refrigerator. Place them in an airtight container or wrap them tightly with plastic wrap. They will keep for up to 3 days.
- Freezing for Longevity: If you want to keep the Danishes for longer, freezing is an option. Wrap each Danish individually in plastic wrap and then place them in a heavy-duty freezer bag. They can be frozen for up to a month. To serve, thaw them in the refrigerator overnight and reheat gently to restore their warmth and texture.
- Refreshing Leftovers: When you’re ready to enjoy a stored Danish, you can refresh it in a preheated oven at 300 degrees Fahrenheit for about 5-10 minutes or until heated through. This method helps to bring back the pastry’s original texture and warmth, making it nearly as good as freshly baked.
Following these serving and storage tips will help you get the most out of your King’s Hawaiian Cheesecake Danishes, ensuring every bite is as satisfying as possible. Whether you’re serving them immediately after baking or enjoying them as a treat later on, these tips guarantee your Danishes remain a delightful treat.
1. Can I use a different type of bread instead of King’s Hawaiian rolls?
Yes, you can use other types of sweet bread if King’s Hawaiian rolls are not available. Brioche or challah are excellent substitutes due to their similar texture and sweetness. However, keep in mind that the unique flavor and texture of King’s Hawaiian rolls are part of what makes these Danishes special, so using a different bread might slightly alter the taste and experience.
2. What variations can I make to the cheesecake filling?
The cheesecake filling can be easily varied to suit your taste preferences. You can add different flavorings such as almond extract or coconut extract instead of vanilla. For a fruity twist, mix in some lemon or orange zest, or fold in small pieces of fresh fruits like strawberries or blueberries. If you enjoy a bit of crunch, consider adding finely chopped nuts or a swirl of nut butter.
3. How do I ensure my Danishes don’t become soggy?
To prevent your Danishes from becoming soggy, make sure to cool them completely on a wire rack before storing. This allows air to circulate around them and helps to keep the pastry crisp. If you’re storing them in the refrigerator, wrap them lightly with paper towels before placing them in an airtight container; the paper towels will absorb any excess moisture.
4. Can I prepare these Danishes in advance?
Yes, you can prepare King’s Hawaiian Cheesecake Danishes in advance, which makes them perfect for entertaining. You can assemble the Danishes a day ahead and keep them refrigerated until ready to bake. Alternatively, you can bake them completely and then reheat for serving, following the reheating instructions provided in the storage tips to ensure they retain their texture and flavor.
Print
King’s Hawaiian Cheesecake Danishes
- Prep Time: 10 minutes
- Cook Time: 25 minutes
- Total Time: 35 minutes
- Yield: 12 servings 1x
- Category: Breakfast, Dessert
- Cuisine: American
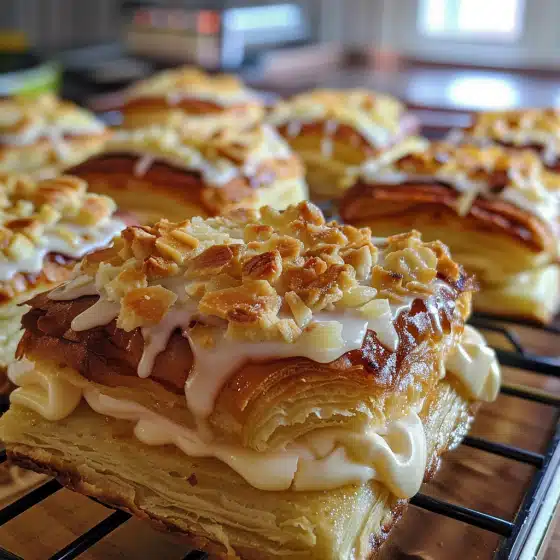
Description
This King’s Hawaiian Cheesecake Danish is a delectable fusion of buttery, sweet Hawaiian rolls and creamy cheesecake filling, topped with a sweet glaze. Perfect for breakfast, brunch, or dessert, it’s an indulgent treat that’s easy to prepare and always a crowd-pleaser.
Ingredients
For the Base:
- 1 package (12-count) King’s Hawaiian Sweet Rolls
- 8 oz (225 g) cream cheese, softened
- 1/3 cup (65 g) granulated sugar
- 1 teaspoon vanilla extract
- 1/2 teaspoon lemon zest (optional)
For the Topping:
- 2 tablespoons unsalted butter, melted
- 2 tablespoons granulated sugar
- 1/4 teaspoon cinnamon
For the Glaze:
- 1/2 cup (60 g) powdered sugar
- 1–2 tablespoons milk or cream
- 1/4 teaspoon vanilla extract
Instructions
1. Preheat the Oven:
- Preheat your oven to 350°F (175°C). Grease a 9×13-inch baking dish or line it with parchment paper.
2. Prepare the Rolls:
- Without separating the rolls, slice the package of King’s Hawaiian rolls horizontally in half, creating a top and bottom layer. Place the bottom layer in the prepared baking dish.
3. Make the Cheesecake Filling:
- In a mixing bowl, beat together the cream cheese, granulated sugar, vanilla extract, and lemon zest (if using) until smooth.
4. Assemble the Danish:
- Spread the cream cheese mixture evenly over the bottom layer of rolls. Place the top layer of rolls back on top. Brush the tops of the rolls with the melted butter. Mix the granulated sugar and cinnamon together, then sprinkle over the buttered tops.
5. Bake:
- Bake for 20–25 minutes, or until the tops of the rolls are golden brown and the filling is set. Remove from the oven and let cool slightly.
6. Make the Glaze:
- In a small bowl, whisk together the powdered sugar, milk, and vanilla extract until smooth. Drizzle the glaze over the warm rolls.
7. Serve:
- Cut into individual portions and serve warm. Enjoy as is, or pair with fresh fruit or coffee.
Notes
- For a fruity twist, add a layer of fruit preserves or pie filling (such as cherry or strawberry) on top of the cream cheese filling before placing the top rolls.
- Store leftovers in an airtight container in the refrigerator for up to 3 days. Reheat in the oven or microwave for a warm, gooey texture.