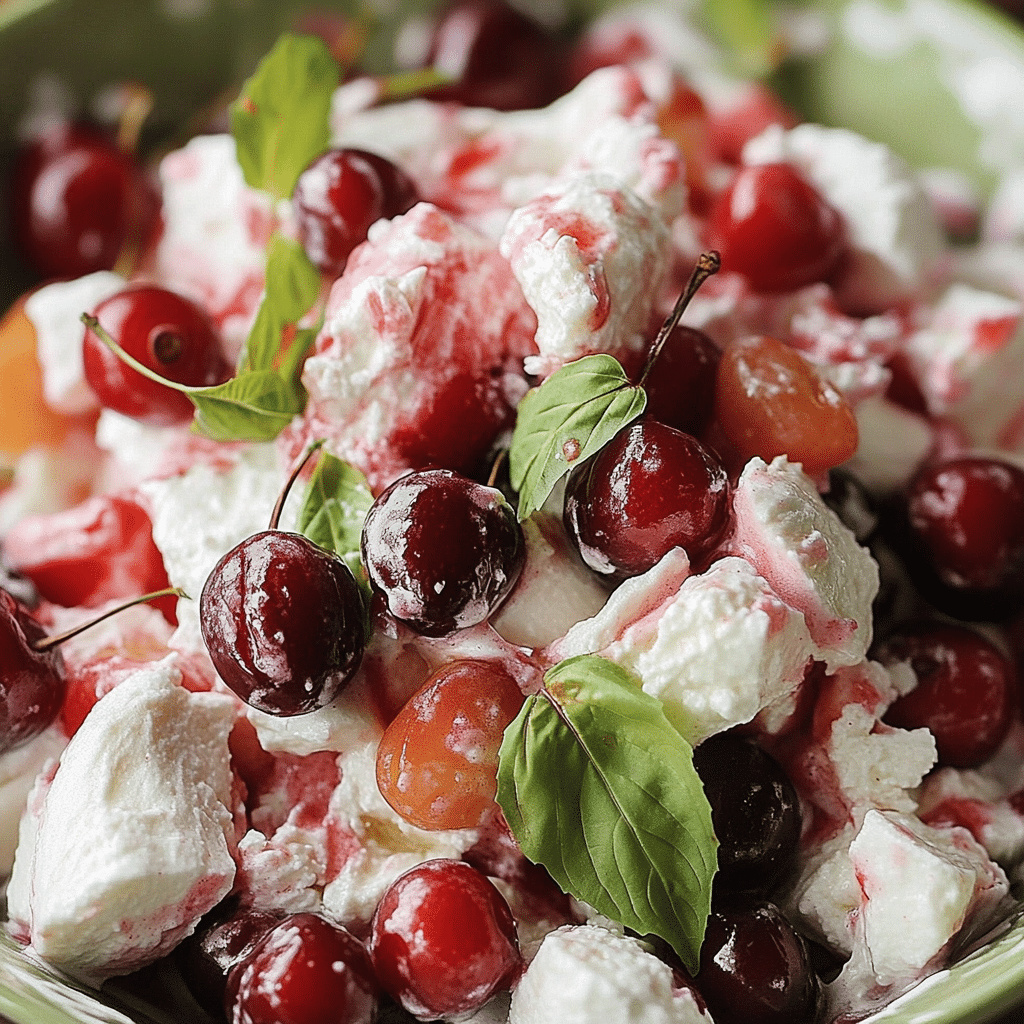
If you’re looking for a dish that combines vibrant flavors and textures, our cherry salad is the perfect choice. This bright, colorful salad features sweet cherries, crisp greens, and an array of fresh ingredients that create a mouthwatering experience. Perfect for summer gatherings or as a refreshing side dish, this cherry salad is as healthy as it is delicious. Let’s dive into how to make it and why it’s a must-try addition to your recipe collection.
Why You’ll Love This Cherry Salad
Cherry salad is a unique twist on traditional salads, combining the natural sweetness of cherries with savory and tangy flavors. It’s a versatile dish that pairs beautifully with grilled meats or can be served as a stand-alone meal for a light and nutritious lunch. Packed with antioxidants, vitamins, and fiber from the cherries, this salad is not just tasty but also good for you. It’s perfect for anyone looking to indulge in something sweet without compromising on health.
Ingredients for Cherry Salad
To create this delicious cherry salad, you’ll need the following ingredients:
For the salad:
- 2 cups of fresh or frozen cherries (pitted and halved)
- 4 cups of mixed leafy greens (spinach, arugula, or mixed salad greens)
- 1/2 cup of crumbled goat cheese or feta cheese
- 1/4 cup of chopped pecans or walnuts (optional)
- 1/4 cup of thinly sliced red onions
- 1 avocado, diced
For the dressing:
- 2 tablespoons of balsamic vinegar
- 1 tablespoon of honey or maple syrup
- 1/4 cup of extra-virgin olive oil
- Salt and freshly ground black pepper to taste
How to Make Cherry Salad
- Prepare the Dressing: In a small bowl, whisk together the balsamic vinegar, honey, olive oil, salt, and black pepper. Adjust the sweetness or acidity by adding more honey or vinegar, depending on your preference.
- Assemble the Salad: In a large mixing bowl, combine the mixed greens, cherries, avocado, red onions, and nuts. Toss gently to combine.
- Add the Cheese: Sprinkle the crumbled goat cheese or feta over the top of the salad.
- Drizzle the Dressing: Pour the dressing over the salad and toss again until everything is well-coated.
- Serve: Transfer to a serving dish or individual bowls and serve immediately.
Tips for the Best Cherry Salad
- Use Fresh Cherries: While frozen cherries can be used in a pinch, fresh cherries provide the best flavor and texture.
- Choose the Right Greens: Mild greens like spinach or mixed lettuce work well, but for a more peppery taste, arugula is a great choice.
- Make Ahead: You can prep the salad ingredients ahead of time but add the dressing and cheese just before serving to keep the greens fresh and crispy.
- Customize It: For a twist, consider adding thin slices of cucumber, goat cheese, or even some grilled chicken for added protein.
Health Benefits of Cherries
Cherries are not only delicious but also provide several health benefits. They are rich in antioxidants, which help combat oxidative stress and reduce inflammation. Additionally, cherries contain melatonin, a natural compound that can help improve sleep. The vitamin C in cherries supports a healthy immune system and skin, while the fiber aids digestion.
Pairing Suggestions
Cherry salad pairs well with a variety of dishes, making it a versatile choice for any meal. Serve it alongside grilled chicken, steak, or fish for a complete meal. It also pairs beautifully with crusty bread and a chilled glass of white wine or sparkling water for a refreshing summer lunch.
Final Thoughts
Cherry salad is a beautiful, vibrant dish that brings a burst of flavor and color to your table. Whether you’re preparing it for a summer picnic, a weeknight dinner, or a holiday gathering, this salad will impress your guests and leave everyone asking for the recipe. Give this recipe a try, and enjoy a sweet, tangy, and savory salad that’s perfect for any occasion!
Serving and Storage Tips for Cherry Salad
Serving Tips:
- Serve Fresh: Cherry salad is best enjoyed immediately after it’s made. The fresh, crisp texture of the greens and the burst of flavor from the cherries are at their peak when the salad is freshly assembled.
- Presentation: For an elegant touch, serve the salad on a large platter or in individual bowls, and garnish with a few extra cherries, a sprinkle of cheese, and a few whole nuts on top for added visual appeal.
- Temperature: If you’ve prepared the salad ahead of time, serve it slightly chilled. This keeps the greens fresh and the flavors well balanced.
- Accompaniments: Pair with a light main course such as grilled chicken, fish, or a vegetarian dish to make it a complete meal. It also goes well with crusty bread, rolls, or a side of quinoa for a filling option.
Storage Tips:
- Separate Ingredients: To prevent the salad from becoming soggy, store the dressing and delicate ingredients like cheese and avocado separately from the greens and cherries. This helps maintain freshness and texture until it’s time to serve.
- Refrigeration: If you need to store the salad for later use, keep it in an airtight container in the refrigerator. It’s best consumed within 1-2 days for optimal flavor and texture.
- Dressing Storage: Keep the dressing in a small container or jar and add it to the salad just before serving to avoid wilting the greens.
- Avocado Tip: If you want to store the salad with avocado included, sprinkle the avocado slices with a bit of lemon or lime juice to prevent browning.
- Nuts: Nuts can be stored separately and added just before serving to keep their crunch.
Following these tips will ensure that your cherry salad stays as delicious as when it was first made, so you can enjoy it even after the initial preparation.
1. Can I use frozen cherries in this salad? Yes, you can use frozen cherries, but for the best flavor and texture, fresh cherries are recommended. If you do use frozen cherries, make sure they are thawed and drained of excess liquid before adding them to the salad to prevent it from becoming too watery.
2. How long can I store cherry salad in the refrigerator? Cherry salad is best enjoyed fresh, but if you need to store leftovers, keep it in an airtight container in the refrigerator for up to 1-2 days. Be sure to store the dressing separately and add it just before serving to maintain the crispness of the greens.
3. Can I make the dressing ahead of time? Absolutely! The dressing can be prepared up to 3-4 days in advance. Store it in a sealed container or jar in the refrigerator and give it a good shake or stir before using it. This will help the flavors blend and make assembly quick and easy when you’re ready to serve.
4. What can I substitute for goat cheese or feta cheese? If you’re not a fan of goat cheese or feta, you can substitute with other types of cheese like ricotta, blue cheese, or a mild cheese like mozzarella. For a dairy-free option, try using cashew cheese or nutritional yeast for a cheesy flavor.
Print
Cherry Salad
- Prep Time: 10 minutes
- Cook Time: 2 hours
- Total Time: 2 hours 10 minutes
- Yield: 8 servings 1x
- Category: Salad, Dessert
- Method: No-Cook
- Cuisine: American
Description
This delightful Cherry Salad combines sweet cherries, juicy pineapple, crunchy nuts, and fluffy marshmallows, all enveloped in a creamy dressing. It’s a perfect side dish for potlucks, barbecues, or holiday gatherings.
Ingredients
- 1 can (21 ounces) cherry pie filling
- 1 can (14 ounces) sweetened condensed milk
- 1 can (20 ounces) crushed pineapple, drained
- 2 cups mini marshmallows
- 1 cup chopped walnuts or pecans
- 1 container (8 ounces) frozen whipped topping, thawed
Instructions
- Combine Ingredients:
- In a large mixing bowl, combine the cherry pie filling, sweetened condensed milk, and drained crushed pineapple. Stir until well mixed.
- Add the mini marshmallows and chopped nuts to the mixture, stirring to distribute evenly.
- Fold in Whipped Topping:
- Gently fold in the thawed whipped topping until the mixture is creamy and all ingredients are well incorporated.
- Chill:
- Cover the bowl with plastic wrap or transfer the salad to an airtight container.
- Refrigerate for at least 2 hours before serving to allow the flavors to meld and the salad to set.
- Serve:
- Once chilled, give the salad a gentle stir.
- Serve cold as a side dish or dessert.
Notes
- Variations: For added texture and flavor, consider mixing in 1 cup of shredded coconut or substituting the nuts with chopped pecans.
- Storage: Store leftovers in an airtight container in the refrigerator for up to 3 days.
- Make-Ahead: This salad can be prepared a day in advance, making it convenient for gatherings.

