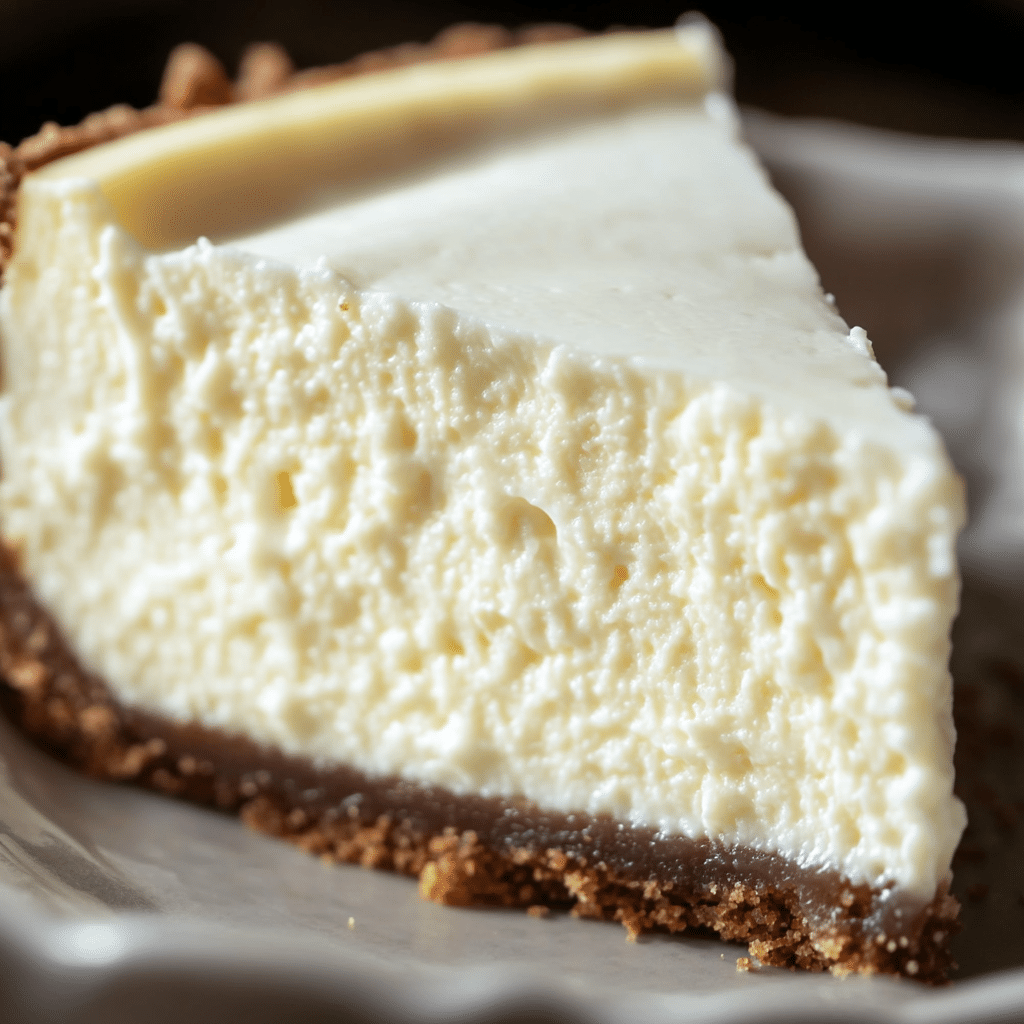
A classic cheesecake is a dessert that never goes out of style. Whether you’re celebrating a special occasion or simply treating yourself, the perfect cheesecake is always a crowd-pleaser. Follow this foolproof recipe to make the most velvety, creamy, and irresistible cheesecake that will impress family and friends alike.
What Makes This Cheesecake Recipe Perfect?
The perfect cheesecake is all about achieving the right texture and flavor balance. It should be rich and creamy but not overly dense. Our recipe combines a buttery graham cracker crust with a smooth, tangy cream cheese filling, topped with a light hint of vanilla and a touch of lemon zest for brightness.
Ingredients for the Perfect Cheesecake
For the Crust:
- 1 and 1/2 cups of graham cracker crumbs (about 10 graham crackers, crushed)
- 1/4 cup of granulated sugar
- 1/2 cup (1 stick) of unsalted butter, melted
For the Filling:
- 2 pounds (4 packages) of cream cheese, softened to room temperature
- 1 cup of granulated sugar
- 1 teaspoon of vanilla extract
- 3 large eggs, room temperature
- 1/4 cup of sour cream or Greek yogurt
- 1 tablespoon of all-purpose flour (optional for added structure)
- 1 teaspoon of lemon zest (optional for brightness)
For the Topping (Optional):
- Fresh fruit (strawberries, blueberries, or raspberries)
- Whipped cream
- Chocolate shavings or caramel drizzle
Step-by-Step Instructions
Step 1: Prepare the Crust
- Preheat your oven to 325°F (163°C).
- Mix the crust ingredients: In a medium bowl, combine the graham cracker crumbs and sugar. Stir in the melted butter until the mixture resembles coarse sand.
- Press the crust mixture evenly into the bottom of a 9-inch springform pan, pressing up the sides slightly for a uniform base.
- Bake the crust for 10 minutes, then remove from the oven and let it cool while preparing the filling.
Step 2: Make the Cheesecake Filling
- Beat the cream cheese: In a large mixing bowl, beat the softened cream cheese with an electric mixer on medium speed until smooth and creamy, about 2-3 minutes. Scrape down the sides of the bowl as needed.
- Add sugar and vanilla: Gradually add the sugar and vanilla extract to the cream cheese, mixing until fully combined.
- Incorporate the eggs: Add the eggs one at a time, beating on low speed after each addition. Do not overmix; you want to avoid incorporating too much air into the batter.
- Add sour cream and lemon zest: Stir in the sour cream (or Greek yogurt) and lemon zest for an added layer of flavor.
- Optional flour: Add the flour if using, mixing gently to incorporate. This will help create a more stable texture, but it’s optional.
Step 3: Bake the Cheesecake
- Pour the filling over the prepared crust and spread it evenly.
- Bake in the preheated oven for 50-60 minutes or until the center is set and only slightly jiggly when you gently shake the pan.
- Cool gradually: Turn off the oven and crack the door open to let the cheesecake cool slowly for an hour. This helps prevent cracking.
- Chill: After cooling, transfer the cheesecake to the refrigerator for at least 4-6 hours or overnight. This will allow it to firm up and develop its flavors.
Step 4: Serve and Enjoy
- Top as desired: Before serving, add fresh fruit, whipped cream, or a drizzle of chocolate or caramel.
- Slice with care: Use a hot, sharp knife to cut clean slices without tearing the cheesecake.
Tips for the Best Cheesecake
- Use room temperature ingredients: This ensures a smooth, lump-free filling.
- Avoid overmixing: Overmixing can incorporate too much air and cause cracks.
- Slow cooling is key: Rapid temperature changes can cause cracks. Cooling gradually in the oven before refrigeration is essential.
- Don’t skip chilling: Proper chilling is what gives your cheesecake its signature creamy texture.
Final Thoughts
With this recipe, you’re guaranteed to bake a cheesecake that’s as stunning as it is delicious. Whether you stick to the classic flavor or add your favorite toppings, this cheesecake will be a showstopper at any gathering. Enjoy the rich, creamy, and perfect blend of sweet and tangy flavors that make this dessert timeless.
Serving and Storage Tips for Your Perfect Cheesecake
When it comes to enjoying a cheesecake, serving and storing it properly ensures that it remains fresh, flavorful, and visually appealing. Here are the best practices for serving and storing your perfect cheesecake:
Serving Tips
- Cutting Clean Slices:
- Use a hot knife: For neat slices, dip your knife into hot water, wipe it dry, and then cut the cheesecake. This helps create clean cuts without disturbing the texture.
- Wipe the knife between slices: To keep slices looking neat, wipe the knife blade with a damp cloth between each cut.
- Presentation:
- Garnish creatively: Add a topping such as fresh fruit, a drizzle of caramel or chocolate sauce, or a sprinkle of powdered sugar for a beautiful finish.
- Serve with accompaniments: Pair your cheesecake with a side of whipped cream, a scoop of vanilla ice cream, or a fruit compote to elevate the dessert experience.
- Portion Control:
- Serve moderate slices: Cheesecake is rich and indulgent, so keep portions reasonable to allow guests to savor each bite without feeling too full.
- Serving Temperature:
- Serve chilled: Cheesecake should be served straight from the fridge for the best texture and flavor. Let it sit at room temperature for about 10-15 minutes if you prefer a slightly softer texture.
Storage Tips
- Refrigeration:
- Keep it covered: Store your cheesecake in an airtight container or wrap it tightly with plastic wrap to prevent it from absorbing any unwanted odors and drying out.
- Refrigerate promptly: Make sure the cheesecake is refrigerated within 2 hours of baking to keep it safe for consumption. It should be kept at or below 40°F (4°C).
- Shelf life: A cheesecake will stay fresh in the fridge for up to 5 days.
- Freezing for Longer Storage:
- Wrap properly: For longer storage, wrap the cheesecake in plastic wrap and then foil to prevent freezer burn.
- Freeze in slices: If you prefer, you can freeze individual slices for easier serving. Place slices on a baking sheet lined with parchment paper and freeze until solid before transferring to a freezer-safe container or bag.
- Storage duration: Cheesecake can be frozen for up to 3 months without losing much quality.
- Thawing: To thaw, remove the cheesecake or slices from the freezer and place them in the refrigerator for several hours or overnight. Avoid thawing at room temperature to prevent condensation from forming.
- Avoid Storing Toppings with the Cheesecake:
- Keep toppings separate: If you plan to store a topped cheesecake, it’s best to keep the toppings separate and add them just before serving to prevent them from becoming soggy or losing their texture.
By following these serving and storage tips, you can make sure your perfect cheesecake stays as delicious as the day it was made, whether you’re enjoying it right away or saving it for later.
Q1: Can I use low-fat cream cheese in this recipe?
A1: While you can use low-fat cream cheese, it may not yield the same rich and creamy texture as full-fat cream cheese. Full-fat cream cheese provides a smoother consistency and better flavor. If you choose to use low-fat options, consider adding a bit more sour cream or Greek yogurt to maintain the richness.
Q2: How do I prevent cracks in my cheesecake?
A2: Cracks in a cheesecake can occur due to overmixing, sudden temperature changes, or baking at too high a temperature. To prevent cracks, mix the batter on low speed and avoid overmixing. Bake at a moderate temperature (325°F/163°C) and allow the cheesecake to cool gradually in the oven with the door slightly open before transferring it to the refrigerator.
Q3: Can I add flavors or mix-ins to my cheesecake?
A3: Absolutely! You can customize your cheesecake by adding flavors or mix-ins. Try adding a swirl of fruit preserves, chocolate chips, or a handful of crushed cookies to the batter before baking. You can also incorporate extracts like almond or lemon for an extra flavor boost.
Q4: How long should I let the cheesecake cool before refrigerating?
A4: After baking, allow the cheesecake to cool in the oven with the door cracked open for about 1 hour. This gradual cooling helps prevent cracks. Once it reaches room temperature, transfer it to the refrigerator and chill for at least 4-6 hours or overnight to set properly before serving.

Perfect Cheesecake Recipe
- Prep Time: 30 minutes
- Additional Time: 5 hours
- Cook Time: 1 hour 10 minutes
- Total Time: 6 hours 40 minutes
- Yield: 12 servings 1x
- Category: Dessert
- Method: Baking
- Cuisine: American
Description
This classic New York-style cheesecake features a rich, creamy filling atop a buttery graham cracker crust. It’s a timeless dessert that’s perfect for any occasion.
Ingredients
For the Crust:
- 1 1/2 cups (180g) graham cracker crumbs (about 12 full sheets)
- 1/4 cup (50g) granulated sugar
- 5 tablespoons (70g) unsalted butter, melted
For the Filling:
- 32 ounces (910g) full-fat cream cheese, at room temperature
- 1 cup (200g) granulated sugar
- 1 cup (240g) full-fat sour cream, at room temperature
- 1 teaspoon pure vanilla extract
- 2 teaspoons fresh lemon juice (optional, for added brightness)
- 3 large eggs, at room temperature
Instructions
- Prepare the Crust:
- Preheat the oven to 350°F (177°C). Place a rack in the lower-middle position.
- In a medium bowl, combine the graham cracker crumbs, sugar, and melted butter. Mix until the crumbs are evenly moistened.
- Press the mixture firmly into the bottom and slightly up the sides of a 9-inch springform pan to form an even layer.
- Bake for 10 minutes, then remove from the oven and let cool completely. Reduce the oven temperature to 325°F (163°C).
- Prepare the Filling:
- In a large mixing bowl, beat the cream cheese on medium speed until smooth and creamy, about 2 minutes.
- Add the sugar and beat until well combined and smooth.
- Mix in the sour cream, vanilla extract, and lemon juice (if using) until fully incorporated.
- Add the eggs one at a time, beating on low speed after each addition until just combined. Avoid overmixing to prevent incorporating too much air.
- Assemble and Bake:
- Pour the filling over the cooled crust, spreading it into an even layer.
- To prevent cracks, use a water bath: Wrap the bottom of the springform pan with aluminum foil to prevent leaks. Place the pan inside a larger roasting pan and pour hot water into the roasting pan until it reaches about halfway up the sides of the springform pan.
- Bake at 325°F (163°C) for 55-70 minutes, or until the center is almost set but still slightly jiggly.
- Cool and Chill:
- Turn off the oven and crack the door open. Leave the cheesecake inside to cool slowly for 1 hour.
- Remove the cheesecake from the water bath and let it cool completely at room temperature.
- Cover and refrigerate for at least 4 hours, preferably overnight, before serving.
Notes
- Room Temperature Ingredients: Ensure all ingredients are at room temperature before starting to achieve a smooth, lump-free filling.
- Water Bath: Baking the cheesecake in a water bath helps prevent cracks and ensures even baking.
- Serving: For clean slices, use a sharp knife dipped in hot water, wiping it clean between cuts.
- Storage: Store leftovers in the refrigerator for up to 5 days.

