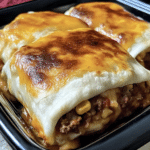
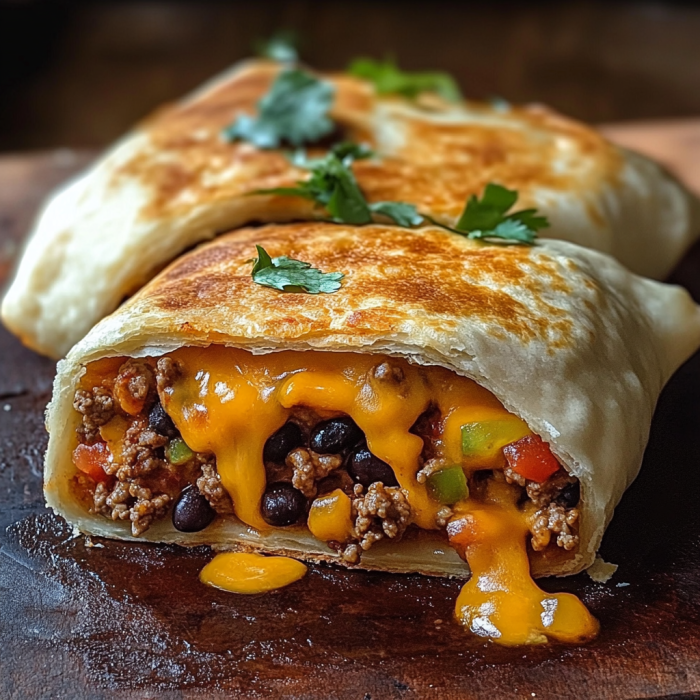
Are you ready to elevate your taco night to a whole new level? Introducing Loaded Taco-Stuffed Cheesy Pockets—a mouthwatering fusion of classic taco flavors wrapped in gooey cheese and baked to perfection. Whether you’re hosting a game day party, a family dinner, or just craving a cheesy, comforting meal, these taco-stuffed pockets are sure to be a hit.
What Are Loaded Taco-Stuffed Cheesy Pockets?
Loaded Taco-Stuffed Cheesy Pockets are essentially a delicious cross between a taco and a cheesy stuffed bread pocket. Picture this: seasoned ground beef mixed with taco spices, black beans, corn, and melted cheese, all enveloped in a golden, flaky dough. Each bite delivers a burst of savory taco flavors combined with the richness of cheese, making these pockets a delightful treat for any occasion.
Ingredients You’ll Need
To make these tasty pockets, you’ll need the following ingredients:
- Ground Beef: The base of your taco filling, cooked until browned and seasoned with taco spices.
- Taco Seasoning: For that authentic taco flavor.
- Black Beans: Adds texture and a boost of protein.
- Corn: Sweet and crunchy addition.
- Shredded Cheddar Cheese: For that gooey, cheesy goodness.
- Pizza Dough or Crescent Roll Dough: The outer layer of the pocket, providing a crisp, golden finish.
- Sour Cream and Salsa: Optional, for dipping and extra flavor.
Step-by-Step Instructions
- Preheat Your Oven: Start by preheating your oven to 375°F (190°C). This ensures that your pockets bake evenly and become crispy.
- Cook the Beef: In a skillet over medium heat, cook the ground beef until browned. Drain any excess fat, then add taco seasoning and a splash of water. Stir in the black beans and corn, cooking until heated through.
- Prepare the Dough: Roll out your pizza dough or crescent roll dough on a lightly floured surface. Cut the dough into squares or circles, depending on your preference.
- Assemble the Pockets: Place a spoonful of the taco mixture in the center of each dough piece. Top with shredded cheddar cheese. Fold the dough over the filling and seal the edges by pinching them together or using a fork to crimp.
- Bake: Arrange the pockets on a baking sheet lined with parchment paper. Bake for 12-15 minutes or until the dough is golden brown and crispy.
- Serve and Enjoy: Let the pockets cool slightly before serving. Pair with sour cream and salsa for dipping if desired.
Why You’ll Love These Cheesy Pockets
- Versatile and Customizable: You can easily adjust the filling based on your preferences. Add diced tomatoes, jalapeños, or your favorite taco toppings for a personalized touch.
- Perfect for Any Occasion: These pockets are great as a party appetizer, a fun family dinner, or a quick and easy weeknight meal.
- Kid-Friendly: The cheesy, savory filling is sure to be a hit with kids and adults alike.
Final Thoughts
Loaded Taco-Stuffed Cheesy Pockets are a fantastic way to enjoy the flavors of tacos in a fun, new format. Their cheesy, savory goodness and crispy, golden exterior make them an irresistible treat. Try them out for your next meal or gathering, and watch them disappear in no time!
Serving and Storage Tips for Loaded Taco-Stuffed Cheesy Pockets
Serving Tips
- Fresh Out of the Oven: These cheesy pockets are best enjoyed fresh from the oven while the cheese is still gooey and the dough is crispy. Serve them warm for the best texture and flavor.
- Dipping Sauces: Enhance the flavor by serving with your favorite dipping sauces. Classic options include sour cream, salsa, guacamole, or even a zesty taco sauce. For a twist, try a creamy ranch or a spicy jalapeño dip.
- Accompaniments: Pair with a side salad or some fresh veggies for a well-rounded meal. A simple Mexican-inspired salad with lettuce, tomatoes, and avocado makes a great complement.
- Garnishes: Top with chopped cilantro, a squeeze of lime, or sliced jalapeños for an extra burst of flavor.
Storage Tips
- Cooling: Allow the taco-stuffed pockets to cool to room temperature before storing to prevent condensation and sogginess.
- Refrigeration: Store any leftovers in an airtight container in the refrigerator. They can typically be kept for up to 3-4 days. Make sure the container is tightly sealed to keep them fresh.
- Freezing: For longer storage, you can freeze these pockets. Place them in a freezer-safe container or zip-top bag, separating layers with parchment paper to prevent sticking. They can be frozen for up to 2-3 months.
- Reheating: To reheat, preheat your oven to 350°F (175°C). Place the pockets on a baking sheet and heat for about 10-15 minutes or until heated through and the cheese is melty again. For a quicker option, you can use a microwave, but the dough may not stay as crispy.
- Avoiding Sogginess: If you notice that the pockets are a bit soggy after freezing, reheat them in an oven or toaster oven to help restore their crispiness.
With these serving and storage tips, you can ensure that your Loaded Taco-Stuffed Cheesy Pockets stay delicious and satisfying every time you enjoy them.
1. Can I use a different type of dough for these pockets?
Yes, you can use various types of dough for these cheesy pockets. Besides pizza dough or crescent roll dough, you might also try using puff pastry, biscuit dough, or homemade bread dough. Each type of dough will give a slightly different texture and flavor, so feel free to experiment to find your favorite.
2. Can I make these pockets ahead of time?
Absolutely! You can prepare the taco filling and assemble the pockets a day in advance. Simply store them in an airtight container in the refrigerator. When ready to bake, place them on a baking sheet and bake as directed. If you prefer to freeze them, follow the storage tips above for freezing and reheating.
3. What can I use as a vegetarian or vegan alternative?
For a vegetarian version, substitute the ground beef with cooked lentils, black beans, or a meat substitute like textured vegetable protein (TVP). For a vegan option, use a plant-based cheese and ensure the dough is vegan-friendly. Adjust the seasoning and fillings to taste, and you’ll have a delicious meat-free version of this recipe.
4. How can I make these pockets spicier?
To add some heat to your taco-stuffed pockets, consider mixing in diced jalapeños, hot sauce, or red pepper flakes into the taco filling. You can also top the pockets with a spicy salsa or a drizzle of sriracha before serving. Adjust the spice level to your preference for the perfect kick!
Print
Loaded Taco-Stuffed Cheesy Pockets
- Prep Time: 20 minutes
- Cook Time: 15 minutes
- Total Time: 35 minutes
- Yield: 12 pockets 1x
- Category: Main Course, Appetizer
- Method: Baking
- Cuisine: Tex-Mex
Description
These Loaded Taco-Stuffed Cheesy Pockets combine seasoned ground beef, creamy cheese, and zesty salsa, all wrapped in soft tortillas and baked to golden perfection. They’re perfect for a quick weeknight dinner or as a crowd-pleasing appetizer.
Ingredients
- 1 pound (450g) ground beef
- 1 packet taco seasoning mix
- 1/2 cup salsa
- 8 ounces (225g) cream cheese, softened
- 1 cup shredded cheddar cheese
- 12 small (6-inch) flour tortillas
- 2 tablespoons melted butter
Instructions
-
Prepare the Filling:
- In a skillet over medium heat, cook the ground beef until browned and fully cooked. Drain any excess fat.
- Add the taco seasoning mix to the beef, following the package instructions (typically adding water and simmering until the mixture thickens).
- Remove from heat and let the mixture cool slightly.
-
Combine Cream Cheese and Salsa:
- In a medium bowl, beat the softened cream cheese until smooth.
- Stir in the salsa until well combined.
-
Assemble the Pockets:
- Preheat your oven to 350°F (175°C). Lightly grease a baking sheet or line it with parchment paper.
- Lay out a tortilla and spread a spoonful of the cream cheese and salsa mixture in the center.
- Add a spoonful of the seasoned beef mixture on top of the cream cheese layer.
- Sprinkle with shredded cheddar cheese.
- Fold the sides of the tortilla over the filling, then roll it up tightly to form a pocket.
- Place the pocket seam-side down on the prepared baking sheet.
- Repeat with the remaining tortillas and filling.
-
Bake:
- Brush the tops of the pockets with melted butter to help them crisp up and turn golden.
- Bake in the preheated oven for 15 minutes, or until the tortillas are golden brown and the cheese is melted.
-
Serve:
- Remove from the oven and let cool slightly before serving.
- Optional: Serve with additional salsa, sour cream, or guacamole for dipping.
Notes
- Variations: Feel free to customize the filling by adding ingredients like black beans, corn, diced bell peppers, or jalapeños for extra flavor and texture.
- Storage: Leftovers can be stored in an airtight container in the refrigerator for up to 3 days. Reheat in the oven at 350°F (175°C) until warmed through to maintain crispness.
- Make-Ahead: These pockets can be assembled ahead of time and refrigerated until ready to bake. If baking from chilled, you may need to add a few extra minutes to the baking time.

