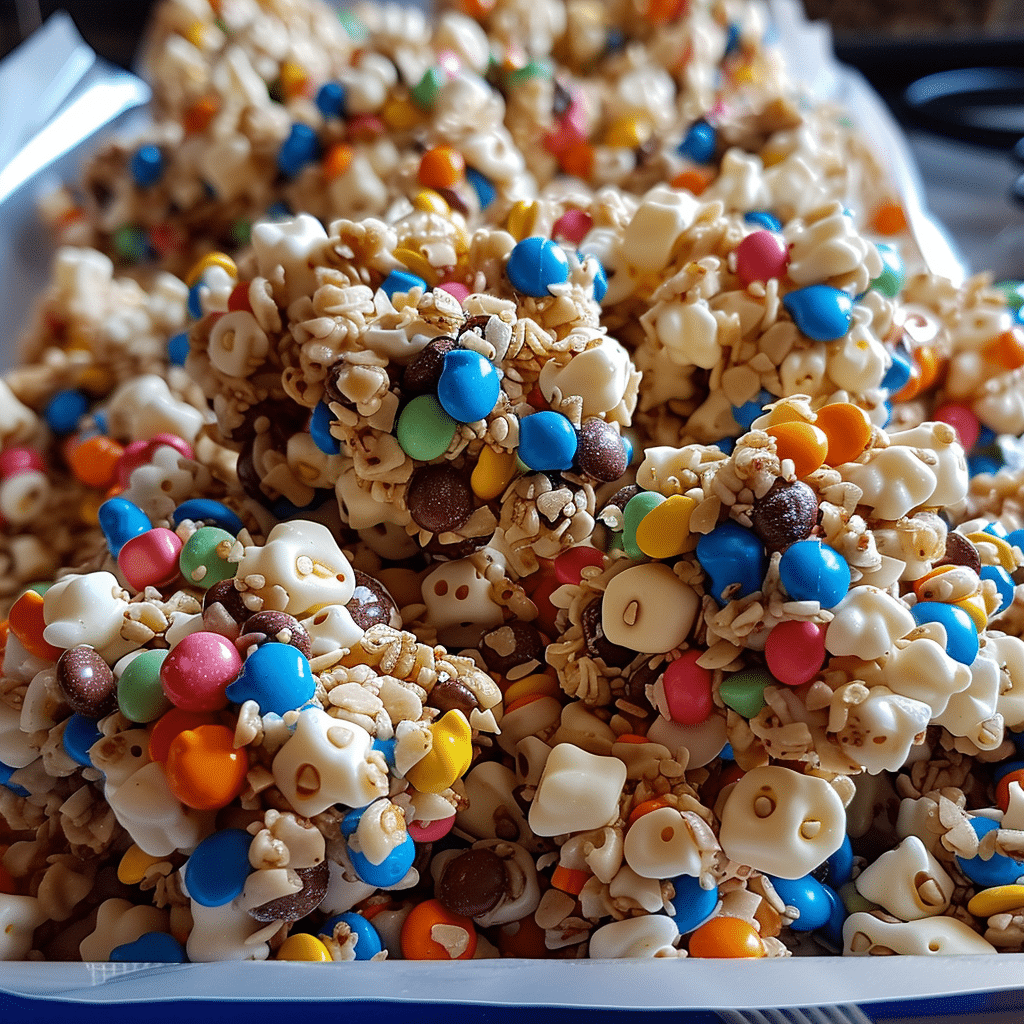
Are you looking for a simple, delicious, and kid-friendly recipe to make with your little ones? Look no further than these No-Bake Clusters! This treat is perfect for children to help with, as it requires minimal cooking and only a few ingredients. With their chewy texture and delightful flavors, these clusters will become a favorite in your household!
Why You’ll Love No-Bake Clusters
- Easy to Make: These clusters require no oven time, making them a perfect activity for young chefs. Kids can help measure, mix, and shape the ingredients into fun clusters.
- Customizable: You can easily swap ingredients based on your child’s preferences. Want to add more chocolate? Go for it! Prefer dried fruits over nuts? The choice is yours!
- Nutritious Options: By incorporating oats, nut butter, and dried fruits, you can make these clusters a bit healthier without sacrificing taste.
- Perfect for Snacks and Lunchboxes: These treats are a fantastic addition to lunchboxes or as an after-school snack. They provide a quick energy boost to keep your kids fueled for playtime.
Ingredients You’ll Need
To whip up a batch of these kid-friendly no-bake clusters, gather the following ingredients:
- 1 cup rolled oats
- 1/2 cup nut butter (peanut butter, almond butter, or sunflower seed butter)
- 1/2 cup honey or maple syrup
- 1/2 cup mini chocolate chips or chopped nuts
- 1/2 cup dried fruits (raisins, cranberries, or apricots)
- A pinch of salt (optional)
Step-by-Step Instructions
Step 1: Mix the Base
In a large mixing bowl, combine the rolled oats, nut butter, and honey or maple syrup. Use a spatula or spoon to mix everything until well combined. The mixture should be sticky but hold together.
Step 2: Add Extras
Fold in the mini chocolate chips, dried fruits, and a pinch of salt if desired. Ensure that the extras are evenly distributed throughout the mixture.
Step 3: Form the Clusters
Using your hands or a spoon, scoop out small portions of the mixture and shape them into clusters. Place the clusters onto a parchment-lined baking sheet or plate.
Step 4: Chill
Refrigerate the clusters for at least 30 minutes to set. Once firm, they can be stored in an airtight container in the fridge for up to a week.
Tips for Success
- Get Creative: Encourage your kids to get creative by adding their favorite mix-ins, such as coconut flakes, seeds, or even a sprinkle of cinnamon.
- Make It Fun: Use cookie cutters to shape the clusters into fun shapes for a special touch.
- Allergies: If allergies are a concern, ensure the nut butter is safe for your child or use alternatives like sunbutter.
Conclusion
These Kid-Friendly No-Bake Clusters are a quick, simple, and enjoyable recipe that your children will love to help make. With endless possibilities for customization, these clusters can suit any taste preference while providing a nutritious snack option. Next time you’re looking for a fun kitchen activity with your kids, grab these ingredients and start mixing! You’ll be amazed at how quickly these delightful treats disappear.
Serving and Storage Tips for Kid-Friendly No-Bake Clusters
Once you’ve made your delicious Kid-Friendly No-Bake Clusters, it’s essential to know how to serve and store them to keep them fresh and enjoyable. Here are some practical tips for serving and storing your clusters:
Serving Tips
- Portion Control: Use a small cookie scoop or your hands to create uniform clusters. This helps with portion control and makes it easy for kids to grab a snack.
- Presentation: Serve the clusters on a colorful plate or in fun cupcake liners to make them visually appealing for children. You can even arrange them in the shape of a smiley face or other fun designs to make snack time exciting!
- Pairing Suggestions: These clusters can be enjoyed alone or paired with other snacks. Consider serving them with:
- Yogurt or a fruit dip
- Fresh fruit slices (such as apples or bananas)
- A glass of milk or a smoothie for a balanced snack
- Make it a Fun Activity: Encourage your kids to create their own cluster combinations by providing a variety of mix-ins and letting them customize their treats. This can be a fun way to involve them in the kitchen!
Storage Tips
- Keep Them Fresh: Store your no-bake clusters in an airtight container to prevent them from becoming stale. A well-sealed container will help retain their chewy texture.
- Refrigeration: For optimal freshness, keep the clusters in the refrigerator. This will help them maintain their shape and prevent them from becoming too soft.
- Freezing for Later: If you want to prepare a batch in advance, these clusters freeze well! Place the clusters in a single layer on a baking sheet and freeze until solid. Once frozen, transfer them to an airtight freezer bag or container. They can be stored in the freezer for up to 3 months. To enjoy, simply take out a few clusters and let them thaw at room temperature for a short time.
- Label and Date: If you’re freezing clusters, label the container or bag with the date they were made. This will help you keep track of their freshness.
- Check for Quality: Before serving leftovers, always check for any signs of spoilage, such as an off smell or changes in texture.
By following these serving and storage tips, you can ensure that your Kid-Friendly No-Bake Clusters remain delicious and enjoyable for days to come! Enjoy your time in the kitchen and happy snacking!
1. Can I substitute the nut butter in this recipe?
Yes! If you or your child has a nut allergy, you can substitute the nut butter with sunflower seed butter, soy nut butter, or a nut-free alternative. These options will still provide the same binding effect while keeping the clusters nut-free.
2. How can I make these clusters healthier?
To make your no-bake clusters healthier, consider using whole grain oats, reducing the amount of honey or maple syrup, or opting for natural sweeteners like mashed bananas or unsweetened applesauce. You can also increase the amount of dried fruits and nuts for added nutrients and fiber.
3. Can I add protein powder to the clusters?
Absolutely! Adding a scoop of your favorite protein powder can boost the nutritional content of the clusters. Just keep in mind that it may change the texture slightly, so you may need to adjust the amount of nut butter or liquid used to maintain the right consistency.
4. How long do these clusters last?
When stored in an airtight container in the refrigerator, no-bake clusters can last for about a week. If frozen, they can be stored for up to three months. Just remember to thaw them at room temperature before serving for the best texture.

Kid-Friendly No-Bake Clusters
- Prep Time: 10 minutes
- Cook Time: 30 minutes
- Total Time: 40 minutes
- Yield: 18–20 clusters 1x
- Category: Snack, Dessert
- Method: No-Bake
- Cuisine: American
Description
These No-Bake Clusters are perfect for kids to help make! Combining chocolate, peanut butter, and crunchy cereal, they’re an easy, no-bake treat that kids and adults alike will love. Great for school lunches, after-school snacks, or a quick dessert.
Ingredients
- 2 cups semi-sweet chocolate chips or milk chocolate chips
- 1/2 cup creamy peanut butter (optional for nut-free, can substitute with sunflower butter)
- 2 cups crispy rice cereal or cornflake cereal
- 1 cup mini marshmallows
- 1/2 cup chopped pretzels or nuts (optional)
Instructions
-
Melt the Chocolate and Peanut Butter:
- In a microwave-safe bowl, melt the chocolate chips in 30-second intervals, stirring in between, until smooth. Stir in the peanut butter until fully combined.
-
Combine Ingredients:
- In a large bowl, mix the cereal, mini marshmallows, and chopped pretzels (if using). Pour the melted chocolate mixture over the dry ingredients and gently fold until everything is well coated.
-
Form the Clusters:
- Line a baking sheet with parchment paper. Scoop spoonfuls of the mixture onto the baking sheet to form clusters. You can use a cookie scoop for even sizes.
-
Chill to Set:
- Place the baking sheet in the refrigerator for about 20-30 minutes, or until the clusters are firm.
-
Serve:
- Once set, remove the clusters from the fridge and enjoy! Store in an airtight container at room temperature or in the fridge for a firmer texture.
Notes
- Storage: Keep in an airtight container for up to a week.
- Variations: Substitute chocolate with white chocolate, or add dried fruits like cranberries or raisins for extra flavor.

