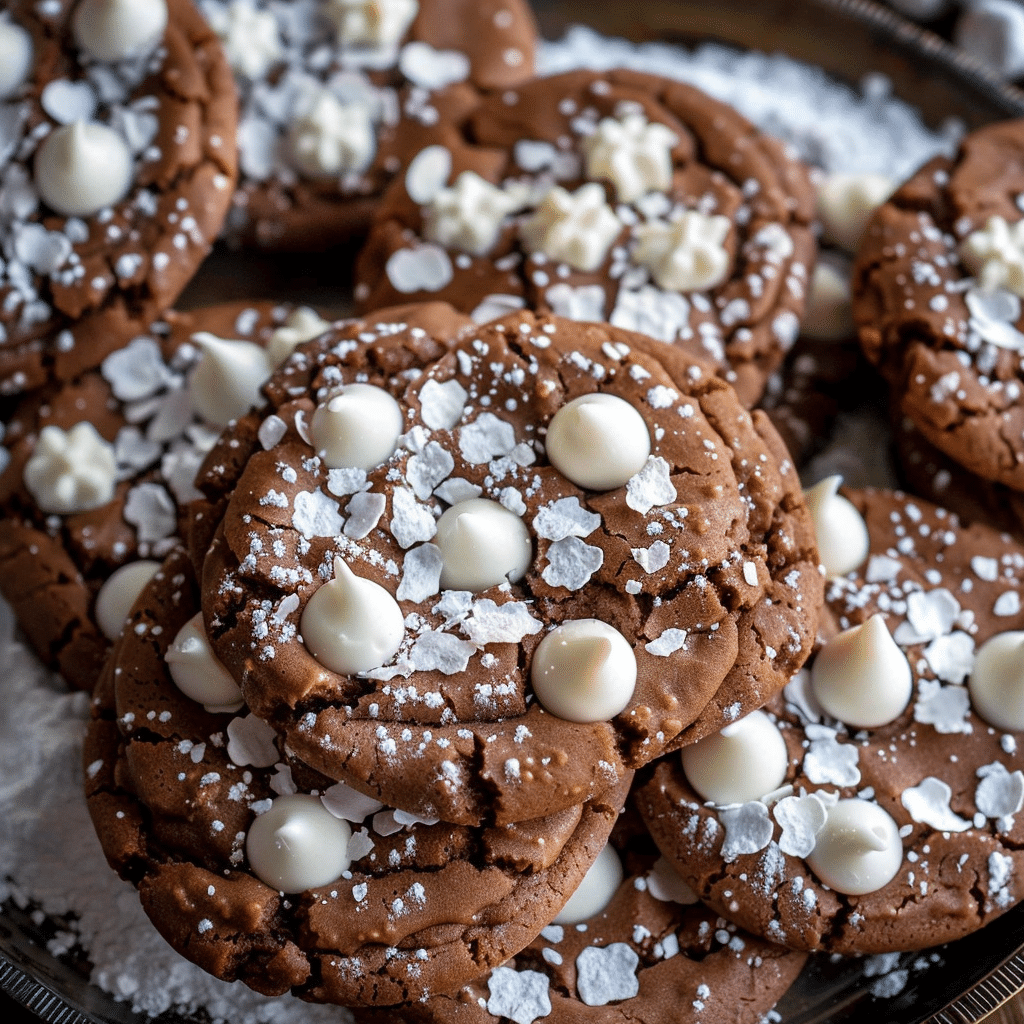
When winter arrives, there’s nothing quite like the warm, comforting taste of hot chocolate. Imagine combining that delightful flavor with the joy of freshly baked cookies! Hot Chocolate Cookies are a delicious way to embrace the season and indulge in a sweet treat that will warm your heart. Perfect for holiday gatherings, cozy evenings by the fire, or simply satisfying your sweet tooth, these cookies are sure to become a favorite.
Why You’ll Love Hot Chocolate Cookies
These cookies capture all the flavors of your favorite hot cocoa, featuring rich chocolate dough infused with cocoa powder and mini marshmallows. They’re soft, chewy, and have a delightful chocolatey flavor that is simply irresistible. Here’s why you’ll love them:
- Decadent Flavor: The combination of cocoa powder and chocolate chips creates a rich, chocolatey taste that is perfect for any chocolate lover.
- Texture Galore: With a soft and chewy center, these cookies have the perfect bite, with the added surprise of melting marshmallows.
- Easy to Make: This recipe is straightforward, making it a great choice for bakers of all levels. In no time, you’ll have a batch of delicious cookies ready to enjoy!
Ingredients You’ll Need
To make Hot Chocolate Cookies, gather the following ingredients:
- 1 cup unsalted butter, softened
- 1 cup granulated sugar
- 1 cup brown sugar, packed
- 2 large eggs
- 1 teaspoon vanilla extract
- 2 cups all-purpose flour
- ½ cup cocoa powder
- 1 teaspoon baking soda
- ½ teaspoon salt
- 1 cup semi-sweet chocolate chips
- 1 cup mini marshmallows (plus extra for topping)
How to Make Hot Chocolate Cookies
Follow these simple steps to whip up your batch of Hot Chocolate Cookies:
Step 1: Preheat the Oven
Preheat your oven to 350°F (175°C) and line a baking sheet with parchment paper.
Step 2: Cream the Butter and Sugars
In a large mixing bowl, cream together the softened butter, granulated sugar, and brown sugar until light and fluffy. This usually takes about 2-3 minutes.
Step 3: Add Eggs and Vanilla
Beat in the eggs one at a time, followed by the vanilla extract. Mix until well combined.
Step 4: Combine Dry Ingredients
In a separate bowl, whisk together the flour, cocoa powder, baking soda, and salt. Gradually add this mixture to the wet ingredients, mixing until just combined.
Step 5: Fold in Chocolate Chips and Marshmallows
Gently fold in the chocolate chips and mini marshmallows.
Step 6: Scoop and Bake
Using a cookie scoop or tablespoon, drop dough onto the prepared baking sheet, spacing them about 2 inches apart. Top each cookie with a few extra mini marshmallows for an added touch.
Bake in the preheated oven for 10-12 minutes, or until the edges are set but the centers are still soft.
Step 7: Cool and Enjoy
Let the cookies cool on the baking sheet for a few minutes before transferring them to a wire rack to cool completely. Enjoy your Hot Chocolate Cookies warm, or store them in an airtight container for later.
Tips for the Perfect Cookies
- Don’t Overbake: For the best texture, remove the cookies from the oven when they are slightly underbaked. They will continue to firm up as they cool.
- Add Peppermint: For a festive twist, consider adding crushed peppermint candies to the dough for a minty flavor.
- Experiment with Mix-Ins: Feel free to get creative! Try adding nuts, white chocolate chips, or a drizzle of chocolate on top for extra indulgence.
Conclusion
Hot Chocolate Cookies are the perfect winter treat, combining the rich flavors of hot cocoa with the comforting texture of cookies. Whether you’re enjoying them with a cup of coffee, serving them at a holiday party, or gifting them to friends and family, these cookies are sure to bring joy and warmth to any occasion. So grab your ingredients and get baking—you won’t regret it!
Serving and Storage Tips for Hot Chocolate Cookies
Serving Suggestions
- Pair with Beverages: Serve your Hot Chocolate Cookies warm with a glass of milk, hot chocolate, or your favorite coffee. The combination enhances the chocolate flavor and adds a delightful touch to your dessert experience.
- Presentation Ideas: For a festive look, arrange the cookies on a decorative platter and sprinkle some powdered sugar on top for a snowy effect. You can also add a few marshmallows or chocolate curls for an elegant touch.
- Cookie Sandwiches: For a fun twist, consider making cookie sandwiches by adding a scoop of vanilla ice cream or whipped cream between two cookies. This creates a deliciously gooey treat that is perfect for warm summer days.
- Decorate for Special Occasions: Customize your Hot Chocolate Cookies with themed decorations for holidays or parties. For example, drizzle melted white chocolate over the cookies or add colored sprinkles for a festive touch.
Storage Tips
- Room Temperature: Store cooled cookies in an airtight container at room temperature for up to one week. Make sure the container is sealed tightly to maintain freshness.
- Refrigeration: If you prefer softer cookies, you can store them in the refrigerator, where they will last for about 10 days. Just be sure to let them come to room temperature before serving, as they may become firm when chilled.
- Freezing for Later: For longer storage, freeze your Hot Chocolate Cookies. Place them in a single layer on a baking sheet and freeze until solid. Once frozen, transfer the cookies to a freezer-safe bag or container, separating layers with parchment paper. They can be frozen for up to three months.
- Reheating Tips: When ready to enjoy frozen cookies, simply thaw them in the refrigerator or at room temperature. To warm them up, place them in a preheated oven at 350°F (175°C) for about 5-7 minutes, or until heated through.
By following these serving and storage tips, you can ensure that your Hot Chocolate Cookies remain delicious and enjoyable for everyone. Whether you’re indulging in them right away or saving some for later, these tips will help maintain their flavor and texture. Enjoy your baking!
- Can I substitute ingredients in the Hot Chocolate Cookies recipe?
- Yes, you can make some substitutions. For example, you can use coconut oil or margarine in place of unsalted butter. If you’re looking for a dairy-free option, try using dairy-free chocolate chips and nut milk. You can also substitute all-purpose flour with a gluten-free flour blend, though it may affect the texture slightly.
- How do I make my cookies chewier?
- To achieve chewier cookies, consider the following tips: use more brown sugar than granulated sugar, as brown sugar adds moisture. You can also chill the dough for at least 30 minutes before baking, which helps prevent spreading and results in a thicker, chewier cookie.
- What should I do if my cookie dough is too sticky?
- If your dough is too sticky to handle, try chilling it in the refrigerator for about 30 minutes. This will firm up the dough, making it easier to scoop and shape. If the dough is still sticky, you can add a small amount of flour (1-2 tablespoons) until it reaches a manageable consistency.
- Can I add other mix-ins to the cookie dough?
- Absolutely! Hot Chocolate Cookies are versatile, and you can customize them with various mix-ins. Consider adding chopped nuts (like walnuts or pecans), toffee bits, crushed peppermint candies for a minty flavor, or even different types of chocolate chips (like white or dark chocolate) for a unique twist. Just be mindful not to overload the dough to ensure even baking.

Hot Chocolate Cookies
- Prep Time: 10 minutes
- Cook Time: 10-12 minutes
- Total Time: 22 minutes
- Yield: 24 cookies 1x
- Category: Dessert, Cookies
- Method: Baking
- Cuisine: American
Description
These Hot Chocolate Cookies are soft, chewy, and packed with rich chocolate flavor! Topped with gooey marshmallows, they taste just like a cozy cup of hot cocoa. Perfect for winter nights, holiday gatherings, or any time you’re craving a warm, chocolatey treat.
Ingredients
- 1/2 cup (115g) unsalted butter, softened
- 1/2 cup (100g) granulated sugar
- 1/2 cup (100g) brown sugar, packed
- 1 large egg, room temperature
- 1 tsp vanilla extract
- 1 1/2 cups (190g) all-purpose flour
- 1/4 cup (30g) unsweetened cocoa powder
- 1/2 tsp baking soda
- 1/4 tsp salt
- 1 cup (180g) semi-sweet chocolate chips
- 12 large marshmallows, cut in half
Instructions
-
Preheat the Oven:
- Preheat your oven to 350°F (175°C). Line two baking sheets with parchment paper.
-
Make the Cookie Dough:
- In a large mixing bowl, cream together the softened butter, granulated sugar, and brown sugar until light and fluffy.
- Add the egg and vanilla extract, mixing until smooth.
- In a separate bowl, whisk together the flour, cocoa powder, baking soda, and salt.
- Gradually add the dry ingredients to the wet ingredients, mixing until just combined. Fold in the chocolate chips.
-
Shape and Bake the Cookies:
- Scoop 1 tablespoon of dough and roll into a ball. Place on the prepared baking sheets, about 2 inches apart.
- Bake for 8 minutes. Remove the cookies from the oven and gently press a marshmallow half into the center of each cookie.
-
Finish Baking with Marshmallows:
- Return the cookies to the oven and bake for an additional 2-3 minutes, or until the marshmallows are puffy and slightly melted.
-
Cool and Serve:
- Allow the cookies to cool on the baking sheet for a few minutes, then transfer to a wire rack to cool completely.
- Enjoy the cookies warm or at room temperature for a delicious hot chocolate-inspired treat!
Notes
- Extra chocolatey: Drizzle melted chocolate over the marshmallows for even more chocolate flavor.
- Make it peppermint: Add 1/2 tsp peppermint extract to the dough or sprinkle crushed peppermint candies on top.
- Storage: Store in an airtight container at room temperature for up to 4 days.

