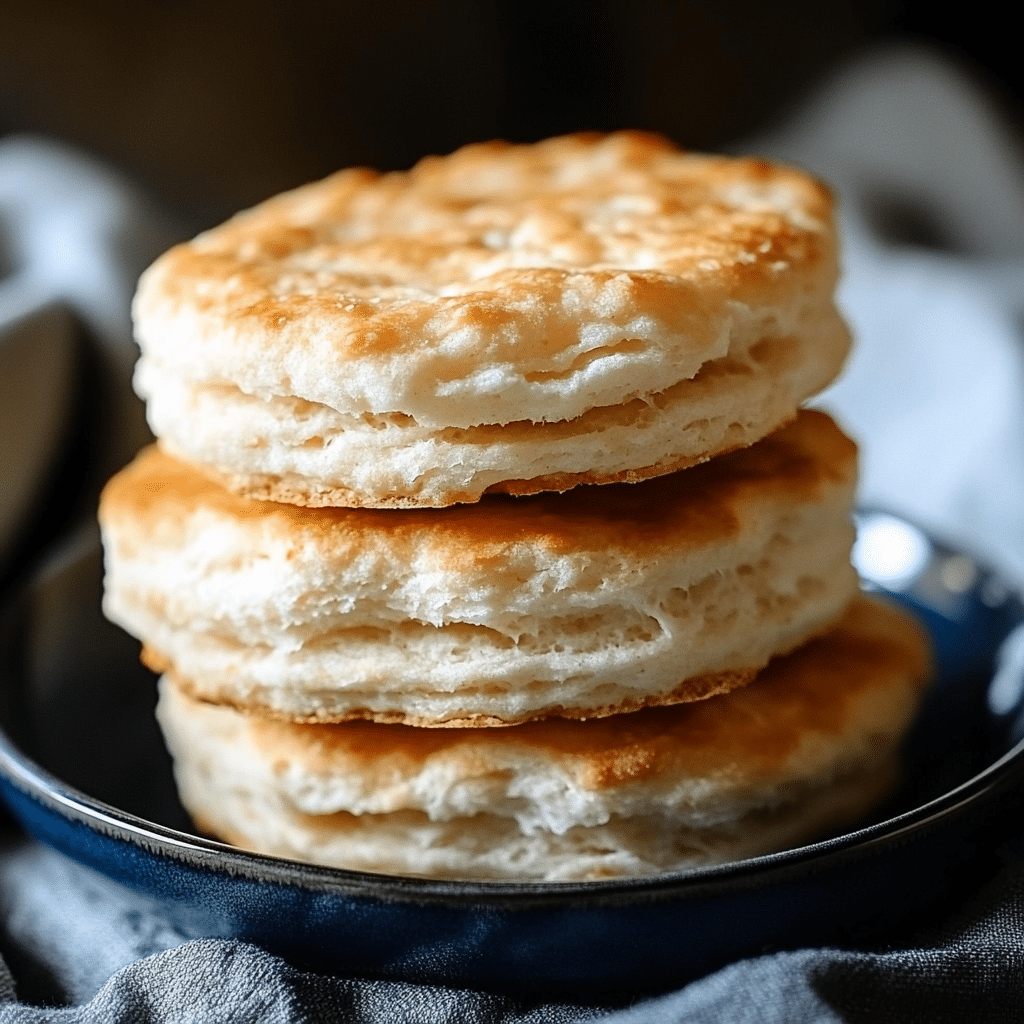
When it comes to comfort food, few things compare to the warm, flaky goodness of homemade biscuits. Perfect for breakfast, lunch, or dinner, homemade biscuits are a versatile addition to any meal. Whether served with gravy, jam, or butter, they’re always a crowd-pleaser. This easy recipe will guide you through the steps to create the perfect homemade biscuits every time.
Ingredients for Homemade Biscuits:
- 2 cups all-purpose flour
- 1 tablespoon baking powder
- 1 teaspoon salt
- 1 tablespoon sugar
- 1/2 cup (1 stick) unsalted butter, cold and cubed
- 3/4 cup whole milk (you may need a little more depending on dough consistency)
- Optional: 1 tablespoon of melted butter for brushing
Step-by-Step Instructions for Perfect Homemade Biscuits:
Step 1: Preheat the Oven
Start by preheating your oven to 450°F (232°C). This high temperature helps create the biscuits’ signature flaky layers.
Step 2: Mix Dry Ingredients
In a large mixing bowl, whisk together the flour, baking powder, salt, and sugar. These dry ingredients form the foundation for your biscuit dough.
Step 3: Cut in the Butter
Add the cold, cubed butter to the dry ingredients. Use a pastry cutter, fork, or your fingers to work the butter into the flour mixture until it resembles coarse crumbs with small pea-sized bits of butter. The butter should be cold to create the flaky texture that’s characteristic of a perfect biscuit.
Step 4: Add the Milk
Pour in the milk and stir gently with a spoon until the dough just comes together. Be careful not to overmix, as this can result in dense biscuits. If the dough seems too dry, add a little more milk, a tablespoon at a time, until it reaches a slightly sticky consistency.
Step 5: Turn Out and Fold the Dough
Lightly flour a clean surface and turn out the dough. Gently fold it over itself a couple of times to create layers, but avoid overworking the dough to keep it light and airy.
Step 6: Roll Out the Dough
Using a rolling pin, roll the dough out to about 1-inch thickness. You want the dough to be thick enough to hold its shape during baking but not too thick.
Step 7: Cut the Biscuits
Using a round biscuit cutter (or a drinking glass), cut out biscuits from the dough. Press straight down without twisting to ensure clean edges. Gather any leftover dough, gently re-roll, and cut out additional biscuits.
Step 8: Bake the Biscuits
Place the biscuits on a baking sheet, making sure they’re close together but not touching. This helps them rise evenly. Bake for 10-12 minutes, or until the tops are golden brown and the biscuits have puffed up.
Step 9: Optional: Brush with Butter
For a soft, shiny top, brush the freshly baked biscuits with melted butter as soon as they come out of the oven.
Tips for the Best Homemade Biscuits:
- Keep Ingredients Cold: The cold butter is key to creating the flaky layers in your biscuits. If your kitchen is warm, you can chill the flour and bowl before starting.
- Don’t Overmix the Dough: Overworking the dough can make biscuits tough. Stir just until the dough comes together.
- Use a Sharp Cutter: A sharp biscuit cutter ensures clean cuts that help the biscuits rise evenly.
Serving Suggestions:
Homemade biscuits are incredibly versatile. Here are a few ways you can serve them:
- Classic Biscuits and Gravy: Pair your biscuits with rich, creamy sausage gravy for a Southern-style breakfast.
- Jam and Butter: Spread with butter and your favorite jam or jelly for a simple, sweet treat.
- Chicken and Biscuits: Serve them alongside a hearty chicken stew or pot pie for a filling meal.
- Breakfast Sandwiches: Split them in half and fill with eggs, cheese, and bacon or sausage for a delicious breakfast sandwich.
Why You’ll Love This Homemade Biscuits Recipe
- Quick and Easy: With just a few basic ingredients and simple steps, you can have freshly baked biscuits ready in under 30 minutes.
- Flaky and Tender: The key to these biscuits is the cold butter, which ensures they bake up with perfect layers and a soft interior.
- Customizable: You can add herbs, cheese, or even bacon bits to the dough for extra flavor.
Conclusion
Making homemade biscuits is easier than you think and always worth the effort. Whether you’re serving them at a special family gathering or enjoying them on a quiet morning, these biscuits will become a staple in your kitchen. Perfectly flaky, golden, and delicious, this homemade biscuit recipe will have everyone asking for seconds!
Don’t forget to share this recipe with friends and family, and let us know how your homemade biscuits turned out in the comments below! Happy baking!
Serving and Storage Tips for Homemade Biscuits
Homemade biscuits are best enjoyed fresh out of the oven, but with the right storage, you can enjoy them for a few days. Here are some essential serving and storage tips to keep your biscuits fresh and delicious:
Serving Tips:
- Serve Immediately for Best Taste:
Biscuits are at their best when they’re warm and fresh from the oven. The golden, flaky texture is most noticeable when served right away. - Add a Topping:
- Sweet: Spread with butter, honey, or your favorite jam or jelly. Fruit preserves like strawberry or peach can elevate your biscuit experience.
- Savory: Top with a dollop of gravy, or serve alongside dishes like scrambled eggs, sausage, or fried chicken.
- Make a Biscuit Sandwich:
- Cut your biscuits in half and fill them with ingredients like fried eggs, bacon, sausage, or cheese to make a hearty breakfast sandwich.
- You can also use biscuits to make a savory sandwich with chicken or turkey, or a classic “biscuits and gravy” meal for a comforting Southern-style breakfast.
- Pair with Soups and Stews:
Biscuits are great for mopping up delicious broths. Serve them alongside soups like tomato soup, chili, or beef stew to add a comforting touch.
Storage Tips:
- Storing Leftover Biscuits:
- Room Temperature: Let your biscuits cool to room temperature before storing them. Place them in an airtight container or zip-top bag to maintain their softness. They’ll last for about 2-3 days at room temperature.
- To Keep Them Soft: For extra softness, you can wrap biscuits in a clean kitchen towel before placing them in an airtight container.
- Freezing Biscuits:
- Before Baking: If you want to make a big batch ahead of time, freeze unbaked biscuits. Arrange them on a baking sheet in a single layer and freeze until solid. Once frozen, transfer them to a zip-top bag or airtight container. Bake from frozen, adding an extra few minutes to the baking time.
- After Baking: If you’ve already baked the biscuits, freeze them by wrapping each biscuit individually in plastic wrap or aluminum foil. Store them in a freezer-safe bag for up to 3 months. When you’re ready to eat them, simply reheat them in the oven at 350°F (175°C) for 10-15 minutes.
- Reheating Biscuits:
- In the Oven: To restore the biscuits’ flaky texture, reheat them in the oven at 350°F (175°C) for about 5-10 minutes. You can also brush the tops with a little butter before reheating for extra moisture and flavor.
- In the Microwave: If you’re in a hurry, you can microwave individual biscuits for about 15-20 seconds. However, the texture may be softer compared to the oven method.
Pro Tip: Freshness Tips
To keep your biscuits soft for longer, consider placing a slice of bread in the storage container with the biscuits. The bread will help retain moisture and keep the biscuits from drying out too quickly.
By following these serving and storage tips, you can enjoy your homemade biscuits at their best, whether they’re fresh out of the oven or reheated for a delicious snack later on.
- Why are my biscuits dense instead of fluffy?
Biscuits can become dense if the dough is overmixed or the butter is too soft. Be sure to mix the dough just until it comes together and handle it gently. Use cold butter and avoid overworking the dough, which helps create those light, flaky layers. - Can I make the biscuit dough ahead of time?
Yes, you can make the biscuit dough ahead of time and refrigerate it for up to 2 hours before baking. If you want to prepare it further in advance, you can freeze unbaked biscuits. Just freeze them on a baking sheet first, then transfer to a zip-top bag, and bake from frozen when you’re ready. - What’s the best way to store leftover biscuits?
To store leftover biscuits, let them cool to room temperature, then place them in an airtight container or wrap them in plastic wrap. They’ll stay fresh for 2-3 days at room temperature. For longer storage, freeze them for up to 3 months and reheat when needed. - Can I make homemade biscuits without baking powder?
Yes, you can substitute baking powder with self-rising flour. Self-rising flour already contains baking powder and salt, so you can omit these from the recipe. Keep in mind that this will slightly alter the texture and rise, but it will still produce a delicious biscuit.

homemade biscuits
- Prep Time: 10 minutes
- Cook Time: 15 minutes
- Total Time: 25 minutes
- Yield: 4 servings 1x
- Category: Bread, Side Dish
- Method: Baking
- Cuisine: American
Description
These homemade biscuits are light, fluffy, and buttery, making them the perfect addition to any breakfast or dinner. With a tender crumb and golden crust, they’re easy to make from scratch and ideal for serving with butter, jam, or gravy.
Ingredients
- 2 cups all-purpose flour
- 1 tablespoon baking powder
- 1 tablespoon sugar
- 1/2 teaspoon salt
- 1/2 cup (1 stick) cold unsalted butter, cut into small cubes
- 3/4 cup cold milk (or buttermilk for extra flavor)
Instructions
- Preheat the Oven: Preheat your oven to 425°F (220°C). Line a baking sheet with parchment paper.
- Mix Dry Ingredients: In a large bowl, whisk together the flour, baking powder, sugar, and salt.
- Cut in the Butter: Add the cold, cubed butter to the flour mixture. Use a pastry cutter or your fingertips to work the butter into the flour until the mixture resembles coarse crumbs with some pea-sized bits of butter remaining.
- Add the Milk: Pour in the milk and gently stir with a fork until just combined. Do not overmix; the dough should be slightly sticky.
- Knead and Shape: Turn the dough onto a lightly floured surface and knead it gently 4-5 times until it comes together. Pat or roll the dough to about 3/4-inch thickness.
- Cut Out Biscuits: Use a biscuit cutter or the rim of a glass to cut out biscuits, pressing straight down without twisting (this helps them rise better). Place the biscuits on the prepared baking sheet, close together for softer sides or spaced apart for crispier edges.
- Bake the Biscuits: Bake for 12-15 minutes, or until the biscuits are golden brown on top.
- Serve: Serve warm, and enjoy with butter, honey, or your favorite jam!
Notes
- For extra-flaky biscuits, try folding the dough over itself a few times before cutting.
- Brush the tops with melted butter before baking for a golden, flavorful crust.

