
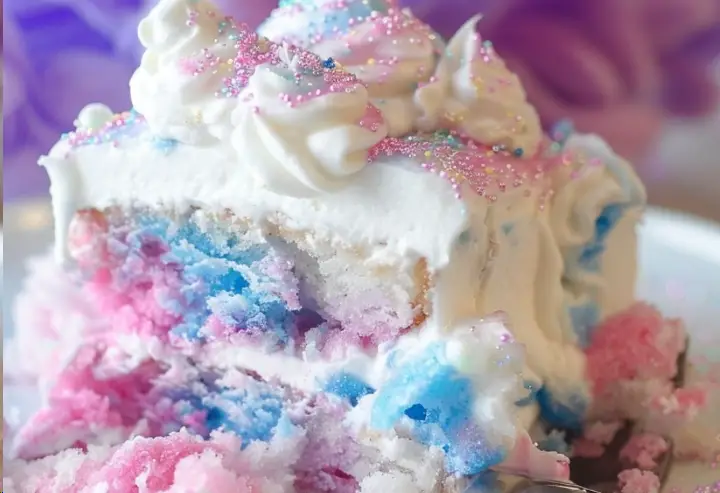
Craving a whimsical dessert that’s as delightful to the eyes as it is to the taste buds? Look no further than this enchanting Cotton Candy Cake recipe! Bursting with fluffy cotton candy goodness and adorned with swirls of pink and blue frosting, this cake is sure to captivate both young and old alike. Follow these simple steps to create your own magical masterpiece.
Ingredients:
- 2 cups all-purpose flour
- 1 tablespoon baking powder
- 1/2 teaspoon salt
- 1/2 cup unsalted butter, softened
- 1 1/4 cups granulated sugar
- 4 egg whites
- 1 teaspoon vanilla extract
- 1 cup milk
- 1/2 cup cotton candy, chopped (plus more for garnish)
- Pink and blue food coloring
Frosting:
- 1 cup unsalted butter, softened
- 4 cups powdered sugar
- 2 teaspoons vanilla extract
- 2-3 tablespoons milk
- Pink and blue food coloring
Directions:
- Preheat your oven to 350°F (175°C). Grease and flour two 9-inch round cake pans.
- Whisk together flour, baking powder, and salt in a medium bowl.
- In a large bowl, beat butter and sugar until light and fluffy. Add egg whites one at a time, followed by vanilla extract. Mix well.
- Gradually add the flour mixture to the butter mixture alternately with milk, beginning and ending with the flour mixture. Beat until just combined.
- Divide the batter into two bowls. Mix pink food coloring into one bowl and blue food coloring into the other. Gently fold chopped cotton candy into both batters.
- Pour the batters into the prepared pans, swirling slightly with a knife for a marbled effect.
- Bake for 25-30 minutes or until a toothpick inserted into the center comes out clean. Cool in pans for 10 minutes, then transfer to wire racks to cool completely.
- For the frosting, beat butter until creamy. Gradually add powdered sugar, vanilla, and enough milk to reach spreading consistency. Divide frosting into two bowls and color one pink and the other blue.
- Frost the cooled cake layers and decorate with additional cotton candy for a whimsical touch.
Nutritional Information:
- Prep Time: 20 minutes
- Cooking Time: 30 minutes
- Total Time: 50 minutes
- Calories: 520 kcal per serving
- Servings: 12 servings
Indulge in the sweet nostalgia of cotton candy with every slice of this delectable cake. Whether you’re celebrating a birthday, hosting a party, or simply treating yourself to something special, this Cotton Candy Cake is sure to be a hit. Enjoy the magic of dessert with every bite!
Serving and Storage Tips:
Serving:
- Serve slices of Cotton Candy Cake on decorative plates for a charming presentation.
- Garnish each slice with a small tuft of cotton candy for an extra touch of sweetness.
- Pair with a glass of cold milk or a cup of hot tea for a delightful treat.
Storage:
- Store leftover cake in an airtight container at room temperature for up to 3 days.
- For longer storage, tightly wrap individual slices in plastic wrap and freeze for up to 1 month.
- Thaw frozen slices in the refrigerator overnight before serving.
- To maintain freshness, avoid storing the cake in direct sunlight or near heat sources.
With these serving and storage tips, you can ensure that your Cotton Candy Cake remains fresh and delicious, ready to be enjoyed whenever the craving strikes.
Frequently Asked Questions (FAQs):
1. Can I use pre-made cotton candy for this recipe?
- Yes, you can use pre-made cotton candy for convenience. Simply chop it into small pieces as instructed in the recipe and fold it into the cake batter.
2. Can I use whole eggs instead of just egg whites?
- While this recipe calls for egg whites to achieve a lighter texture, you can use whole eggs if you prefer. Just keep in mind that the texture and color of the cake may vary slightly.
3. Can I make this cake ahead of time for a special occasion?
- Absolutely! You can bake the cake layers in advance and store them in an airtight container at room temperature for up to a day before frosting. This allows you to save time on the day of your event.
4. How do I achieve the marbled effect in the cake layers?
- To achieve the marbled effect, simply pour the pink and blue batter into the prepared pans alternately, then gently swirl them together with a knife before baking. This creates a beautiful swirl of colors throughout the cake.