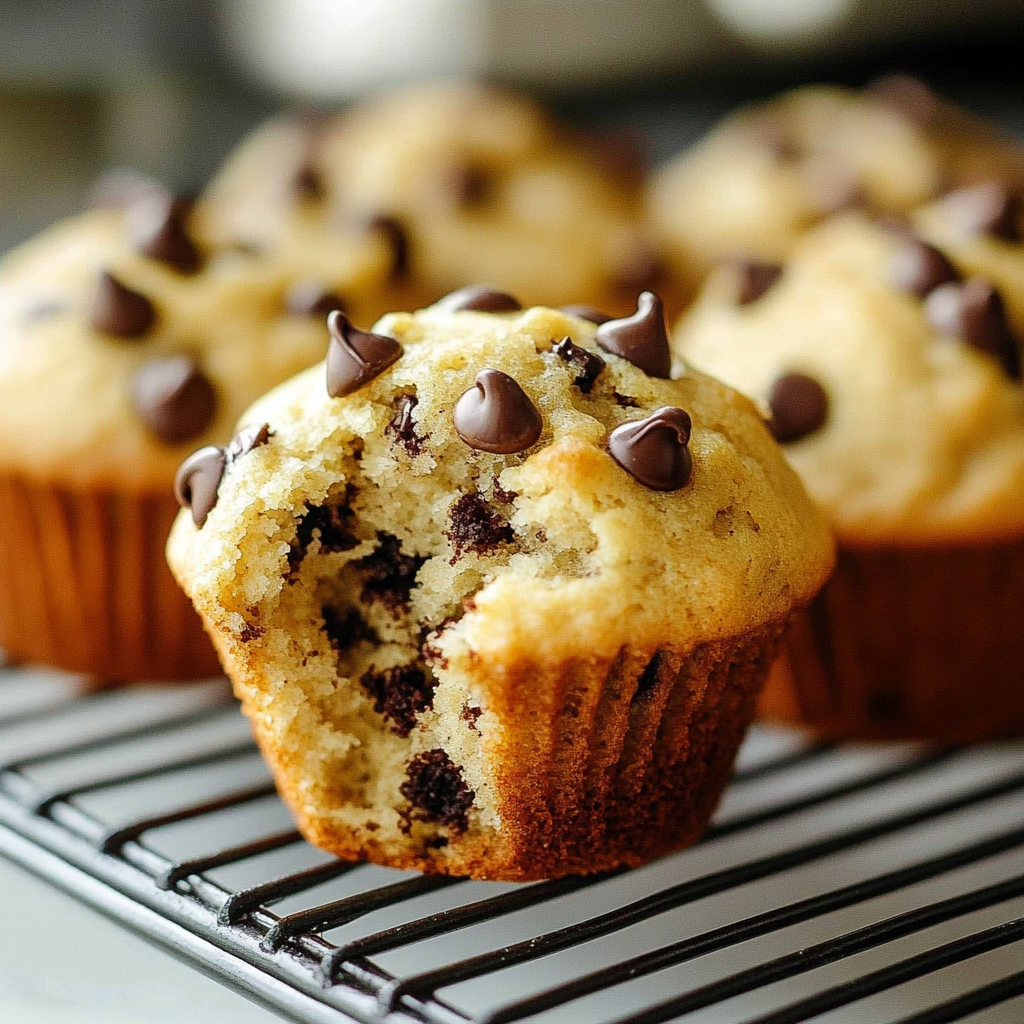
Indulge in the delightful combination of buttery goodness and sweet chocolate chips with these homemade Chocolate Chip Muffins. Perfect for breakfast, brunch, or a comforting snack, these muffins are sure to please your taste buds and satisfy your cravings.
Ingredients:
- ½ cup butter, softened
- 1 cup granulated sugar
- 2 large eggs
- 2 teaspoons baking powder
- ½ teaspoon salt
- 1 teaspoon vanilla extract
- 2 cups all-purpose flour
- ½ cup milk
- 1 cup semi-sweet chocolate chips
Directions:
- Line a muffin tin with paper liners and lightly grease them with nonstick cooking spray.
- In a large mixing bowl, cream together the softened butter and granulated sugar using a hand mixer for about two minutes until smooth.
- Beat in the eggs until well combined.
- Add the baking powder, salt, and vanilla extract to the mixture, and mix briefly.
- Gradually add half of the all-purpose flour to the mixture, mixing with a hand mixer until just combined.
- Pour in the milk and stir until well combined.
- Scrape the bottom and sides of the bowl, then add the remaining flour, mixing until just combined.
- Gently fold in the semi-sweet chocolate chips using a rubber spatula.
- Divide the batter evenly among the 12 muffin liners.
- Preheat the oven to 425 degrees Fahrenheit and let the batter rest while the oven preheats.
- Bake in the preheated oven for 20 to 25 minutes, or until a toothpick inserted into the center of a muffin comes out clean.
- After 7 minutes of baking, reduce the oven temperature to 350 degrees Fahrenheit. Keep an eye on the muffins as baking times may vary depending on your oven.
- Allow the muffins to cool for 5 minutes in the pan before transferring them to a wire rack to cool completely.
Tips:
- Ensure that the butter is softened to room temperature for easier creaming with the sugar.
- Do not overmix the batter to avoid dense muffins. Mix until the ingredients are just combined.
- You can customize these muffins by adding nuts or dried fruits along with the chocolate chips for extra flavor and texture.
Conclusion:
With their moist and tender crumb, coupled with bursts of chocolatey goodness in every bite, these Chocolate Chip Muffins are a delightful treat for any occasion. Enjoy them warm or at room temperature with a glass of milk or your favorite hot beverage for a truly comforting experience. Treat yourself and your loved ones to the joy of homemade muffins today!
- Can I use salted butter instead of unsalted butter in this recipe?
- Yes, you can substitute salted butter for unsalted butter in this recipe. However, since salt content varies between brands, you may want to adjust the amount of added salt accordingly. Reduce the amount of salt called for in the recipe by about half if you use salted butter. This adjustment helps maintain the right balance of flavors in your muffins.
- Can I use other types of flour, such as whole wheat flour or gluten-free flour, instead of all-purpose flour?
- While you can experiment with different types of flour, using all-purpose flour provides the best texture and consistency for these muffins. Whole wheat flour may result in denser muffins due to its higher protein content. If you choose to use gluten-free flour, look for a blend specifically designed for baking. Keep in mind that the texture and flavor may vary slightly from the original recipe.
- Can I substitute the semi-sweet chocolate chips with other types of chocolate?
- Absolutely! Feel free to use your favorite type of chocolate chips or chunks in this recipe. You can use milk chocolate chips, dark chocolate chips, or even white chocolate chips for a different flavor profile. You can also mix different types of chocolate for a more complex taste. Additionally, you can chop up chocolate bars into chunks if you prefer larger pieces of chocolate in your muffins.
- How should I store these chocolate chip muffins, and how long do they stay fresh?
- Store the cooled chocolate chip muffins in an airtight container at room temperature for up to 3 days. If you need to store them for a longer period, you can freeze the muffins in a freezer-safe bag or container for up to 3 months. To enjoy them later, simply thaw them at room temperature or warm them up in the microwave for a few seconds. Avoid storing them in the refrigerator, as it can dry out the muffins and affect their texture.
- Can I add nuts or dried fruits to these muffins?
- Yes, you can definitely add nuts or dried fruits to enhance the flavor and texture of these chocolate chip muffins. Chopped walnuts, pecans, or almonds can add a delightful crunch, while dried cranberries, raisins, or chopped apricots can provide a hint of sweetness. Simply fold in your desired nuts or fruits along with the chocolate chips into the batter before baking. Be mindful of any allergies your family or guests may have before adding nuts.
- How can I make these muffins more moist and tender?
- To ensure moist and tender muffins, avoid overmixing the batter. Mix the ingredients only until they are just combined. Overmixing can develop gluten in the flour, resulting in tougher muffins. Additionally, make sure not to overbake the muffins. Keep a close eye on them towards the end of the baking time, and remove them from the oven as soon as a toothpick inserted into the center comes out clean. Overbaking can lead to dry muffins.
- Can I make mini muffins instead of regular-sized muffins with this recipe?
- Yes, you can adapt this recipe to make mini chocolate chip muffins. Simply adjust the baking time accordingly. Mini muffins generally require less time to bake than regular-sized muffins, so start checking for doneness after about 10-15 minutes of baking. The exact baking time may vary depending on your oven and the size of your mini muffin tin.
- Can I use an alternative to paper liners for baking these muffins?
- While paper liners are convenient for easy removal and cleanup, you can also grease the muffin tin directly with nonstick cooking spray or butter. Make sure to coat the cavities of the muffin tin thoroughly to prevent the muffins from sticking. Alternatively, you can use silicone muffin liners, which are reusable and environmentally friendly. Just be sure to grease them lightly before filling them with the batter.

Chocolate Chip Muffins
- Prep Time: 10 mins
- Cook Time: 16–18 mins
- Total Time: 26–28 mins
- Yield: 12 muffins 1x
- Category: Breakfast / Snack
- Method: Baking
- Cuisine: American
- Diet: Vegetarian
Description
Indulge in the delightful combination of buttery goodness and sweet chocolate chips with these homemade Chocolate Chip Muffins. Perfect for breakfast, brunch, or a comforting snack, these muffins are sure to please your taste buds and satisfy your cravings.
Ingredients
- 1 3/4 cups all-purpose flour
- 1/2 cup granulated sugar
- 1/4 cup brown sugar, packed
- 2 tsp baking powder
- 1/2 tsp salt
- 1/2 cup milk
- 1/2 cup plain yogurt or sour cream
- 2 large eggs
- 1/3 cup vegetable oil or melted butter
- 1 tsp vanilla extract
- 1 cup semi-sweet chocolate chips
Instructions
- Preheat oven to 400°F (200°C). Line a 12-cup muffin tin with liners or grease it.
- In a bowl, whisk flour, sugars, baking powder, and salt.
- In another bowl, whisk together milk, yogurt, eggs, oil, and vanilla until smooth.
- Pour wet ingredients into dry and gently stir until just combined—batter should be slightly lumpy.
- Fold in chocolate chips, reserving a few for topping.
- Divide batter evenly among muffin cups (about ¾ full) and sprinkle with remaining chips.
- Bake 16–18 minutes, or until golden and a toothpick comes out clean or with a few moist crumbs.
- Cool in pan for 5 minutes, then transfer to a wire rack to cool completely.
Notes
- Do not overmix the batter to keep muffins tender.
- Yogurt adds moisture—substitute with sour cream or buttermilk if needed.
- For variation, use half chocolate chips and half chopped nuts.
- Store cooled muffins in an airtight container at room temperature for up to 3 days, or freeze for up to 2 months.
Nutrition
- Serving Size: 1 muffin
- Calories: 240
- Sugar: 18 g
- Sodium: 180 mg
- Fat: 10 g
- Saturated Fat: 4 g
- Unsaturated Fat: 5 g
- Trans Fat: 0 g
- Carbohydrates: 33 g
- Fiber: 1 g
- Protein: 4 g
- Cholesterol: 45 mg

