
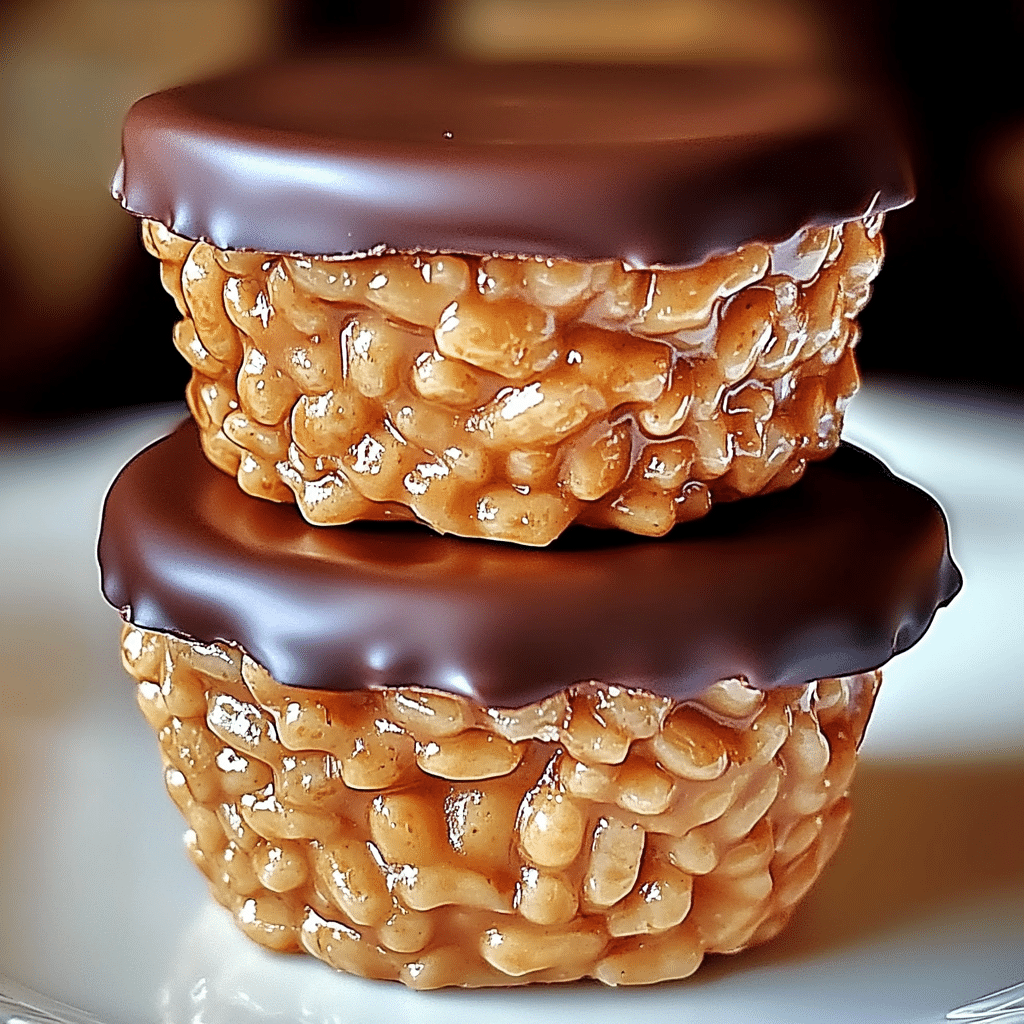
If you’re craving a simple yet indulgent dessert, look no further than these Chocolate Peanut Butter Rice Krispie Cups! This no-bake recipe combines the rich flavors of chocolate and peanut butter with the crispy crunch of Rice Krispies for a delightful treat that’s perfect for any occasion. Whether you’re planning a party, preparing a sweet snack, or just want to satisfy your sweet tooth, these cups are sure to impress.
Ingredients for Chocolate Peanut Butter Rice Krispie Cups:
- 1 cup peanut butter (smooth or chunky, based on preference)
- 1/4 cup honey or maple syrup (for a natural sweetener)
- 2 cups Rice Krispies cereal
- 1 cup dark or milk chocolate chips (your choice of chocolate)
- 1 tablespoon coconut oil (optional, for a smoother texture)
Instructions for Making Chocolate Peanut Butter Rice Krispie Cups:

- Prepare the Cup Base: In a medium-sized saucepan, combine the peanut butter and honey (or maple syrup). Heat over medium heat, stirring occasionally until the mixture is smooth and well combined. This should only take about 2-3 minutes. Once melted, remove the pan from the heat.
- Mix in Rice Krispies: Pour the Rice Krispies cereal into the peanut butter mixture. Stir gently until the cereal is evenly coated in the peanut butter and honey mixture.
- Form the Cups: Line a muffin tin with cupcake liners. Spoon the Rice Krispies mixture into each liner, pressing it down gently with the back of a spoon to form a compact base.
- Melt the Chocolate: In a microwave-safe bowl, melt the chocolate chips with the coconut oil (if using). Microwave in 20-30 second intervals, stirring in between, until the chocolate is completely melted and smooth.
- Top with Chocolate: Spoon the melted chocolate over the Rice Krispies mixture in each muffin cup, covering the entire surface. Use the back of a spoon to spread the chocolate evenly.
- Chill and Set: Place the muffin tin in the refrigerator and allow the cups to set for at least 1 hour, or until the chocolate is firm and the cups are fully set.
- Serve and Enjoy: Once the cups are ready, remove them from the muffin tin and serve! These sweet treats are perfect for sharing or enjoying on your own.
Tips for Perfect Chocolate Peanut Butter Rice Krispie Cups:
- Customize the Flavor: If you love extra texture, add chopped nuts like almonds, cashews, or even mini marshmallows to the Rice Krispies mixture before setting.
- Make It Vegan: Use a dairy-free chocolate and maple syrup instead of honey to make this recipe vegan-friendly.
- Storage: Store these Rice Krispie cups in an airtight container in the refrigerator for up to one week, or freeze for longer storage.
Why You’ll Love This Recipe:
- Easy and Quick: With only a few ingredients and minimal prep, this recipe is perfect for beginner bakers or anyone in a rush for a sweet treat.
- No Baking Required: There’s no need to turn on the oven, making these cups ideal for hot summer days or when you want to avoid heating up the kitchen.
- Perfectly Balanced Flavors: The creamy peanut butter, sweet honey, and rich chocolate come together to create the ultimate flavor combination that will leave you coming back for more.
Final Thoughts:
These Chocolate Peanut Butter Rice Krispie Cups are a fun, tasty, and satisfying treat that’s sure to become a favorite in your recipe repertoire. Whether you’re making them for a special event or just as a snack, they offer a perfect balance of texture and flavor. With their simple preparation and delicious result, you’ll want to make these often. Enjoy these homemade cups and share the joy with friends and family!
Serving Tips for Chocolate Peanut Butter Rice Krispie Cups:
- Serve as a Snack or Dessert: These Chocolate Peanut Butter Rice Krispie Cups are perfect for serving at parties, gatherings, or as a quick snack. They pair wonderfully with a glass of milk, coffee, or even a cold glass of iced tea.
- Dress Them Up: For an extra touch, sprinkle the tops of the cups with crushed peanuts, sea salt, or even a drizzle of caramel sauce before serving.
- Great for Kids: These cups are a kid-friendly treat that can be enjoyed as a lunchbox snack or after-school treat. They’re easy to grab and enjoy without the mess!
- Mini Versions: If you’re hosting a party or event, consider making mini versions of these cups by using a mini muffin tin. They’re perfect for bite-sized portions and can be easily shared.
Storage Tips for Chocolate Peanut Butter Rice Krispie Cups:
- Refrigeration: Store the Rice Krispie cups in an airtight container in the refrigerator to keep the chocolate firm and the peanut butter fresh. They will stay fresh for up to one week.
- Freezing: If you’d like to make these ahead of time, you can freeze the cups for longer storage. Place the cups in a single layer on a baking sheet and freeze until solid. Once frozen, transfer them to an airtight container or a freezer-safe bag. They will keep in the freezer for up to 3 months. To enjoy, simply let them thaw in the refrigerator for a few hours or at room temperature for about 30 minutes.
- Avoid Moisture: Make sure the container is sealed tightly to prevent moisture from affecting the texture of the cups. If you plan to store them in the fridge for several days, try to keep them away from strong-smelling foods as they can absorb odors.
With these simple serving and storage tips, you can keep your Chocolate Peanut Butter Rice Krispie Cups fresh and ready to enjoy at any time!
1. Can I use a different type of cereal for this recipe?
Yes, you can substitute Rice Krispies with other cereals like Cornflakes, Cheerios, or any crispy, crunchy cereal you prefer. Keep in mind that the texture and flavor might slightly vary, but the result will still be delicious!
2. How can I make these cups healthier?
To make these Chocolate Peanut Butter Rice Krispie Cups healthier, you can:
- Use natural peanut butter with no added sugars or oils.
- Replace honey with a natural sweetener like maple syrup or agave syrup.
- Opt for dark chocolate with a higher cocoa content for less sugar.
- Add chopped nuts or seeds for extra protein and fiber.
3. Can I make these cups ahead of time?
Yes, these cups are perfect for making ahead. After preparing, store them in the refrigerator for up to one week or freeze them for up to three months. Simply let them thaw in the fridge or at room temperature before serving.
4. Can I use creamy peanut butter instead of chunky?
Absolutely! Both creamy and chunky peanut butter work well in this recipe. If you prefer a smoother texture, go for creamy peanut butter. If you like a bit of crunch, chunky peanut butter is a great choice.
Chocolate Peanut Butter Rice Krispie Cups
- Prep Time: 15 minutes
- Cook Time: 1 hour
- Total Time: 1 hour 15 minutes
- Category: Dessert, Snack
- Cuisine: American
Description
A delightful no-bake treat featuring crispy rice cereal combined with creamy peanut butter and rich chocolate. Perfect for satisfying your sweet tooth or as a crowd-pleasing dessert at any gathering.
Ingredients
Makes 12 cups:
- For the base:
- 3 cups (75 g) of rice cereal
- 1/2 cup (120 g) of peanut butter (smooth or chunky)
- 1/4 cup (60 g) of honey or maple syrup
- For the topping:
- 1 cup (175 g) of chocolate chips (milk, dark, or semi-sweet)
- 1/4 cup (60 g) of peanut butter
- Optional garnish:
- Crushed peanuts
- Sea salt flakes
Instructions
- Prepare the base mixture:
- In a microwave-safe bowl, combine peanut butter and honey (or maple syrup). Heat for 30–40 seconds, or until the mixture is warm and pourable. Stir to combine.
- Add the rice cereal to the peanut butter mixture and gently fold until all the cereal is coated.
- Fill the muffin cups:
- Line a 12-cup muffin tin with paper liners. Divide the rice cereal mixture evenly among the cups, pressing it down firmly with the back of a spoon to create a compact layer.
- Make the chocolate topping:
- Melt the chocolate chips and peanut butter together in a microwave-safe bowl in 20-second intervals, stirring between each until smooth.
- Spoon the melted chocolate mixture over the rice cereal base in each cup, spreading it evenly.
- Add garnish (optional):
- Sprinkle crushed peanuts or sea salt flakes on top of the chocolate layer for extra flavor and texture.
- Chill and set:
- Place the muffin tin in the refrigerator for at least 1 hour, or until the chocolate is firm.
- Serve and enjoy:
- Remove the cups from the tin, peel off the liners, and enjoy! Store any leftovers in an airtight container in the refrigerator.
Notes
- For a vegan option, use dairy-free chocolate chips and maple syrup.
- Add a drizzle of white chocolate on top for an extra decorative touch.
- You can swap peanut butter with almond or sunflower butter for a different flavor or to accommodate allergies.