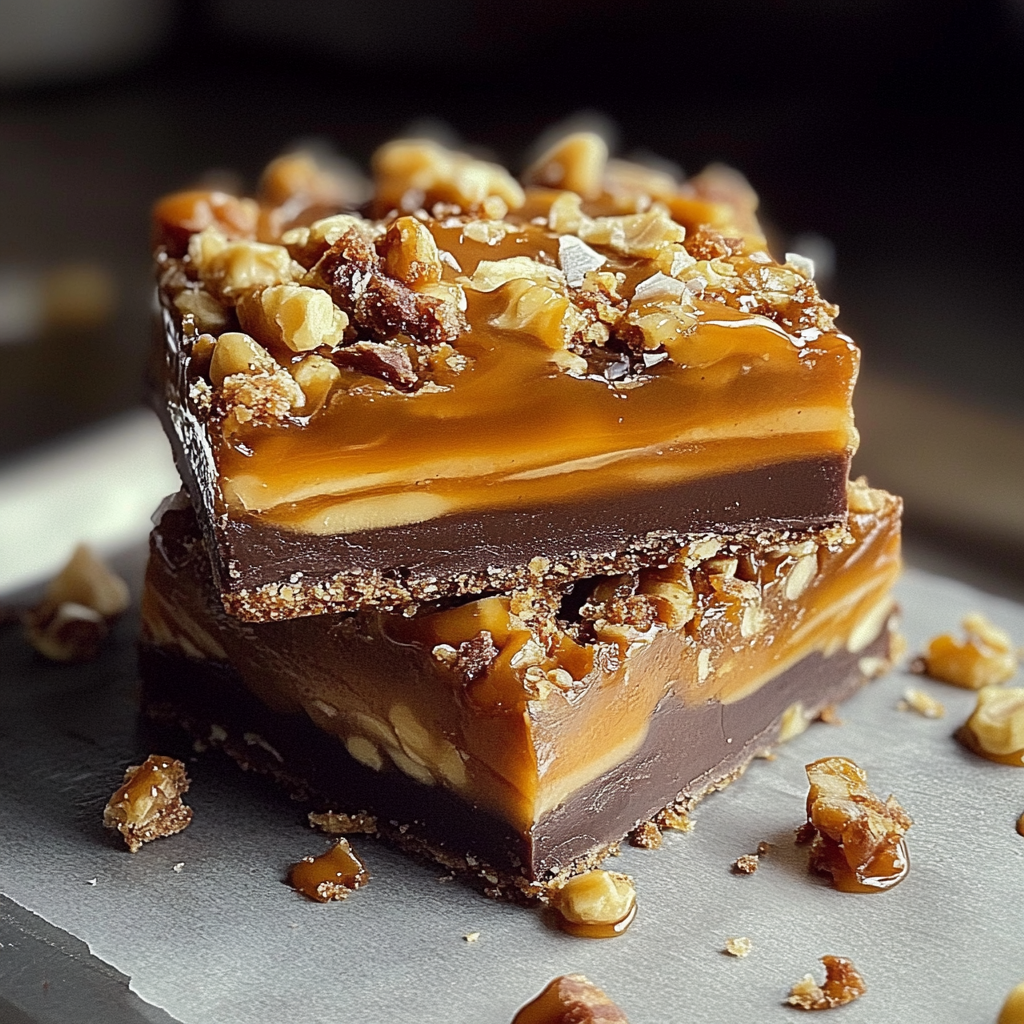
Butterfinger Crunch Bars are a deliciously indulgent treat that combines the irresistible flavors of peanut butter, chocolate, and the signature crunch of Butterfinger candy. Perfect for sharing at parties, giving as gifts, or enjoying as a special dessert, this no-bake recipe is simple to prepare and delivers a burst of flavor in every bite.
Why You’ll Love Butterfinger Crunch Bars
- Quick and Easy: A no-bake dessert that comes together in less than 30 minutes.
- Crowd-Pleaser: Loved by kids and adults alike for its sweet and crunchy texture.
- Customizable: Easily adjust the toppings or add a drizzle of caramel for extra flair.
Ingredients
Here’s what you’ll need to make these mouthwatering Butterfinger Crunch Bars:
- 1 cup creamy peanut butter
- 1/2 cup unsalted butter
- 2 cups powdered sugar
- 1 teaspoon vanilla extract
- 2 cups graham cracker crumbs
- 1 cup crushed Butterfinger candy bars
- 1 1/2 cups milk chocolate chips
- 1 tablespoon coconut oil (optional, for a smoother chocolate layer)
Step-by-Step Instructions
1. Prepare the Base
- In a microwave-safe bowl, melt the peanut butter and unsalted butter together in 30-second intervals, stirring until smooth.
- Add the powdered sugar and vanilla extract to the melted mixture, then stir in the graham cracker crumbs.
- Press the mixture evenly into a greased or parchment-lined 9×9-inch pan.
2. Add the Butterfinger Crunch
- Sprinkle the crushed Butterfinger candy bars evenly over the peanut butter layer, pressing lightly to adhere.
3. Top with Chocolate
- Melt the milk chocolate chips with the coconut oil (if using) in the microwave in 20-second bursts, stirring between each interval until smooth.
- Pour the melted chocolate over the Butterfinger layer, spreading it evenly with a spatula.
4. Chill and Serve
- Refrigerate the bars for at least 2 hours or until firm.
- Once set, cut into squares or rectangles and serve.
Tips for Perfect Butterfinger Crunch Bars
- Room Temperature Cutting: Allow the bars to sit at room temperature for 5-10 minutes before cutting to prevent the chocolate from cracking.
- Storage: Store the bars in an airtight container in the fridge for up to one week.
- Additions: For a twist, mix in some mini marshmallows or chopped peanuts into the peanut butter layer.
Nutrition Information (Per Serving)
- Calories: 250
- Fat: 14g
- Carbohydrates: 28g
- Protein: 4g
Note: Values are approximate and depend on portion size and specific ingredients used.
Why Butterfinger Crunch Bars Are a Must-Try
Butterfinger Crunch Bars are not just a dessert; they’re an experience. The combination of creamy peanut butter, crispy candy pieces, and rich chocolate creates a harmony of textures and flavors. Whether you’re making them for a bake sale or indulging in a homemade treat, these bars are guaranteed to impress.
Final Thoughts
If you’re looking for a simple, satisfying, and utterly delicious dessert recipe, Butterfinger Crunch Bars should be at the top of your list. With minimal effort and maximum flavor, they’re the perfect addition to your dessert repertoire.
So, gather your ingredients and get ready to enjoy the ultimate no-bake treat! Don’t forget to share your creations and tag us on social media with your Butterfinger Crunch Bars masterpiece.
Serving and Storage Tips for Butterfinger Crunch Bars
Serving Tips
- Room Temperature is Key:
For the best texture and flavor, let the Butterfinger Crunch Bars sit at room temperature for 5-10 minutes before serving. This helps soften the chocolate slightly and makes cutting and eating more enjoyable. - Cut Cleanly:
Use a sharp knife warmed under hot water (then dried) to cut the bars into neat squares or rectangles. This technique helps prevent the chocolate from cracking. - Presentation Matters:
Arrange the bars on a decorative platter or plate. Garnish with a drizzle of melted chocolate or a sprinkle of crushed Butterfinger pieces for added flair. - Serve in Portions:
These bars are rich and decadent. Cutting them into smaller pieces is perfect for parties or gatherings where guests may want to sample multiple desserts.
Storage Tips
- Refrigeration:
Store the bars in an airtight container in the refrigerator for up to 1 week. Keeping them cool ensures the chocolate layer remains firm and the bars stay fresh. - Freezing:
- For longer storage, freeze the bars in a single layer on a baking sheet until firm, then transfer them to a freezer-safe container or zip-top bag.
- They can be frozen for up to 3 months. Thaw in the fridge or at room temperature before serving.
- Layer Protection:
If stacking the bars for storage, place parchment or wax paper between layers to prevent sticking and protect the chocolate coating. - Avoid Heat:
Keep the bars out of direct sunlight or warm environments, as the chocolate and peanut butter base may soften or melt.
By following these tips, your Butterfinger Crunch Bars will stay delicious and ready to impress, whether you’re serving them fresh or saving some for later indulgence!
1. Can I use a different type of candy instead of Butterfinger?
Absolutely! If you don’t have Butterfinger candy bars, you can substitute them with other crunchy candies like Heath bars, Snickers, or Reese’s Pieces for a different flavor twist.
2. Do I have to use coconut oil in the chocolate topping?
No, the coconut oil is optional. It helps create a smoother, shinier chocolate layer but isn’t necessary. You can melt the chocolate chips on their own, and they’ll still work perfectly.
3. Can I make these bars gluten-free?
Yes! To make gluten-free Butterfinger Crunch Bars, use gluten-free graham cracker crumbs and ensure the Butterfinger candy bars are gluten-free (check the packaging for confirmation).
4. How far in advance can I make these bars?
Butterfinger Crunch Bars can be made up to 5-7 days in advance if stored in an airtight container in the refrigerator. They also freeze well, making them a great make-ahead dessert option for parties or holidays.
Print
Butterfinger Crunch Bars
- Prep Time: 15 minutes
- Cook Time: 2 hours
- Total Time: 2 hours 15 minutes
- Yield: 16 bars 1x
- Category: Dessert, No-Bake
- Method: No-Bake
- Cuisine: American
Description
Butterfinger Crunch Bars are a no-bake treat that combines rich peanut butter, chocolate, and the iconic Butterfinger candy crunch. Perfect for parties, holidays, or just a quick and indulgent dessert, these bars are sure to disappear fast!
Ingredients
- 1 cup creamy peanut butter
- 1/2 cup unsalted butter (1 stick), melted
- 1 cup graham cracker crumbs
- 1 cup powdered sugar
- 2 cups crushed Butterfinger candies (about 8 fun-size bars)
- 1 cup milk or semi-sweet chocolate chips
- 2 tbsp coconut oil or vegetable oil (optional, for smoother chocolate topping)
Instructions
1. Prepare the Base
- In a mixing bowl, combine the peanut butter, melted butter, graham cracker crumbs, powdered sugar, and 1 cup of the crushed Butterfinger candies.
- Mix well until the ingredients are fully incorporated and form a slightly sticky, cohesive mixture.
2. Press into the Pan
- Line an 8×8-inch (or similar size) baking dish with parchment paper for easy removal.
- Press the peanut butter mixture evenly into the pan to form the base layer. Use the back of a spoon or a flat spatula to smooth it out.
3. Add the Chocolate Topping
- In a microwave-safe bowl, melt the chocolate chips in 30-second intervals, stirring between each, until fully melted. Add coconut oil if using for a smoother texture.
- Pour the melted chocolate over the peanut butter base and spread it evenly with a spatula.
4. Sprinkle with Butterfinger Crunch
- Immediately sprinkle the remaining 1 cup of crushed Butterfinger candies evenly over the chocolate topping, pressing gently to adhere.
5. Chill and Slice
- Refrigerate the bars for at least 2 hours, or until fully set.
- Once firm, lift the bars out of the pan using the parchment paper and cut into squares or rectangles.
Notes
- Storage: Store in an airtight container in the refrigerator for up to a week. These bars can also be frozen for longer storage.
- Variations: Swap Butterfinger candies for Reese’s Pieces, crushed peanut butter cups, or your favorite candy for a unique twist.
- Tips: For cleaner cuts, use a sharp knife warmed under hot water, wiping the blade between cuts.

