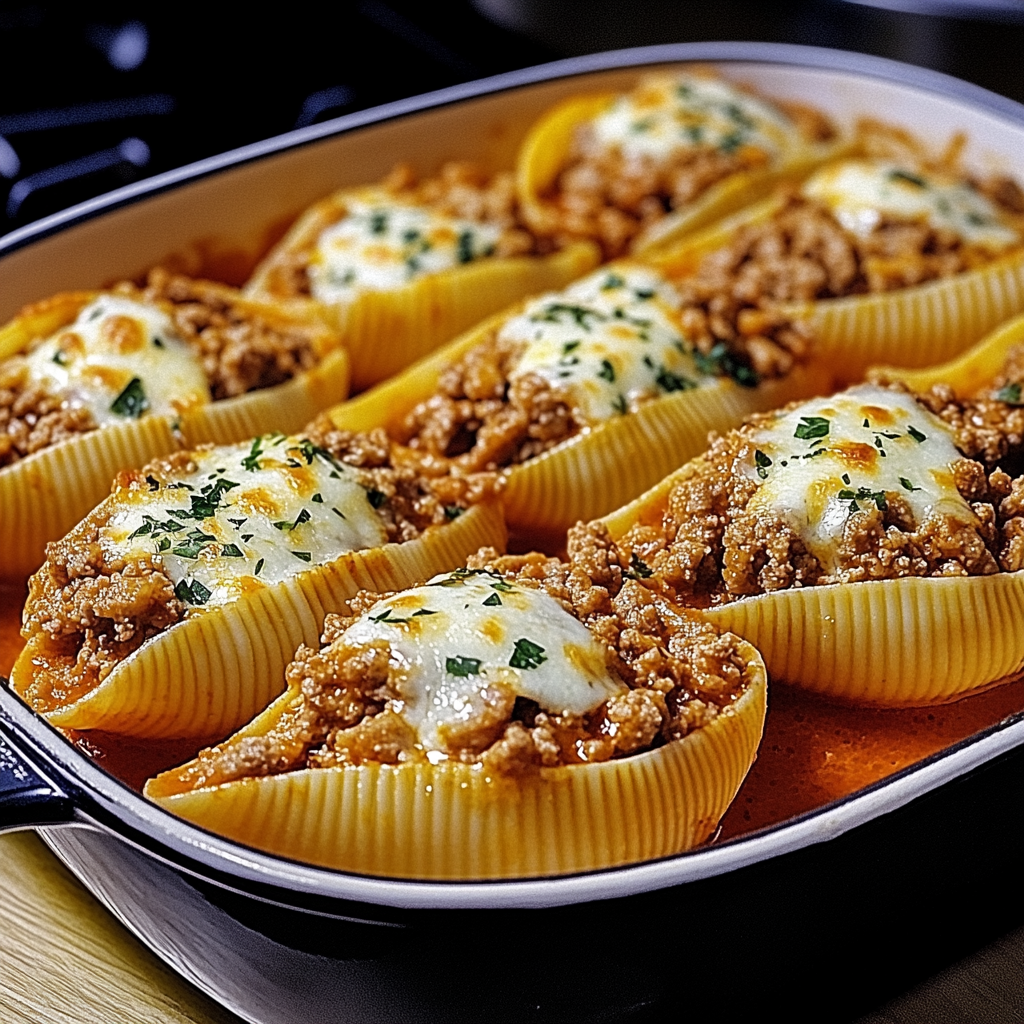
When it comes to hearty, satisfying dishes, Beef-Stuffed Shells with Creamy Ricotta Filling is a classic recipe that hits all the right notes. This dish combines jumbo pasta shells filled with a savory mixture of seasoned ground beef and a creamy ricotta filling, all baked together in a rich marinara sauce. It’s a perfect family meal, great for a cozy dinner or even for meal prepping!
Ingredients for Beef-Stuffed Shells with Creamy Ricotta Filling
To make this delicious beef-stuffed shells dish, you’ll need:
- Jumbo pasta shells – these are large enough to be stuffed with the savory filling.
- Ground beef – the star of the filling, seasoned to perfection.
- Ricotta cheese – this creamy cheese adds richness to the filling.
- Mozzarella cheese – for a gooey, melty topping that pairs perfectly with the beef and ricotta.
- Parmesan cheese – adds a sharp, salty flavor.
- Egg – helps bind the ricotta filling together.
- Marinara sauce – the perfect base to bake the stuffed shells in.
- Seasonings – garlic, onion, dried basil, and oregano are used to flavor both the beef and ricotta filling.
How to Make Beef-Stuffed Shells with Creamy Ricotta Filling
- Prepare the Jumbo Shells: Begin by cooking the jumbo pasta shells according to the package instructions until they are al dente. Drain them and set aside to cool slightly.
- Cook the Ground Beef: In a skillet over medium heat, brown the ground beef, breaking it up into small pieces. Add garlic, onion, and your choice of seasonings like basil and oregano for extra flavor. Once cooked through, remove from heat and set aside to cool.
- Prepare the Ricotta Filling: In a bowl, combine ricotta cheese, an egg, mozzarella cheese, Parmesan cheese, and a pinch of salt and pepper. Mix until smooth and creamy. Add in the cooked ground beef and mix everything together to form the filling.
- Stuff the Shells: Spoon the beef-ricotta mixture into each cooked pasta shell, making sure to pack them well.
- Assemble and Bake: Spread a layer of marinara sauce in the bottom of a baking dish. Arrange the stuffed shells on top of the sauce. Pour the remaining marinara sauce over the shells and sprinkle with more mozzarella and Parmesan cheese. Cover the dish with aluminum foil.
- Bake: Place the baking dish in a preheated oven (350°F or 175°C) and bake for about 25 minutes, or until the cheese is melted and bubbly.
- Serve and Enjoy: Remove from the oven, let it cool for a few minutes, and then serve your Beef-Stuffed Shells with Creamy Ricotta Filling hot and delicious!
Why You’ll Love This Recipe
- Hearty and Filling: The combination of ground beef, cheese, and pasta makes this dish a satisfying meal that’s sure to please your family and guests.
- Creamy and Flavorful: The ricotta filling adds a rich, creamy texture that balances beautifully with the seasoned beef and marinara sauce.
- Easy to Customize: Add your favorite vegetables like spinach or mushrooms to the beef filling for a twist, or top with fresh herbs like basil before serving.
- Great for Meal Prep: This dish stores well in the refrigerator for up to 3 days and reheats perfectly, making it a great option for meal prep.
Tips for Perfect Beef-Stuffed Shells
- Don’t Overcook the Pasta Shells: Since the shells will bake in the sauce, it’s important not to cook them too long initially. They should be slightly firm to avoid becoming too soft during baking.
- Use High-Quality Marinara Sauce: A good marinara sauce will elevate the flavors of the entire dish. If you’re short on time, store-bought marinara works, but homemade sauce is always a winner.
- Make Ahead: You can assemble the stuffed shells a day ahead and refrigerate them before baking. This makes for a convenient, stress-free meal.
Conclusion
Beef-Stuffed Shells with Creamy Ricotta Filling is a timeless comfort food that’s perfect for any occasion. Whether you’re cooking for your family or hosting a dinner party, this dish promises to be a crowd-pleaser. With its rich filling, cheesy goodness, and savory marinara sauce, this recipe will become a staple in your weekly meal rotation.
Serving and Storage Tips for Beef-Stuffed Shells with Creamy Ricotta Filling
Serving Tips:
- Garnish: Before serving, sprinkle some fresh basil or parsley over the top to add a burst of color and freshness. A light drizzle of olive oil or balsamic glaze can also add extra flavor.
- Side Dishes: Serve these beef-stuffed shells with a simple side salad, such as a crisp Caesar or mixed green salad, and some crusty bread to soak up the delicious marinara sauce. Roasted vegetables or sautéed spinach also pair wonderfully with this dish.
- Serving Temperature: Beef-Stuffed Shells are best served warm, straight out of the oven. Let them sit for a few minutes to cool slightly so the filling sets, making it easier to serve.
Storage Tips:
- Refrigerating: Leftover beef-stuffed shells can be stored in an airtight container in the refrigerator for up to 3-4 days. The flavors will continue to meld, and the dish will be just as tasty when reheated.
- Freezing: To freeze, assemble the stuffed shells but do not bake them. Instead, cover the baking dish tightly with plastic wrap and aluminum foil and freeze for up to 3 months. When ready to bake, let the dish thaw in the refrigerator overnight and then bake as directed, adding a few extra minutes to the baking time if needed.
- Reheating: To reheat leftovers, cover the dish with foil and bake at 350°F (175°C) for about 15-20 minutes until heated through. You can also reheat individual portions in the microwave, though the oven will help maintain the dish’s texture and prevent it from becoming soggy.
Meal Prep Tip:
- Beef-Stuffed Shells are an excellent option for meal prepping. You can prepare the stuffed shells in advance, store them in individual portions, and reheat them as needed throughout the week. This makes for an easy, ready-to-eat dinner on busy days.
1. Can I use a different type of meat for the filling?
Yes, absolutely! While ground beef is the traditional choice, you can easily substitute it with other types of ground meat, such as ground turkey, chicken, or pork. For a vegetarian option, you can use a combination of ricotta, spinach, mushrooms, or lentils for the filling.
2. Can I make Beef-Stuffed Shells ahead of time?
Yes, this recipe is perfect for meal prepping! You can assemble the stuffed shells a day ahead and store them in the fridge, uncooked, until you’re ready to bake. Alternatively, you can prepare the dish, bake it, and then refrigerate the leftovers. Reheat in the oven or microwave for a quick and convenient meal.
3. Can I freeze Beef-Stuffed Shells with Creamy Ricotta Filling?
Yes, you can freeze both the assembled and unbaked stuffed shells. Cover the dish tightly with plastic wrap and aluminum foil, and store it in the freezer for up to 3 months. When you’re ready to bake, thaw in the refrigerator overnight and bake as usual, adding a few extra minutes if necessary.
4. How can I prevent the pasta shells from sticking together?
To prevent the jumbo pasta shells from sticking together, make sure to cook them in a large pot of salted water, and stir occasionally while they cook. After draining the shells, lay them out on a sheet of parchment paper or lightly drizzle them with olive oil to keep them separated. If you’re not using them right away, cover them with a damp cloth to keep them moist.
Print
Beef-Stuffed Shells with Creamy Ricotta Filling
- Prep Time: 25 minutes
- Cook Time: 35 minutes
- Total Time: 1 hour
- Yield: 4–6 servings 1x
- Category: Main Course
- Method: Baked
- Cuisine: Italian-American
Description
These Beef-Stuffed Shells with Creamy Ricotta Filling are a comforting, Italian-inspired dish featuring tender pasta shells stuffed with a flavorful mixture of seasoned ground beef, creamy ricotta, and mozzarella. Topped with marinara sauce and baked to perfection, this dish makes for a cozy, family-friendly meal!
Ingredients
- For the Shells and Filling:
- 20-24 jumbo pasta shells
- 1 lb ground beef
- 1 small onion, diced
- 2 cloves garlic, minced
- Salt and pepper, to taste
- 1 1/2 cups ricotta cheese
- 1 cup shredded mozzarella cheese
- 1/2 cup grated Parmesan cheese
- 1 large egg
- 1 tbsp fresh basil, chopped (or 1 tsp dried basil)
- 1 tbsp fresh parsley, chopped (or 1 tsp dried parsley)
- For the Sauce:
- 2 cups marinara sauce (homemade or store-bought)
- 1/2 cup shredded mozzarella cheese, for topping
- Fresh basil or parsley, chopped, for garnish (optional)
Instructions
- Cook the Pasta Shells: Bring a large pot of salted water to a boil. Add the jumbo shells and cook until al dente according to package instructions. Drain, rinse under cold water, and set aside.
- Prepare the Beef Mixture: In a large skillet over medium heat, cook the ground beef with diced onion until the beef is browned and the onion is softened. Add the garlic, season with salt and pepper, and cook for another minute. Remove from heat and let cool slightly.
- Make the Ricotta Filling: In a large mixing bowl, combine the ricotta, mozzarella, Parmesan, egg, basil, and parsley. Stir in the cooked beef mixture until well combined.
- Preheat Oven: Preheat your oven to 350°F (175°C). Grease a 9×13-inch baking dish.
- Stuff the Shells: Spoon a small amount of marinara sauce into the bottom of the baking dish. Using a spoon, fill each cooked shell with the beef and ricotta mixture, then arrange them in the baking dish. Pour the remaining marinara sauce over the stuffed shells.
- Bake: Cover the baking dish with foil and bake for 25 minutes. Remove the foil, sprinkle with the remaining mozzarella cheese, and bake for an additional 10 minutes, or until the cheese is melted and bubbly.
- Serve: Garnish with fresh basil or parsley if desired, and serve warm.
Notes
- For a twist, add a pinch of red pepper flakes to the beef mixture for a bit of heat.
- This dish can be assembled in advance and refrigerated until ready to bake.

