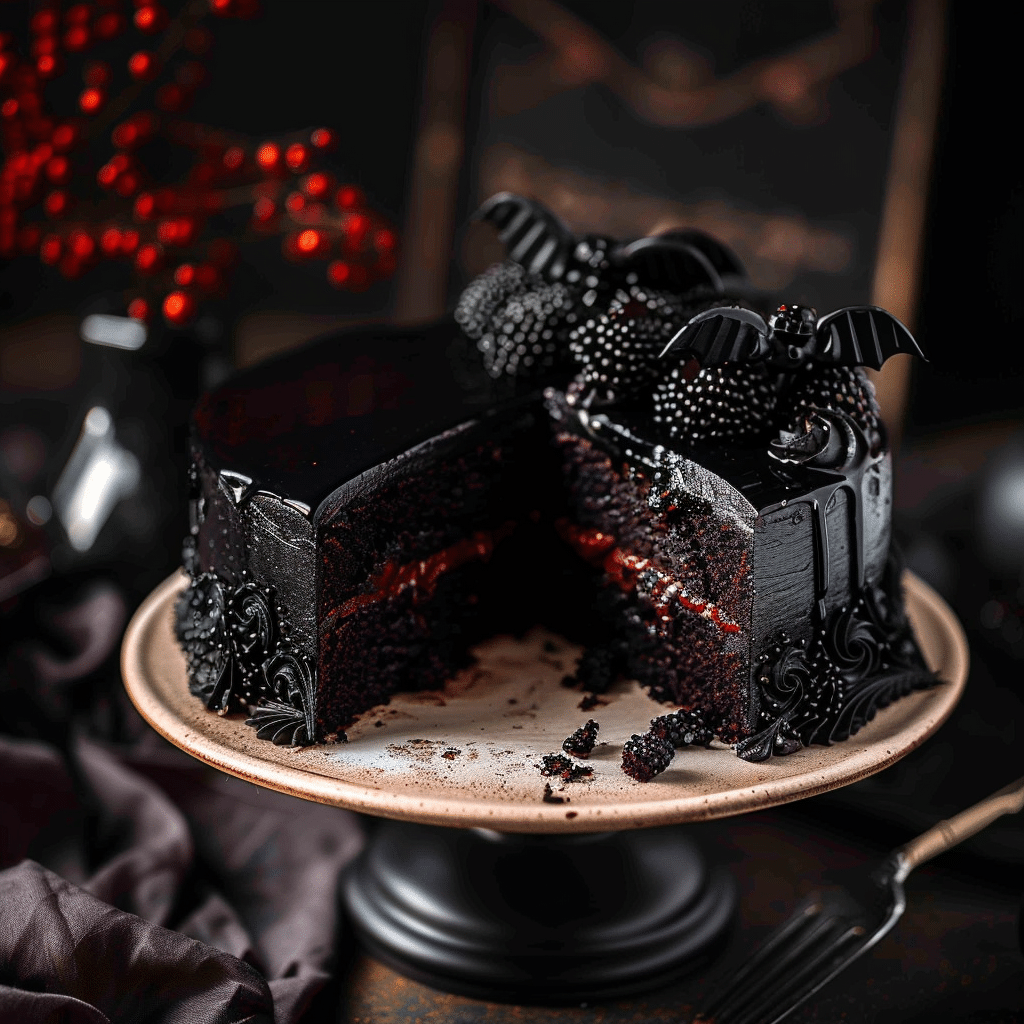
As Halloween approaches, it’s time to get creative in the kitchen and whip up some festive treats that will delight your guests. One standout recipe is the Spooky Black Velvet Halloween Cake. This hauntingly delicious dessert is not only visually stunning but also incredibly moist and flavorful, making it a perfect centerpiece for your Halloween celebrations. In this article, we’ll explore how to create this bewitching cake and why it deserves a spot at your spooky soirée.
What Makes It Spooky?
The Spooky Black Velvet Halloween Cake is a twist on the classic red velvet cake, featuring a deep black color that captures the essence of Halloween. This unique cake is made using activated charcoal, which gives it its dark hue and adds a subtle earthiness to the flavor. It’s the perfect canvas for eerie decorations and can be adorned with ghostly frosting, candy spiders, or creepy crawlers for that extra Halloween flair.
Ingredients You’ll Need
To make your Spooky Black Velvet Halloween Cake, gather the following ingredients:
For the Cake:
- 2 cups all-purpose flour
- 1 ½ cups granulated sugar
- ¾ cup unsweetened cocoa powder
- 1 ½ teaspoons baking powder
- 1 teaspoon baking soda
- ½ teaspoon salt
- 1 cup buttermilk, room temperature
- 1 cup vegetable oil
- 2 large eggs, room temperature
- 1 teaspoon vanilla extract
- 2 tablespoons activated charcoal powder
- 1 cup boiling water
For the Cream Cheese Frosting:
- 8 oz cream cheese, softened
- ½ cup unsalted butter, softened
- 4 cups powdered sugar
- 1 teaspoon vanilla extract
- Black food coloring (optional)
For Decoration:
- Candy eyes, gummy worms, or chocolate spiders
- Edible glitter or sprinkles (optional)
Step-by-Step Instructions
1. Preheat Your Oven
Start by preheating your oven to 350°F (175°C). Grease and flour two 9-inch round cake pans or line them with parchment paper for easy removal.
2. Mix Dry Ingredients
In a large bowl, whisk together the flour, sugar, cocoa powder, baking powder, baking soda, salt, and activated charcoal powder until well combined.
3. Combine Wet Ingredients
In a separate bowl, mix the buttermilk, vegetable oil, eggs, and vanilla extract. Whisk until smooth.
4. Combine Wet and Dry Ingredients
Gradually add the wet mixture to the dry ingredients, mixing until just combined. Be careful not to overmix. Slowly pour in the boiling water, stirring until the batter is smooth and well combined. The batter will be quite thin.
5. Bake the Cakes
Divide the batter evenly between the prepared cake pans. Bake for 30-35 minutes, or until a toothpick inserted into the center comes out clean. Allow the cakes to cool in the pans for 10 minutes before transferring them to a wire rack to cool completely.
6. Prepare the Cream Cheese Frosting
While the cakes cool, prepare the cream cheese frosting. In a mixing bowl, beat the softened cream cheese and butter together until smooth. Gradually add the powdered sugar, beating until fluffy. Stir in the vanilla extract and black food coloring if desired for a darker frosting.
7. Assemble the Cake
Once the cakes are completely cool, place one layer on a serving platter. Spread a generous layer of cream cheese frosting on top. Place the second layer on top and frost the entire cake with the remaining cream cheese frosting.
8. Decorate
Now comes the fun part! Use your creativity to decorate the cake with candy eyes, gummy worms, and chocolate spiders. Add edible glitter or sprinkles for an extra spooky effect.
Why You’ll Love This Cake
- Visually Striking: The deep black color and festive decorations make it a showstopper at any Halloween party.
- Delicious Flavor: The rich cocoa flavor paired with the creamy frosting creates a mouthwatering treat that guests will love.
- Fun to Make: This recipe is a great opportunity to involve kids or friends in the kitchen for a fun Halloween baking session.
Serving and Storage Tips for Spooky Black Velvet Halloween Cake
To ensure that your Spooky Black Velvet Halloween Cake remains delicious and visually appealing from the moment it’s served until the last slice is enjoyed, follow these serving and storage tips:
Serving Tips
- Chill Before Serving: For the best flavor and texture, refrigerate the cake for at least 30 minutes before serving. This will help the frosting set and make it easier to slice.
- Use a Sharp Knife: To achieve clean slices, use a sharp, serrated knife. Wipe the knife with a damp cloth between cuts to maintain the cake’s pristine appearance.
- Garnish: Enhance the spooky theme by adding extra decorations just before serving, such as more candy eyes, sprinkles, or a dusting of edible glitter. This will freshen the look and add to the festive atmosphere.
- Plate Presentation: Serve slices on colorful Halloween-themed plates. Consider adding a drizzle of chocolate or raspberry sauce on the plate for a creative touch.
- Pairing Suggestions: Complement the cake with a scoop of vanilla ice cream or a dollop of whipped cream to balance the rich flavors of the cake and frosting.
Storage Tips
- Room Temperature Storage: If the cake will be consumed within a day or two, it can be stored at room temperature. Place it in an airtight container or cover it tightly with plastic wrap to keep it fresh.
- Refrigeration: For longer storage, keep the cake in the refrigerator. Make sure it’s covered to prevent the frosting from absorbing odors or drying out. It can be kept in the fridge for up to a week.
- Freezing: If you want to make the cake in advance, consider freezing it. Wrap each cake layer tightly in plastic wrap and then aluminum foil. When ready to serve, allow the cake to thaw in the refrigerator overnight. Frost it once it’s completely thawed.
- Individual Slices: For convenience, you can also freeze individual slices. Wrap each slice in plastic wrap and place them in a freezer-safe bag. They can be frozen for up to three months. Thaw in the refrigerator before serving.
- Keep Decorations Fresh: If you’ve decorated the cake with candies or fragile decorations, consider adding them just before serving to prevent them from getting soggy or losing their shape.
By following these serving and storage tips, you can enjoy your Spooky Black Velvet Halloween Cake at its best, ensuring it remains a favorite among your Halloween treats!
1. Can I use regular cocoa powder instead of unsweetened cocoa powder?
Yes, you can use regular cocoa powder instead of unsweetened cocoa powder. However, unsweetened cocoa powder is recommended for this recipe as it provides a deeper chocolate flavor without adding extra sweetness, allowing the cake to maintain its intended flavor profile.
2. Is activated charcoal safe to eat, and where can I find it?
Yes, activated charcoal is generally considered safe to eat in small amounts, and it’s often used in food recipes for its unique color. You can find activated charcoal in health food stores, specialty baking shops, or online. Always ensure that you are using food-grade activated charcoal.
3. How can I make the frosting a different color?
To change the color of your frosting, simply add a few drops of gel food coloring and mix until you achieve the desired hue. You can create spooky colors like green or purple for Halloween by mixing in different food coloring. Just be cautious not to add too much liquid, which could alter the frosting’s consistency.
4. Can I make this cake ahead of time?
Absolutely! You can bake the cake layers up to 2 days in advance and store them in the refrigerator, wrapped tightly in plastic wrap. The cream cheese frosting can also be made a day ahead and stored in the fridge. When ready to serve, frost the cake and add any decorations to keep it fresh and visually appealing. Alternatively, you can freeze the layers for up to three months and thaw them in the refrigerator before decorating.
Print
Spooky Black Velvet Halloween Cake
- Prep Time: 20 minutes
- Cook Time: 30 minutes
- Total Time: 1 hour 30 minutes
- Yield: 12 servings 1x
- Category: Dessert
- Method: Baking
- Cuisine: American, Halloween
- Diet: Vegetarian
Description
Spooky Black Velvet Halloween Cake is a dark, moist, and decadent treat perfect for celebrating Halloween! Made with rich cocoa powder, buttermilk, and black food coloring, this cake is frosted with creamy black buttercream and topped with spooky decorations like candy eyes and Halloween sprinkles.
Ingredients
For the Black Velvet Cake:
- 2 1/2 cups (310g) all-purpose flour
- 1/2 cup (50g) unsweetened cocoa powder
- 1 1/2 cups (300g) granulated sugar
- 1 tsp baking soda
- 1 tsp baking powder
- 1/2 tsp salt
- 1 cup (240ml) buttermilk, room temperature
- 1 cup (240ml) vegetable oil
- 2 large eggs, room temperature
- 2 tsp vanilla extract
- 1 cup (240ml) hot water
- Black gel food coloring
For the Black Buttercream Frosting:
- 1 1/2 cups (340g) unsalted butter, softened
- 5 cups (600g) powdered sugar
- 1/2 cup (50g) unsweetened cocoa powder
- 1/2 cup (120ml) heavy cream or milk
- 2 tsp vanilla extract
- Black gel food coloring
For Decoration:
- Halloween sprinkles
- Candy eyes
- Black and orange food coloring gel for piping
Instructions
- Preheat the Oven:
- Preheat your oven to 350°F (175°C). Grease and line three 8-inch round cake pans with parchment paper.
- Make the Cake Batter:
- In a large mixing bowl, sift together the flour, cocoa powder, sugar, baking soda, baking powder, and salt.
- In a separate bowl, whisk together the buttermilk, vegetable oil, eggs, and vanilla extract.
- Gradually add the wet ingredients to the dry ingredients, mixing until combined.
- Add the hot water and mix until smooth. Stir in enough black gel food coloring to achieve a deep black color.
- Bake the Cake:
- Divide the batter evenly among the prepared cake pans.
- Bake for 25-30 minutes, or until a toothpick inserted into the center comes out clean.
- Let the cakes cool in the pans for 10 minutes, then transfer to a wire rack to cool completely.
- Make the Black Buttercream Frosting:
- In a large mixing bowl, beat the softened butter until creamy.
- Gradually add the powdered sugar and cocoa powder, mixing well.
- Add the heavy cream, vanilla extract, and black gel food coloring. Beat until smooth and fluffy.
- Assemble the Cake:
- Place one cake layer on a serving plate or cake stand. Spread a layer of black buttercream on top.
- Add the second and third layers, spreading more frosting between each layer.
- Use the remaining black buttercream to frost the sides and top of the cake.
- Decorate:
- Add Halloween sprinkles, candy eyes, and black/orange piping as desired for a spooky effect!
- Serve:
- Slice and serve this spooky treat!
Notes
- Intensify the black color: Allow the batter and frosting to sit for 15 minutes to let the black color deepen.
- Make ahead: Bake the cakes a day in advance and refrigerate, then assemble on the day of serving.
- Storage: Store in an airtight container at room temperature for up to 2 days, or in the fridge for up to 5 days.

