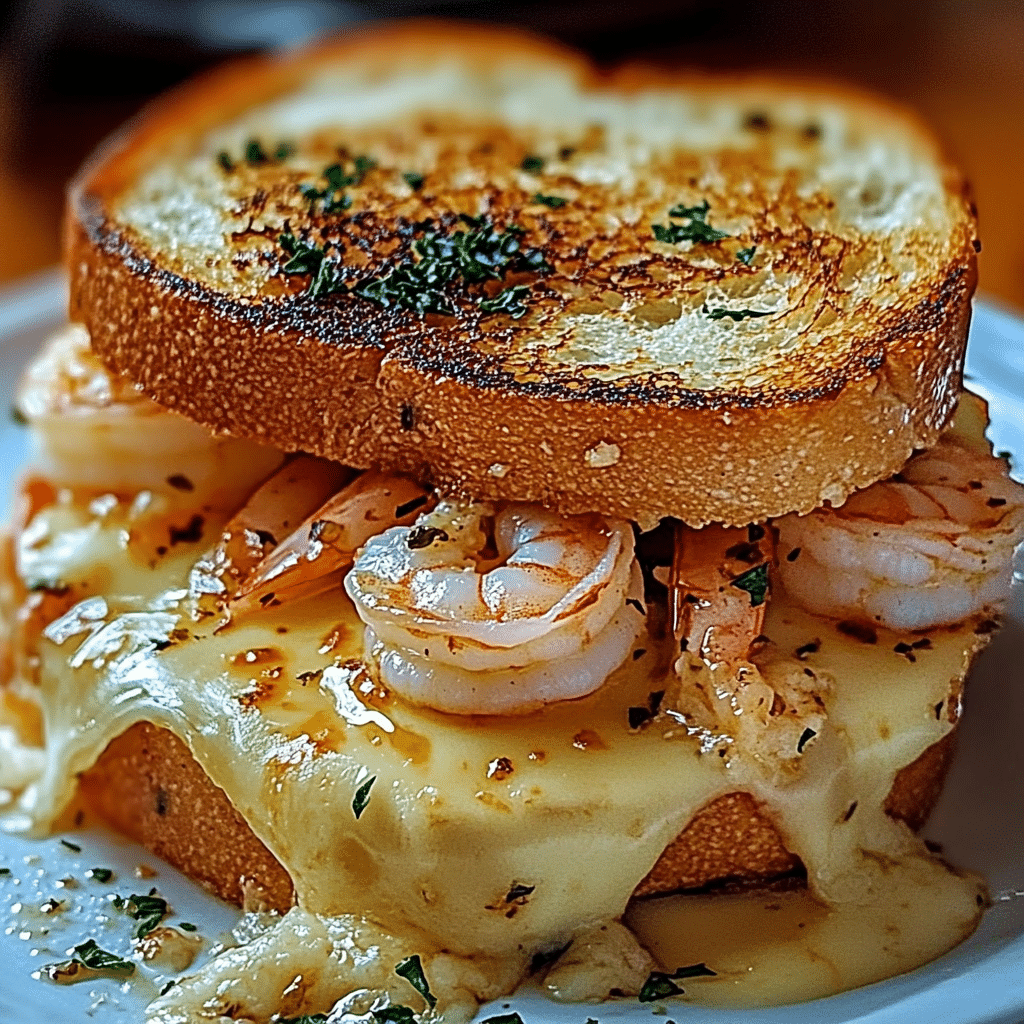
Are you craving a gourmet twist on the classic grilled cheese? Look no further than Shrimp Grilled Cheese with Garlic Bread! This recipe combines the savory goodness of garlic bread with succulent shrimp and gooey melted cheese for a sandwich that’s indulgent, flavorful, and surprisingly easy to make. Perfect for lunch, dinner, or even a decadent snack, this dish is sure to impress.
Ingredients
For two servings, you’ll need:
For the Garlic Bread:
- 4 slices of thick-cut bread (sourdough, ciabatta, or French bread work best)
- 3 tbsp unsalted butter, softened
- 2 cloves garlic, minced
- 1 tbsp fresh parsley, chopped
- A pinch of salt
For the Shrimp:
- 1 cup shrimp, peeled and deveined
- 1 tbsp olive oil
- ½ tsp paprika
- ½ tsp garlic powder
- Salt and pepper to taste
For the Grilled Cheese:
- 4 slices of your favorite cheese (mozzarella, cheddar, or provolone)
- Optional: red pepper flakes for a spicy kick
Instructions
Step 1: Prepare the Garlic Butter
- In a small bowl, mix the softened butter, minced garlic, parsley, and a pinch of salt. Spread this mixture evenly on one side of each bread slice.
Step 2: Cook the Shrimp
- Heat olive oil in a skillet over medium heat.
- Toss the shrimp with paprika, garlic powder, salt, and pepper, then cook for 2-3 minutes per side until pink and fully cooked. Remove from heat and set aside.
Step 3: Assemble the Sandwich
- Place a slice of cheese on the unbuttered side of two bread slices.
- Add a generous layer of cooked shrimp on top of the cheese.
- Top with another slice of cheese, then cover with the second piece of bread, garlic-butter side out.
Step 4: Grill the Sandwich
- Heat a non-stick skillet or griddle over medium heat.
- Place the sandwiches in the skillet and cook for 3-4 minutes on each side, pressing gently with a spatula, until the bread is golden and crispy, and the cheese is melted.
Tips for Perfect Shrimp Grilled Cheese
- Use Fresh Shrimp: Fresh shrimp elevates the flavor and ensures the best texture. If using frozen shrimp, thaw thoroughly and pat dry before cooking.
- Choose Quality Cheese: Opt for a cheese that melts well, such as mozzarella or Gruyère, for that gooey, stretchy texture.
- Don’t Skip the Garlic Butter: The garlic butter is what makes this recipe extra special, so be generous with it!
Serving Suggestions
Pair your Shrimp Grilled Cheese with Garlic Bread with:
- A crisp green salad for a balanced meal.
- A bowl of creamy tomato soup for classic comfort food vibes.
- A refreshing iced tea or lemonade to cut through the richness.
Final Thoughts
This Shrimp Grilled Cheese with Garlic Bread recipe is a must-try for anyone looking to elevate their sandwich game. With its perfect combination of textures and flavors, it’s guaranteed to become a family favorite. Whether you’re entertaining guests or indulging solo, this recipe delivers every time.
Don’t forget to share your creations on social media! Use the hashtag #ShrimpGrilledCheese and tag us to show off your culinary masterpiece.
Serving and Storage Tips for Shrimp Grilled Cheese with Garlic Bread
Serving Tips
- Serve Immediately: Shrimp Grilled Cheese tastes best when it’s hot and fresh. The cheese will be perfectly melted, and the bread will have that irresistible crispy texture.
- Garnish for Presentation: Sprinkle some fresh parsley or red pepper flakes on top for added flavor and a pop of color.
- Pair with Dipping Sauces: Serve with marinara sauce, aioli, or a creamy ranch dip for extra indulgence.
Storage Tips
- Refrigeration: If you have leftovers, wrap the sandwiches in aluminum foil or store them in an airtight container. Refrigerate for up to 2 days.
- Reheating: To keep the bread crispy, reheat in a skillet over medium heat or use a toaster oven. Avoid microwaving, as it can make the bread soggy.
- Freezing: This dish isn’t ideal for freezing due to the cheese and shrimp’s delicate texture, but if necessary, wrap the sandwiches tightly in plastic wrap and place them in a freezer bag. Freeze for up to 1 month, and reheat in the oven for the best results.
Make-Ahead Tips
- Prep Ingredients: Cook the shrimp and prepare the garlic butter ahead of time. Store them in the refrigerator for up to 2 days.
- Assemble and Store: You can assemble the sandwiches (uncooked) and store them in the fridge for a few hours before grilling.
By following these tips, you can enjoy the bold flavors of your Shrimp Grilled Cheese with Garlic Bread anytime while maintaining its fresh, delicious taste!
1. Can I use frozen shrimp for this recipe?
Yes, you can! Just make sure to thaw the shrimp completely before cooking. Pat them dry with a paper towel to remove excess moisture, ensuring they cook evenly and don’t make the bread soggy.
2. What type of cheese works best for this recipe?
Cheeses that melt well, like mozzarella, provolone, cheddar, or Gruyère, are ideal. You can also mix cheeses for a more complex flavor profile, such as combining sharp cheddar with creamy Havarti.
3. Can I make this recipe gluten-free?
Absolutely! Use gluten-free bread and check that all other ingredients, like your shrimp seasoning, are certified gluten-free. Gluten-free breads grill beautifully, especially when coated in garlic butter.
4. How can I make this dish spicier?
To add heat, sprinkle red pepper flakes or a dash of cayenne pepper onto the shrimp while cooking. You can also use a spicy cheese, like pepper jack, or serve the sandwich with a hot sauce for dipping.
PrintShrimp Grilled Cheese with Garlic Bread
This Shrimp Grilled Cheese with Garlic Bread takes the classic sandwich to the next level. Juicy, seasoned shrimp are tucked between layers of gooey melted cheese and crispy, golden garlic bread. It’s a decadent, savory treat that’s perfect for lunch or dinner.
- Prep Time: 10 minutes
- Cook Time: 20 minutes
- Total Time: 30 minutes
- Yield: 4 sandwiches 1x
- Category: Main Course
- Method: Stovetop
- Cuisine: American
Ingredients
For the Garlic Butter:
- 3 tablespoons unsalted butter, softened
- 2 cloves garlic, minced
- 1 tablespoon fresh parsley, finely chopped (optional)
- ¼ teaspoon salt
For the Shrimp:
- 8 ounces shrimp, peeled, deveined, and chopped
- 1 tablespoon olive oil
- ½ teaspoon garlic powder
- ¼ teaspoon smoked paprika
- ¼ teaspoon salt
- ¼ teaspoon black pepper
For the Sandwich:
- 8 slices of bread (sourdough or French bread works best)
- 2 cups shredded mozzarella or Monterey Jack cheese
- 1 cup shredded sharp cheddar cheese
Instructions
1. Prepare the Garlic Butter:
- In a small bowl, mix softened butter, minced garlic, parsley, and salt. Set aside.
2. Cook the Shrimp:
- Heat olive oil in a skillet over medium heat.
- Add the chopped shrimp, garlic powder, smoked paprika, salt, and black pepper. Cook for 3–4 minutes until shrimp are pink and fully cooked. Remove from heat and set aside.
3. Assemble the Sandwiches:
- Spread garlic butter evenly on one side of each bread slice.
- Place a slice of bread, butter side down, on a skillet or griddle over medium heat.
- Add a layer of shredded mozzarella, followed by a portion of the cooked shrimp, then a layer of shredded cheddar cheese.
- Top with another slice of bread, butter side up.
4. Cook the Sandwiches:
- Grill the sandwiches for 3–4 minutes per side, or until the bread is golden brown and crispy, and the cheese is melted.
- Repeat with the remaining ingredients.
5. Serve:
- Slice the sandwiches in half and serve hot. Pair with a side salad, soup, or marinara dipping sauce if desired.
Notes
- Substitute shrimp with cooked crab or lobster for a seafood twist.
- Add a sprinkle of red pepper flakes to the shrimp for a spicy kick.
- You can use pre-cooked shrimp to save time—just sauté them briefly to heat through.


