
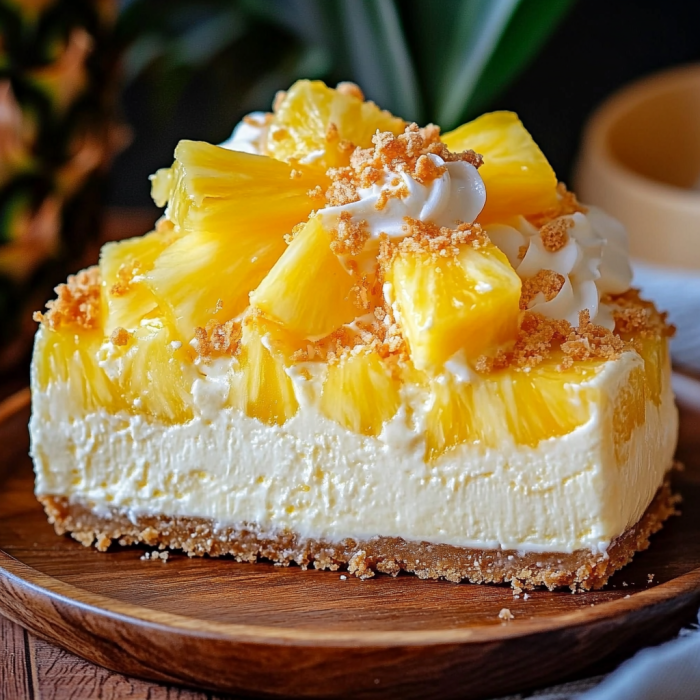
Are you craving a delightful dessert that combines tropical flavors with a creamy, melt-in-your-mouth texture? Look no further than this Refreshing No-Bake Pineapple Mousse Cheesecake. Perfect for summer gatherings or a sweet treat anytime, this recipe is both easy to make and incredibly delicious.
Ingredients:
For the Crust:
- 1 ½ cups graham cracker crumbs
- ¼ cup granulated sugar
- 6 tablespoons unsalted butter, melted
For the Pineapple Mousse Filling:
- 1 can (20 oz) crushed pineapple, drained
- 1 cup heavy cream
- 8 oz cream cheese, softened
- ½ cup granulated sugar
- 1 teaspoon vanilla extract
- 1 tablespoon gelatin powder
- ¼ cup cold water
For Garnish:
- Fresh pineapple chunks
- Whipped cream (optional)
Instructions:

1. Prepare the Crust:
- In a medium bowl, combine the graham cracker crumbs and granulated sugar.
- Stir in the melted butter until the mixture resembles wet sand.
- Press the mixture firmly into the bottom of a 9-inch springform pan to form an even layer. Use the back of a spoon to compact the crumbs.
- Chill the crust in the refrigerator while you prepare the mousse filling.
2. Make the Pineapple Mousse Filling:
- In a small bowl, sprinkle the gelatin over the cold water. Let it sit for about 5 minutes to bloom.
- Heat the gelatin mixture in the microwave for 10-15 seconds or until dissolved. Let it cool slightly.
- In a large bowl, beat the softened cream cheese with granulated sugar until smooth and creamy.
- Add the cooled gelatin mixture and vanilla extract to the cream cheese mixture, and beat until well combined.
- Gently fold in the drained crushed pineapple.
- In another bowl, whip the heavy cream until stiff peaks form.
- Carefully fold the whipped cream into the pineapple mixture until fully incorporated. Be gentle to maintain the light, airy texture.
3. Assemble the Cheesecake:
- Pour the pineapple mousse filling over the chilled graham cracker crust, spreading it evenly with a spatula.
- Refrigerate the cheesecake for at least 4 hours, or until set. For best results, let it chill overnight.
4. Garnish and Serve:
- Before serving, garnish with fresh pineapple chunks and a dollop of whipped cream if desired.
- Remove the cheesecake from the springform pan and slice into pieces.
Tips for Success:
- Drain the Pineapple Well: Ensure the crushed pineapple is well-drained to avoid a watery mousse.
- Use Room Temperature Cream Cheese: This will help achieve a smoother filling.
- Chill Thoroughly: Allowing the cheesecake to set properly is crucial for a firm, sliceable texture.
Why You’ll Love This Recipe:
This No-Bake Pineapple Mousse Cheesecake offers a refreshing twist on traditional cheesecakes. With its light and airy mousse filling and tropical pineapple flavor, it’s the perfect dessert for warm weather. Plus, it’s easy to make and requires no baking, making it a hassle-free option for any occasion.
Serving and Storage Tips for Refreshing No-Bake Pineapple Mousse Cheesecake
Serving Tips:
- Chill Before Serving: Ensure the cheesecake has been refrigerated for at least 4 hours, or preferably overnight. This helps the mousse set properly and makes slicing easier.
- Garnish with Fresh Fruit: Just before serving, top the cheesecake with fresh pineapple chunks, mint leaves, or a light dusting of coconut flakes for a visually appealing and delicious touch.
- Add a Dollop of Whipped Cream: For an extra layer of indulgence, serve each slice with a dollop of whipped cream or a drizzle of pineapple syrup.
- Use a Hot Knife: To make clean slices, dip a knife in hot water and wipe it clean between cuts. This helps prevent the mousse from sticking to the blade.
- Serve Chilled: This cheesecake is best enjoyed cold. Keep it refrigerated until you’re ready to serve to maintain its refreshing texture.
Storage Tips:
- Refrigeration: Store any leftover cheesecake in the refrigerator. Cover it with plastic wrap or place it in an airtight container to prevent it from absorbing other flavors and odors.
- Shelf Life: The no-bake pineapple mousse cheesecake will keep well in the fridge for up to 5 days. Beyond this, the texture and flavor may start to deteriorate.
- Freezing: If you need to store the cheesecake for a longer period, you can freeze it. Wrap the cheesecake tightly in plastic wrap and then in aluminum foil. It can be frozen for up to 2 months. Thaw it in the refrigerator overnight before serving.
- Avoid Freezing Garnishes: If you plan to freeze the cheesecake, add any garnishes like fresh pineapple or whipped cream after thawing. Freezing these toppings can affect their texture and appearance.
By following these serving and storage tips, you can ensure that your Refreshing No-Bake Pineapple Mousse Cheesecake remains delicious and enjoyable for every occasion!
1. Can I use fresh pineapple instead of canned crushed pineapple?
Yes, you can use fresh pineapple, but you’ll need to crush it and ensure it’s well-drained before adding it to the mousse. Fresh pineapple can be more watery than canned, so it’s important to remove excess moisture to avoid a soggy cheesecake.
2. How can I make this cheesecake dairy-free?
To make a dairy-free version, substitute the cream cheese with a dairy-free cream cheese alternative, and use coconut cream or another non-dairy whipped topping in place of heavy cream. Ensure that the gelatin is also suitable for your dietary needs, as some gelatins are animal-based.
3. Can I make this cheesecake ahead of time?
Absolutely! This cheesecake is perfect for making ahead. It needs to chill for at least 4 hours, but you can prepare it up to 2 days in advance. Just store it covered in the refrigerator until you’re ready to serve.
4. What can I use instead of gelatin if I want a vegetarian option?
For a vegetarian alternative, you can use agar-agar, which is a seaweed-based gelling agent. Follow the package instructions for substituting agar-agar for gelatin, as the amount and preparation method may vary. Keep in mind that agar-agar requires boiling to activate its gelling properties.