
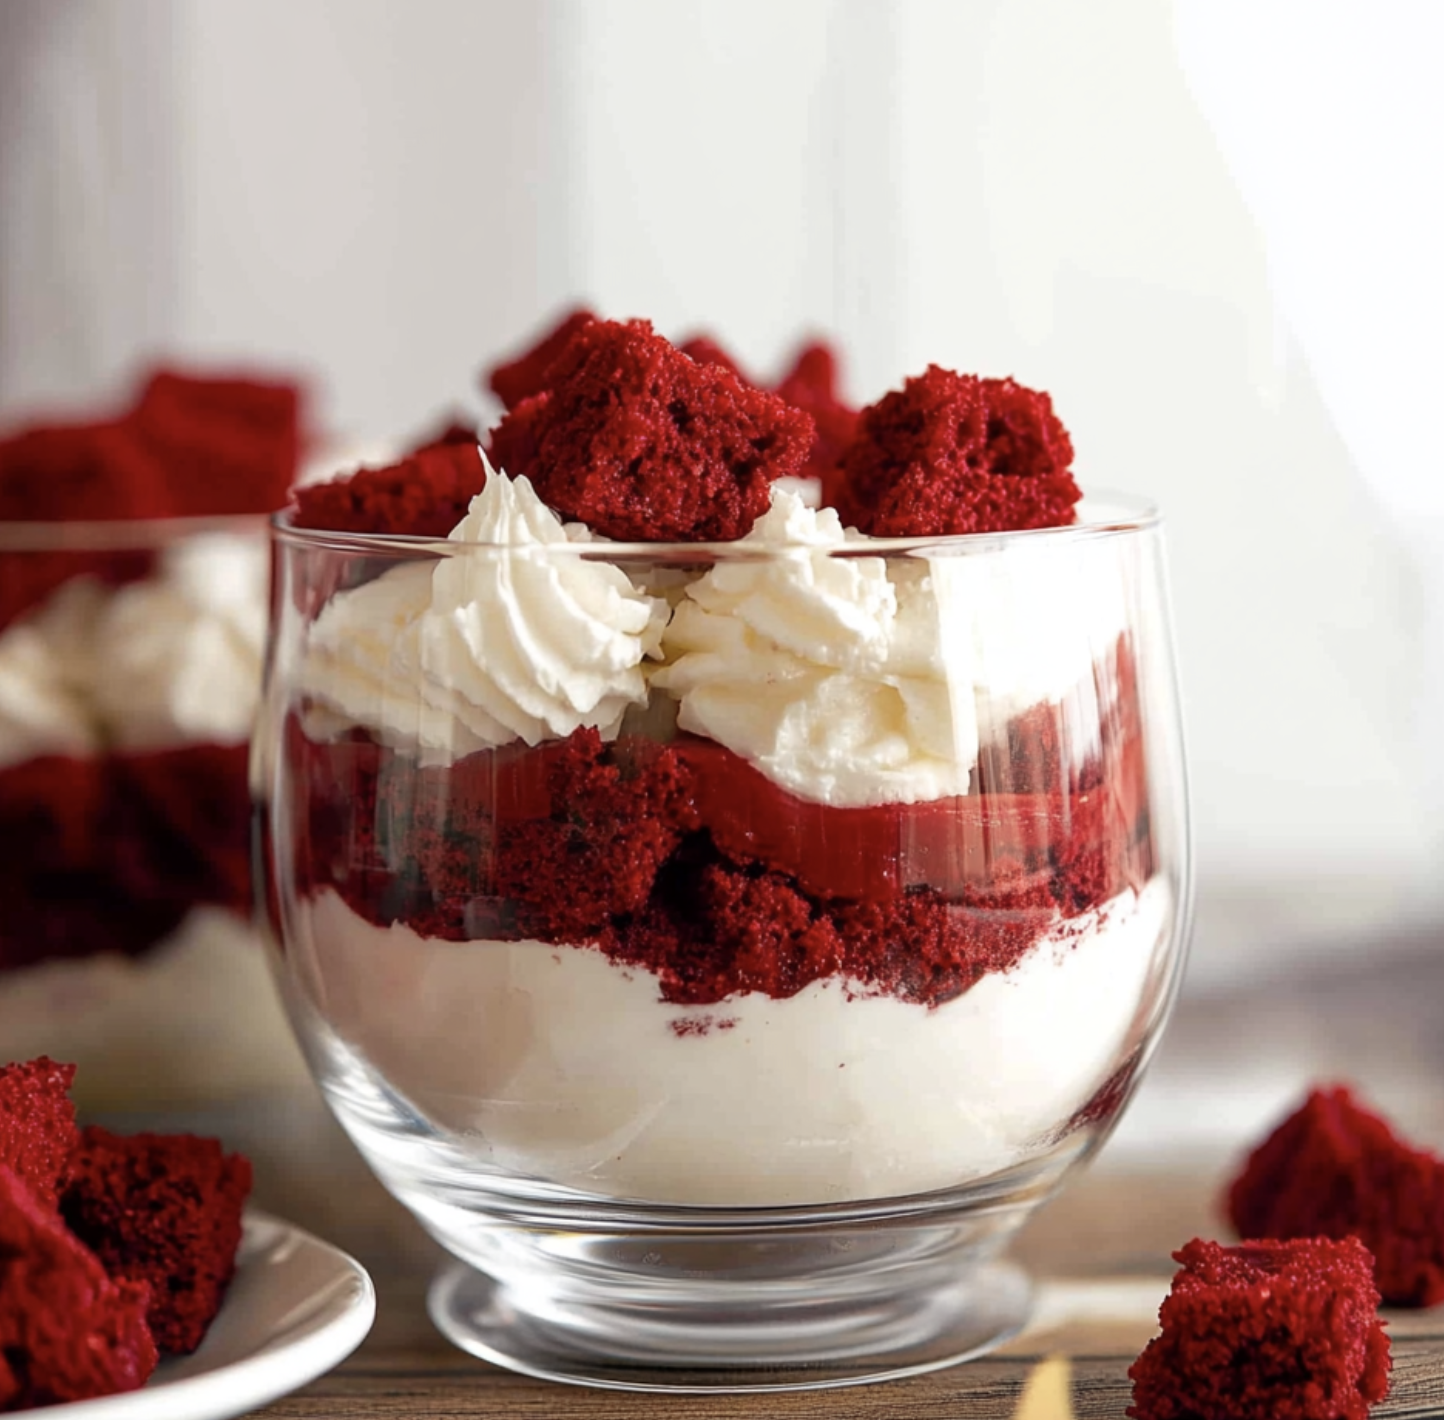
Red Velvet Cheesecake Trifle is a stunning and delicious dessert featuring layers of moist red velvet cake, creamy cheesecake filling, and fluffy whipped topping. This easy-to-assemble trifle is perfect for holidays, parties, or any occasion that calls for a show-stopping treat. The beautiful layers and rich flavors make every bite a delight!
Why You’ll Love This Recipe
- Beautiful presentation with vibrant red and white layers
- Combines moist cake with creamy cheesecake filling
- Easy to make ahead for parties and gatherings
- Perfect for Valentine’s Day, Christmas, or special occasions
- Can be made in a large trifle dish or as individual servings
Ingredients
(Tip: You’ll find the full list of ingredients and measurements in the recipe card below.)
For the Red Velvet Cake:
- 1 box red velvet cake mix (plus ingredients needed for the mix)
- Or use your favorite homemade red velvet cake recipe
For the Cheesecake Filling:
- 16 ounces cream cheese, softened
- 1 cup powdered sugar
- 1 teaspoon vanilla extract
- 2 cups heavy whipping cream
- 1/2 cup granulated sugar
For the Whipped Topping:
- 1 (8-ounce) container whipped topping (or homemade whipped cream)
Optional Garnishes:
- White chocolate shavings
- Red velvet cake crumbs
- Fresh berries
Directions

Make the Red Velvet Cake
- Bake the Cake:
- Prepare the red velvet cake according to the package or recipe instructions.
- Bake in a 9×13-inch pan and let cool completely.
- Cut the Cake into Cubes:
- Once the cake is cooled, cut it into 1-inch cubes.
Prepare the Cheesecake Filling
- Whip the Cream Cheese:
- In a large bowl, beat the softened cream cheese, powdered sugar, and vanilla extract until smooth and creamy.
- Make Whipped Cream:
- In a separate bowl, whip the heavy cream and granulated sugar until stiff peaks form.
- Combine to Make Filling:
- Gently fold the whipped cream into the cream cheese mixture until well combined and fluffy.
Assemble the Trifle
- Layer the Ingredients:
- In a large trifle dish or individual glasses, start with a layer of red velvet cake cubes.
- Add a layer of cheesecake filling, followed by a layer of whipped topping.
- Repeat the layers until all ingredients are used, ending with a layer of whipped topping.
- Garnish:
- Sprinkle white chocolate shavings, red velvet crumbs, or fresh berries on top for a decorative finish.
- Chill Before Serving:
- Refrigerate for at least 1 hour before serving to allow the layers to set.
Servings and Timing
- Servings: 10-12
- Prep Time: 30 minutes
- Cook Time: 25 minutes (for cake baking)
- Total Time: 55 minutes (+ chilling time)
Variations
- Chocolate Red Velvet Trifle: Add a layer of chocolate pudding or chocolate chips for extra richness.
- Berry Red Velvet Trifle: Mix in fresh strawberries or raspberries between the layers for a fruity twist.
- Mini Trifles: Assemble the dessert in individual serving cups or mason jars for a fun presentation.
- Red Velvet Brownie Trifle: Use red velvet brownies instead of cake for a denser, fudgier dessert.
- Oreo Red Velvet Trifle: Add crushed Oreos between the layers for a crunchy surprise.
Storage/Reheating
- Refrigerator: Store covered in the refrigerator for up to 3 days.
- Make Ahead: The trifle can be assembled the day before serving. Add any fresh fruit or garnishes just before serving for best results.
- Freezing: Not recommended, as the cream cheese and whipped topping do not freeze well.
FAQs
1. Can I use store-bought red velvet cake?
Yes, a store-bought cake works well and can save time when assembling the trifle.
2. Can I use Cool Whip instead of homemade whipped cream?
Yes, Cool Whip is a convenient option that works great in this recipe.
3. How do I prevent the trifle from becoming soggy?
Allow the cake to cool completely before layering and avoid over-soaking the cake with any liquids.
4. Can I make this dessert in advance?
Yes, you can make the trifle a day ahead and store it in the refrigerator until ready to serve.
5. What kind of dish should I use for a trifle?
A clear glass trifle dish is ideal to showcase the beautiful layers. You can also use a large bowl or individual glasses.
6. How do I keep the layers neat and defined?
Use a piping bag or spoon to carefully layer the cheesecake filling and whipped topping. Wipe the inside of the dish with a paper towel if needed.
7. Can I use a different type of cake?
Yes, you can use chocolate cake, vanilla cake, or any flavor that complements the cheesecake filling.
8. What can I do if my cream cheese filling is lumpy?
Ensure the cream cheese is fully softened before mixing, and beat until smooth before folding in the whipped cream.
9. Can I add fruit to the trifle?
Yes, fresh strawberries, raspberries, or blueberries add a nice contrast of flavor and color.
10. How do I transport the trifle to a party?
Cover the top with plastic wrap and keep it chilled during transport. Assemble in a disposable dish if needed for easier travel.
Conclusion
Red Velvet Cheesecake Trifle is an elegant and delicious dessert that offers a beautiful presentation and layers of rich flavor. The combination of moist red velvet cake, smooth cheesecake filling, and fluffy whipped topping creates a perfect blend of textures and tastes. Whether served at a holiday dinner, special celebration, or just because, this trifle is sure to impress your guests and leave them craving more. Enjoy every spoonful of this decadent and easy-to-make dessert!
Print
Red Velvet Cheesecake Trifle
- Prep Time: 30 minutes
- Cook Time: 30 minutes
- Total Time: 1 hour
- Yield: 8–10 servings 1x
- Category: Dessert
- Method: Layering
- Cuisine: American
Description
This Red Velvet Cheesecake Trifle is a stunning and delicious layered dessert featuring moist red velvet cake, rich cheesecake filling, and fluffy whipped cream. It’s perfect for holidays, parties, or anytime you want an easy yet impressive dessert. The beautiful layers of red, white, and creamy goodness make every spoonful irresistible!
Ingredients
For the Red Velvet Cake:
- 1 box (15.25 oz / 432 g) red velvet cake mix
- Ingredients as per cake mix instructions (typically eggs, oil, and water)
For the Cheesecake Filling:
- 8 oz (225 g) cream cheese, softened
- 1 cup (120 g) powdered sugar
- 1 teaspoon vanilla extract
- 1 1/2 cups (360 ml) heavy whipping cream
For the Whipped Cream:
- 1 cup (240 ml) heavy whipping cream
- 2 tablespoons powdered sugar
- 1 teaspoon vanilla extract
Optional Toppings:
- Red velvet cake crumbs
- White chocolate shavings
- Fresh berries
Instructions
🎂 Make the Red Velvet Cake:
-
Bake the Cake:
- Prepare the red velvet cake according to the package instructions.
- Bake in a 9×13 inch (23×33 cm) pan and let it cool completely.
-
Crumble the Cake:
- Once cooled, cut the cake into cubes or crumble into bite-sized pieces.
🍰 Prepare the Cheesecake Filling:
-
Beat the Cream Cheese:
- In a large bowl, beat the cream cheese until smooth.
-
Add Sugar and Vanilla:
- Mix in powdered sugar and vanilla extract until well combined.
-
Whip the Cream:
- In a separate bowl, whip the heavy cream until stiff peaks form.
-
Fold Together:
- Gently fold the whipped cream into the cream cheese mixture until smooth and creamy.
🍶 Make the Whipped Cream:
- Whip the Cream:
- Beat heavy whipping cream, powdered sugar, and vanilla extract until soft peaks form.
- Set aside for topping.
🥄 Assemble the Trifle:
-
Layer the Ingredients:
- In a large trifle dish or individual dessert glasses, start with a layer of red velvet cake pieces.
- Add a layer of cheesecake filling.
- Repeat layers until the dish is filled, ending with a layer of whipped cream.
-
Garnish:
- Sprinkle with red velvet cake crumbs, white chocolate shavings, or fresh berries for a beautiful finish.
🍽️ Serve:
-
Chill Before Serving:
- Refrigerate for at least 1 hour before serving to allow the layers to set.
-
Scoop and Enjoy:
- Serve with a large spoon, making sure to get every delicious layer!
Notes
- Make It Ahead: You can prepare this trifle 1 day in advance. Cover and store in the refrigerator until ready to serve.
- Shortcut Tip: Use store-bought red velvet cake or a pre-made cheesecake filling to save time.
- Individual Servings: Layer the trifle in small mason jars or dessert cups for easy, grab-and-go servings.