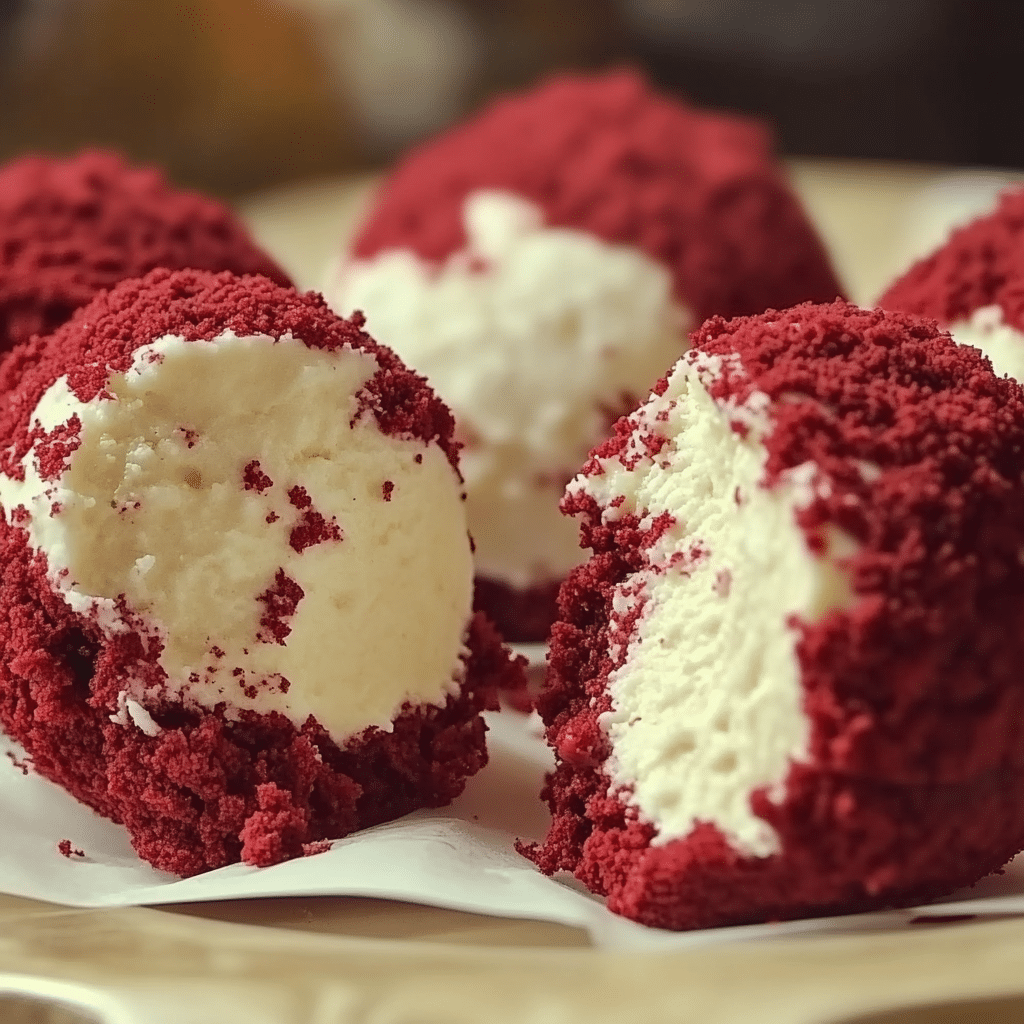
Red Velvet Cheesecake Balls are a decadent, bite-sized dessert that combines the rich, velvety flavor of red velvet cake with creamy cheesecake. These no-bake treats are perfect for parties, holidays, or any time you want a luxurious dessert with minimal effort. Coated in chocolate or dusted with powdered sugar, they’re as beautiful as they are delicious.
Why You’ll Love This Recipe
- No-Bake and Easy: Simple steps make this a fuss-free dessert.
- Rich and Decadent: The combination of red velvet and cheesecake is irresistible.
- Perfect for Any Occasion: Great for parties, gifts, or just indulging at home.
- Customizable: Use your favorite coatings like white chocolate, sprinkles, or nuts.
- Make-Ahead Friendly: Prepare them in advance for stress-free entertaining.
Ingredients
(Tip: You’ll find the full list of ingredients and measurements in the recipe card below.)
- Red velvet cake mix (prepared and cooled)
- Cream cheese, softened
- White or milk chocolate (for coating)
- Optional: Sprinkles, crushed nuts, or shredded coconut for decoration
Directions
1. Crumble the Cake
- Bake the red velvet cake according to package instructions and let it cool completely.
- Once cooled, crumble the cake into fine pieces in a large mixing bowl.
2. Mix with Cream Cheese
- Add softened cream cheese to the crumbled cake.
- Use a spatula or your hands to mix until a smooth, dough-like consistency forms.
3. Form Balls
- Roll the mixture into 1-inch balls and place them on a parchment-lined baking sheet.
- Chill in the refrigerator or freezer for 30 minutes to firm up.
4. Melt Chocolate
- Melt your choice of white or milk chocolate in a microwave-safe bowl, stirring every 30 seconds until smooth.
5. Coat the Balls
- Dip each chilled ball into the melted chocolate, using a fork or skewer to coat evenly.
- Place the coated balls back on the parchment-lined sheet. Decorate with sprinkles or other toppings if desired.
6. Chill and Serve
- Refrigerate the coated balls until the chocolate sets, about 15–20 minutes.
- Serve and enjoy!
Servings and Timing
- Servings: Makes approximately 24–30 balls
- Preparation Time: 20 minutes
- Chilling Time: 45–50 minutes
- Total Time: 1 hour 10 minutes
Variations
- White Chocolate Twist: Use white chocolate for the coating to complement the red velvet flavor.
- Nutty Crunch: Roll in crushed pecans or walnuts for added texture.
- Festive Sprinkles: Customize with seasonal sprinkles for holidays or special occasions.
- Gluten-Free: Use a gluten-free red velvet cake mix for a gluten-free option.
- Drizzle Effect: Drizzle a contrasting chocolate over the coated balls for an elegant finish.
Storage/Reheating
- Storage: Store in an airtight container in the refrigerator for up to 5 days.
- Freezing: Freeze in a single layer in a freezer-safe container for up to 3 months. Thaw in the refrigerator before serving.
FAQs
1. Can I use homemade red velvet cake?
Yes, homemade red velvet cake works perfectly. Just crumble it the same way as store-bought.
2. How soft should the cream cheese be?
The cream cheese should be softened but not melted for easy mixing.
3. What’s the best chocolate for coating?
High-quality melting chocolate or candy melts work best for a smooth, even coating.
4. Can I make these ahead of time?
Yes, you can prepare them up to 2 days in advance and store them in the refrigerator.
5. How do I prevent the balls from sticking to my hands?
Lightly grease your hands with a small amount of oil or butter before rolling.
6. Can I add flavoring to the cream cheese mixture?
Yes, a splash of vanilla or almond extract can enhance the flavor.
7. Can I skip the chocolate coating?
Yes, you can roll the balls in powdered sugar, cocoa powder, or shredded coconut instead.
8. How do I make them smaller or larger?
Adjust the size to your preference, but note that smaller balls will set faster.
9. Can I decorate them differently?
Absolutely! Try edible glitter, crushed candy canes, or drizzled caramel for variety.
10. Are these kid-friendly?
Yes, kids will love their sweetness and the fun of helping decorate!
Conclusion
Red Velvet Cheesecake Balls are an indulgent, no-bake dessert that’s perfect for any occasion. With their rich flavor, creamy texture, and customizable decorations, these treats are sure to impress your family and friends. Give this simple yet elegant recipe a try, and enjoy the irresistible combination of red velvet and cheesecake in every bite!
Print
Red Velvet Cheesecake Balls
- Prep Time: 20 minutes
- Cook Time: 30 minutes
- Total Time: 50 minutes
- Yield: 18–20 balls 1x
- Category: Dessert
- Method: No-Bake
- Cuisine: American
Description
These Red Velvet Cheesecake Balls are rich, creamy, and indulgent bite-sized treats perfect for any occasion! With a velvety red hue and a smooth cream cheese center, they’re as beautiful as they are delicious.
Ingredients
For the Cheesecake Mixture:
- 8 oz cream cheese, softened
- 1/4 cup powdered sugar
- 1 teaspoon vanilla extract
For the Red Velvet Coating:
- 1 1/2 cups red velvet cake crumbs (from a boxed mix or homemade cake)
- 1/2 cup semi-sweet or white chocolate chips, melted (for binding if needed)
For Dipping:
- 12 oz white chocolate or semi-sweet chocolate, melted
Optional Decorations:
- Red velvet cake crumbs for garnish
- Red or white sprinkles
Instructions
- Prepare the Cheesecake Filling:
- In a bowl, beat the softened cream cheese, powdered sugar, and vanilla extract until smooth and creamy.
- Cover the mixture and refrigerate for 20–30 minutes to firm up slightly.
- Make the Red Velvet Mixture:
- In a separate bowl, crumble the red velvet cake into fine crumbs.
- If the crumbs do not hold together when pressed, mix in melted chocolate chips as a binder.
- Assemble the Cheesecake Balls:
- Scoop about 1 tablespoon of the cream cheese mixture and roll it into a ball.
- Flatten the red velvet mixture and wrap it around the cream cheese ball, completely enclosing the filling.
- Roll the ball between your palms to smooth it out. Repeat with the remaining mixture.
- Chill the Balls:
- Place the assembled balls on a baking sheet lined with parchment paper and refrigerate for 30 minutes, or until firm.
- Dip the Balls:
- Melt the dipping chocolate in a microwave-safe bowl in 30-second intervals, stirring between each, until smooth.
- Using a fork or skewer, dip each ball into the melted chocolate, letting the excess drip off before placing it back on the parchment-lined tray.
- Decorate:
- Before the chocolate sets, sprinkle the balls with reserved red velvet crumbs, sprinkles, or drizzle with additional melted chocolate.
- Set and Serve:
- Allow the chocolate to set completely at room temperature or in the refrigerator.
- Serve chilled or at room temperature.
Notes
- Leftovers can be stored in an airtight container in the refrigerator for up to 1 week or frozen for up to 3 months.
- For extra richness, substitute white chocolate for the dipping with semi-sweet or dark chocolate.
- Ensure the cheesecake filling is firm to make rolling easier.

