
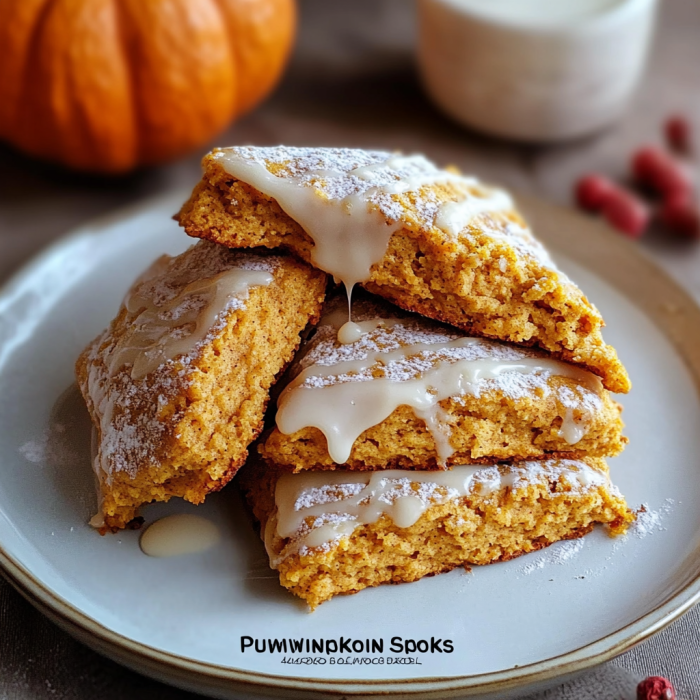
As autumn rolls in and the days grow shorter, nothing beats the comforting aroma of freshly baked pumpkin scones. These delightful treats are perfect for cozy mornings with a cup of tea or coffee, making them a must-try recipe for the fall season. Whether you’re hosting a holiday gathering or simply indulging in a seasonal treat, these pumpkin scones are sure to impress.
Ingredients:
- 2 1/2 cups all-purpose flour
- 1/2 cup granulated sugar
- 1/4 cup packed brown sugar
- 1 tablespoon baking powder
- 1/2 teaspoon salt
- 1 teaspoon ground cinnamon
- 1/2 teaspoon ground ginger
- 1/4 teaspoon ground nutmeg
- 1/2 cup cold unsalted butter, cut into small pieces
- 1/2 cup canned pumpkin puree
- 1/4 cup milk
- 1 large egg
- 1 teaspoon vanilla extract
For the Glaze (optional):
- 1 cup powdered sugar
- 2 tablespoons milk
- 1/4 teaspoon vanilla extract
- 1/4 teaspoon ground cinnamon
Instructions:

- Preheat Oven: Preheat your oven to 425°F (220°C) and line a baking sheet with parchment paper.
- Combine Dry Ingredients: In a large bowl, whisk together the flour, granulated sugar, brown sugar, baking powder, salt, cinnamon, ginger, and nutmeg.
- Cut in Butter: Using a pastry cutter or your fingers, cut the cold butter into the flour mixture until it resembles coarse crumbs.
- Mix Wet Ingredients: In a separate bowl, mix together the pumpkin puree, milk, egg, and vanilla extract until well combined.
- Form Dough: Gradually add the wet ingredients to the dry mixture, stirring until just combined. Be careful not to overmix; the dough should be slightly sticky.
- Shape Scones: Turn the dough out onto a lightly floured surface and gently knead it a few times. Pat the dough into a 1-inch thick rectangle. Use a knife or a bench scraper to cut the dough into squares or triangles.
- Bake: Transfer the scones to the prepared baking sheet. Bake for 15-18 minutes, or until the scones are golden brown on the edges.
- Cool and Glaze: Let the scones cool on a wire rack. If using the glaze, whisk together the powdered sugar, milk, vanilla extract, and ground cinnamon until smooth. Drizzle the glaze over the cooled scones.
Tips for Perfect Pumpkin Scones:
- Use Cold Butter: For the best texture, ensure your butter is very cold when cutting it into the flour. This helps create flaky layers.
- Don’t Overmix: Overmixing the dough can result in tough scones. Mix just until the ingredients are combined.
- Seasonal Spices: Feel free to adjust the spices according to your taste. Adding a pinch of cloves or allspice can enhance the flavor.
Why You’ll Love These Pumpkin Scones:
- Flavorful: The combination of pumpkin and warm spices creates a deliciously comforting treat.
- Versatile: Perfect for breakfast, brunch, or a snack, these scones pair well with tea, coffee, or even a dollop of whipped cream.
- Easy to Make: With simple ingredients and straightforward instructions, these scones are accessible for both novice and experienced bakers.
Serving and Storage Tips for Pumpkin Scones
Serving Tips:
- Fresh Out of the Oven: Pumpkin scones are best enjoyed warm right out of the oven. The buttery, soft texture and the spiced aroma are at their peak. Serve them plain or with a light glaze for an extra touch of sweetness.
- Pairings: These scones pair wonderfully with a variety of beverages:
- Coffee: Complement the warm spices of the scones with a rich cup of coffee.
- Tea: A mild herbal tea or chai can enhance the flavors of the scones.
- Hot Chocolate: For a cozy treat, serve with a cup of creamy hot chocolate.
- Toppings:
- Butter or Jam: Spread a bit of butter or your favorite fruit jam on the scones for added flavor.
- Cream Cheese: A dollop of flavored cream cheese or pumpkin cream cheese can make for a delightful spread.
- Presentation: Arrange the scones on a decorative plate or tiered stand for a charming presentation, especially if serving them at a gathering or brunch.
Storage Tips:
- At Room Temperature:
- Short-Term Storage: If you plan to eat the scones within a day or two, store them in an airtight container at room temperature. This will keep them fresh and prevent them from drying out.
- In the Refrigerator:
- Extended Storage: For longer storage, keep the scones in an airtight container or wrap them tightly in plastic wrap. They can be stored in the refrigerator for up to one week. To enjoy them, simply reheat in the oven or microwave.
- Freezing:
- Long-Term Storage: To freeze scones, place them in a single layer on a baking sheet and freeze until solid. Once frozen, transfer them to a zip-top freezer bag or airtight container. They can be frozen for up to three months.
- Reheating Frozen Scones: To enjoy frozen scones, preheat your oven to 350°F (175°C). Place the scones on a baking sheet and bake for about 10-15 minutes, or until heated through.
- Avoiding Sogginess: To prevent the scones from becoming soggy, avoid storing them in a humid environment. If they are already glazed, consider storing them in a separate container to prevent the glaze from becoming sticky.
By following these serving and storage tips, you can enjoy your pumpkin scones at their best, whether freshly baked or reheated. These scones make for a delightful treat any time of the day, and with proper storage, you can savor them for days to come.
1. Can I use fresh pumpkin instead of canned pumpkin puree?
Yes, you can use fresh pumpkin instead of canned pumpkin puree. To do this, roast or steam the pumpkin until tender, then blend it until smooth. Be sure to drain any excess moisture from the fresh pumpkin to avoid making the dough too wet. Canned pumpkin puree is often more convenient and has a consistent texture, but fresh pumpkin can add a unique flavor to your scones.
2. Can I make pumpkin scones ahead of time?
Absolutely! Pumpkin scones can be made ahead of time. If you want to prepare them in advance, you can freeze the unbaked scone dough. Simply cut the dough into shapes, freeze them on a baking sheet, then transfer to a zip-top freezer bag. When you’re ready to bake, bake directly from frozen, adding a few extra minutes to the baking time. Alternatively, you can bake the scones and store them in an airtight container at room temperature for up to two days, or freeze them for up to three months.
3. Can I substitute any of the spices in the recipe?
Yes, you can adjust the spices according to your preference. If you don’t have ground cinnamon, ginger, or nutmeg, you can use pumpkin pie spice as a substitute. Pumpkin pie spice typically includes a blend of cinnamon, ginger, nutmeg, and sometimes cloves, which makes it a great alternative. Adjust the amount to your taste, starting with about 1 to 1 1/2 teaspoons of pumpkin pie spice in place of the individual spices.
4. What can I use as a glaze if I don’t want to use the optional glaze recipe?
If you prefer not to use the optional glaze, there are several alternatives to add a touch of sweetness or flavor to your scones:
- Powdered Sugar Dusting: Simply dust the scones with powdered sugar for a light, sweet touch.
- Maple Syrup Drizzle: A drizzle of maple syrup can complement the pumpkin flavor beautifully.
- Honey or Agave Syrup: Drizzling a small amount of honey or agave syrup over the scones can add natural sweetness.
- Cinnamon Sugar: Mix sugar with a bit of cinnamon and sprinkle it over the scones before baking for a sweet and spiced crust.