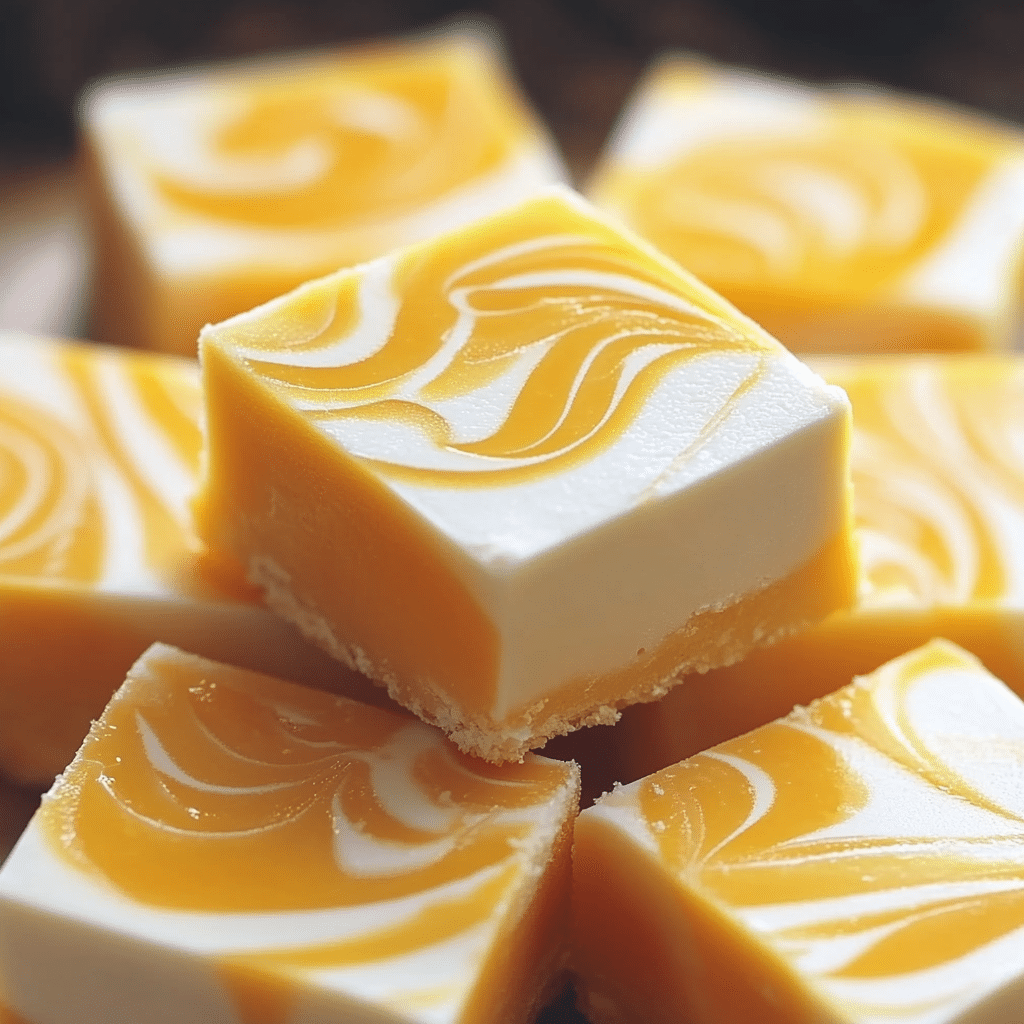
If you’re looking for a decadent treat that combines the creamy richness of fudge with a refreshing citrus twist, then the Orange Dreamsicle Fudge is exactly what you need. This easy-to-make, no-bake dessert brings the flavors of the classic orange creamsicle ice cream into a melt-in-your-mouth fudge form. It’s perfect for any occasion – whether you’re hosting a summer party, celebrating a birthday, or simply craving something sweet. Let’s dive into how you can create this irresistible fudge at home.
Ingredients for Orange Dreamsicle Fudge
- White Chocolate Chips: The smooth and sweet base of the fudge.
- Sweetened Condensed Milk: This is the magic ingredient that gives the fudge its creamy, rich texture.
- Orange Gelatin: For that vibrant orange flavor and color.
- Butter: Adds a touch of richness.
- Vanilla Extract: Enhances the overall sweetness and flavor of the fudge.
Step-by-Step Instructions to Make Orange Dreamsicle Fudge
Step 1: Prepare Your Pan
Start by lining an 8×8-inch baking dish with parchment paper. This will make it easy to remove the fudge once it has set.
Step 2: Melt the Ingredients
In a medium saucepan, combine the white chocolate chips, sweetened condensed milk, butter, and orange gelatin mix. Cook over low heat, stirring constantly until everything is melted and smooth.
Step 3: Add Vanilla
Once the mixture is melted and creamy, stir in the vanilla extract for a little extra flavor.
Step 4: Set the Fudge
Pour the melted fudge mixture into the prepared baking dish. Spread it evenly with a spatula.
Step 5: Chill and Firm Up
Refrigerate the fudge for at least 2-3 hours, or until it has set and become firm.
Step 6: Slice and Enjoy
Once chilled, lift the fudge out of the pan using the parchment paper. Cut it into small squares and serve!
Tips for Perfect Orange Dreamsicle Fudge
- Use High-Quality White Chocolate: The better the chocolate, the creamier and more flavorful your fudge will be.
- Stir Constantly: While melting the ingredients, make sure to stir constantly to prevent burning or scorching.
- Chill Long Enough: Let the fudge set for the full time to ensure it becomes firm and easy to cut.
How to Store Orange Dreamsicle Fudge
This fudge can be stored in an airtight container in the refrigerator for up to 1-2 weeks. You can also freeze it for up to 3 months. Just make sure to wrap it tightly in plastic wrap or foil before freezing.
Final Thoughts on Orange Dreamsicle Fudge
This Orange Dreamsicle Fudge recipe brings the nostalgic taste of your favorite orange creamsicle treat into a convenient and easy-to-make dessert. Whether you’re a fudge fan or just love citrusy sweets, this recipe is sure to be a crowd-pleaser. So, grab your ingredients, make a batch, and treat yourself to this delightful orange-flavored fudge today!
Serving and Storage Tips for Orange Dreamsicle Fudge
Serving Tips:
- Perfect Pairing: Serve this creamy and citrusy fudge with a refreshing cold drink, like iced tea, lemonade, or even a glass of milk. It’s a sweet contrast to a tangy beverage!
- Gift-Worthy: Cut the fudge into small squares and wrap them in cellophane bags tied with ribbon for a charming homemade gift idea. It makes for a thoughtful treat for holidays, birthdays, or any special occasion.
- Presentation: For an extra touch, garnish each fudge piece with a small piece of candied orange peel or a sprinkle of orange zest. This adds visual appeal and enhances the citrus flavor.
- Serve Cold or Room Temperature: You can serve this fudge chilled straight from the refrigerator or let it sit at room temperature for a few minutes before serving for a softer texture.
Storage Tips:
- Refrigeration: To keep your Orange Dreamsicle Fudge fresh, store it in an airtight container in the refrigerator. It will last up to 1-2 weeks when properly stored.
- Freezing: For longer storage, you can freeze the fudge for up to 3 months. To freeze, wrap the fudge tightly in plastic wrap or aluminum foil, and then place it in an airtight container or freezer bag. Allow it to thaw in the refrigerator or at room temperature before serving.
- Avoid Humidity: Keep the fudge away from sources of humidity, as moisture can cause it to soften and lose its texture.
- Keep it Sealed: Always ensure the fudge is well-sealed to prevent it from absorbing any other odors from the fridge, as fudge can be quite sensitive to strong smells.
With these serving and storage tips, you can enjoy your Orange Dreamsicle Fudge at its best, whether you’re serving it at a party or keeping it fresh for later enjoyment!
1. Can I use a different type of chocolate for this recipe?
While white chocolate is essential for the creamy texture of Orange Dreamsicle Fudge, you can experiment with other types of chocolate if you prefer. Dark chocolate or milk chocolate may alter the flavor profile, but it can still be delicious. However, white chocolate creates the classic taste and texture that pairs perfectly with the citrus.
2. How do I know when the fudge is fully set?
The fudge is ready when it is firm to the touch and no longer sticky. If you press your finger lightly on the surface, it should leave no indentation. Allow it to chill for at least 2-3 hours in the refrigerator to ensure it sets properly.
3. Can I add more orange flavor to the fudge?
Yes, if you want an even stronger orange flavor, you can increase the amount of orange gelatin or add a few teaspoons of orange zest to the mixture. Just be mindful of the balance, as too much orange zest might make the fudge more tangy than sweet.
4. Can I make this fudge ahead of time?
Absolutely! Orange Dreamsicle Fudge is a great make-ahead dessert. You can prepare it up to a week in advance and store it in the refrigerator until you’re ready to serve. Just make sure it’s sealed properly to maintain freshness.
PrintOrange Dreamsicle Fudge
This creamy and dreamy Orange Dreamsicle Fudge is a delightful treat that tastes like your favorite childhood popsicle! With the perfect balance of citrusy orange and smooth vanilla, this no-bake fudge is a quick and easy dessert for holidays, parties, or a sweet pick-me-up.
- Prep Time: 10 minutes
- Cook Time: 4 hours
- Total Time: 4 hours 10 minutes
- Yield: 25 small squares 1x
- Category: Dessert
- Method: No-Bake
- Cuisine: American
Ingredients
- 3 cups white chocolate chips
- 1 can (14 oz) sweetened condensed milk
- 1/2 cup unsalted butter
- 1 box (3 oz) orange-flavored gelatin mix (Jell-O)
- 1 tsp orange extract (optional, for extra flavor)
- 1 tsp vanilla extract
- Orange and white food coloring (optional, for a swirled effect)
Instructions
- Prepare the Pan:
Line an 8×8-inch baking dish with parchment paper, leaving some overhang for easy removal. Set aside. - Melt the Base:
In a medium saucepan over low heat, combine the white chocolate chips, sweetened condensed milk, and butter. Stir constantly until smooth and fully melted. Remove from heat. - Divide and Flavor:
Divide the melted mixture into two bowls. To one bowl, add the orange gelatin mix and orange extract (if using), stirring until well combined. To the other bowl, add the vanilla extract. - Add Color (Optional):
If desired, add a few drops of orange food coloring to the orange mixture and a few drops of white food coloring to the vanilla mixture for vibrant colors. - Layer and Swirl:
Pour half of the orange mixture into the prepared pan, spreading it evenly. Follow with half of the vanilla mixture. Repeat with the remaining orange and vanilla mixtures. Use a toothpick or knife to gently swirl the layers for a marbled effect. - Set the Fudge:
Refrigerate the fudge for at least 4 hours, or until firm. - Cut and Serve:
Lift the fudge out of the pan using the parchment paper overhang. Cut into small squares and serve. Store leftovers in an airtight container in the fridge for up to 2 weeks.
Notes
- For extra texture, sprinkle the top of the fudge with white chocolate shavings or orange zest before chilling.
- You can substitute the orange gelatin with other flavors for a fun twist.


