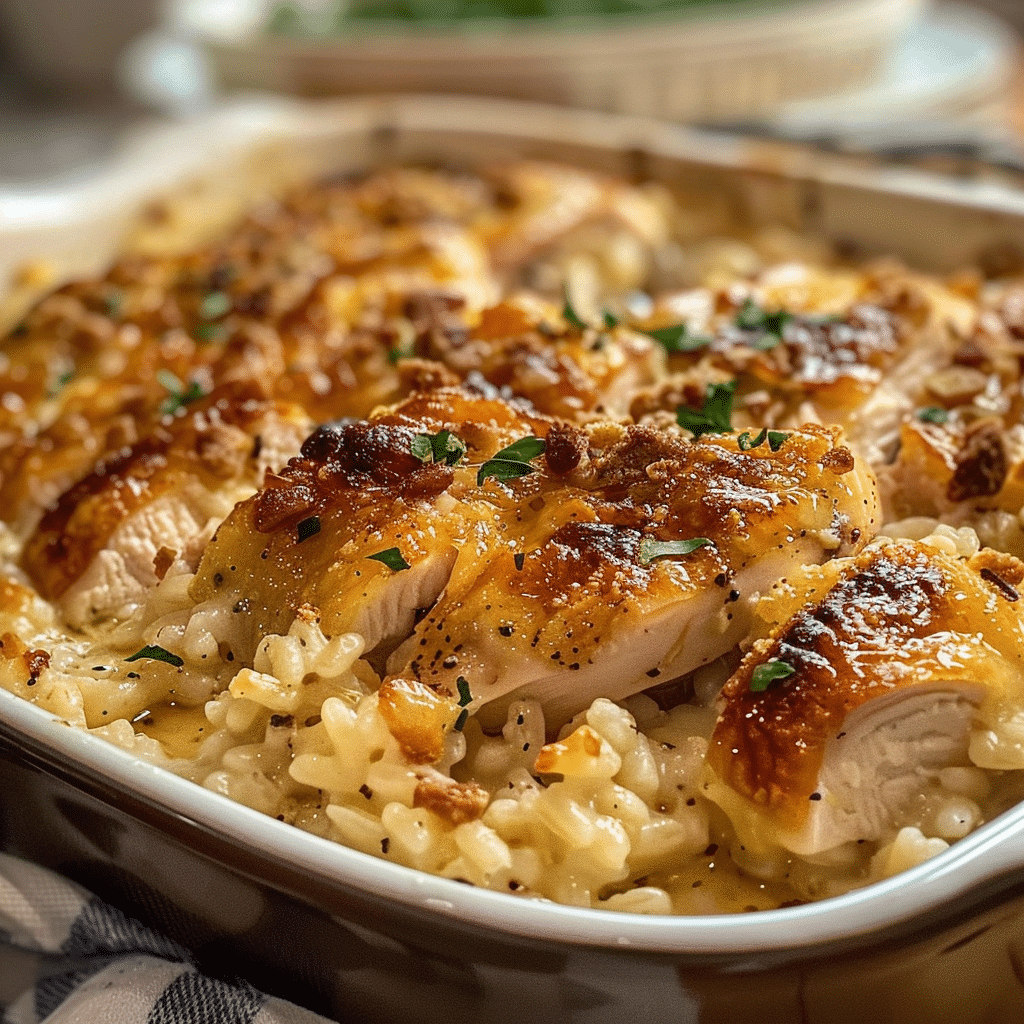
Are you looking for a delicious and hassle-free dinner option? Look no further than No-Peek Chicken Casserole! This comforting dish combines tender chicken, hearty rice, and a creamy sauce, all baked together in one pan for an effortless meal that will please the whole family. Perfect for busy weeknights or when you need to serve a crowd, this recipe is sure to become a staple in your household.
What is No-Peek Chicken Casserole?
No-Peek Chicken Casserole is a one-dish meal that requires minimal effort and cleanup. The name comes from the fact that you simply mix the ingredients, pop it in the oven, and let it cook without peeking until it’s done. This means you can set it and forget it, allowing you to spend more time enjoying your evening and less time slaving over a hot stove.
Ingredients You’ll Need
To make this easy casserole, you will need the following ingredients:
- Chicken: Boneless, skinless chicken breasts or thighs work best.
- Rice: Long-grain white rice or brown rice can be used, though cooking times may vary.
- Cream of Chicken Soup: This adds creaminess and flavor. You can use a store-bought version or make your own.
- Chicken Broth: Enhances the flavor of the rice and chicken.
- Onion Soup Mix: For a savory kick.
- Cheese: Shredded cheddar or your favorite cheese to melt on top.
How to Make No-Peek Chicken Casserole
Step 1: Preheat the Oven
Preheat your oven to 350°F (175°C). This ensures that your casserole cooks evenly.
Step 2: Prepare the Casserole Dish
In a 9×13-inch casserole dish, combine the uncooked rice, cream of chicken soup, and chicken broth. Stir in the onion soup mix until everything is well mixed. This will create a flavorful base for your casserole.
Step 3: Add the Chicken
Place the chicken pieces on top of the rice mixture. There’s no need to season the chicken separately, as the flavors from the soup and broth will infuse it during baking.
Step 4: Cover and Bake
Cover the casserole dish tightly with aluminum foil. Bake for 1 hour without opening the oven door. This is the “no-peek” part of the recipe! The steam will help cook the chicken and rice to perfection.
Step 5: Add Cheese
After an hour, carefully remove the foil and sprinkle your choice of cheese on top. Return the casserole to the oven uncovered for an additional 10-15 minutes, or until the cheese is melted and bubbly.
Step 6: Serve and Enjoy!
Once the casserole is done baking, let it cool for a few minutes before serving. This dish pairs beautifully with a fresh green salad or steamed vegetables.
Why You’ll Love This Recipe
- Easy Preparation: With minimal prep time and only a few simple steps, this recipe is perfect for beginners and busy cooks alike.
- One-Dish Meal: Enjoy the convenience of cooking everything in one dish, which means less cleanup!
- Customizable: Feel free to add your favorite vegetables, such as broccoli or bell peppers, for added nutrition and flavor.
- Leftover Friendly: This casserole reheats well, making it a great option for meal prep or leftovers.
Final Thoughts
No-Peek Chicken Casserole is a delightful and uncomplicated meal that brings comfort to your dinner table. Whether you’re looking for a quick weeknight dinner or a dish to impress guests, this casserole delivers on flavor and convenience. Try this recipe today, and experience the magic of a meal that practically cooks itself!
Additional Tips
- Make Ahead: You can assemble the casserole the night before and store it in the refrigerator. Just add a few extra minutes to the baking time.
- Storage: Store leftovers in an airtight container in the refrigerator for up to 3 days.
- Freezing: This casserole can be frozen before baking. Just thaw in the refrigerator overnight before cooking.
Enjoy your cooking, and bon appétit!
Here are some helpful serving and storage tips for your No-Peek Chicken Casserole to ensure it stays fresh and delicious:
Serving Tips
- Presentation: Serve the casserole directly from the baking dish for a rustic, homey feel. If you prefer a more formal presentation, consider scooping individual portions onto plates.
- Garnish: Fresh herbs like parsley or chives can add a pop of color and flavor. Sprinkle a bit on top just before serving to enhance the dish visually and tastefully.
- Accompaniments: Pair the casserole with sides that complement its creamy texture and flavors. Some great options include:
- Green Salad: A crisp salad with a light vinaigrette balances the richness of the casserole.
- Steamed Vegetables: Broccoli, green beans, or carrots provide a nutritious contrast and add color to the meal.
- Bread: Serve with warm crusty bread or dinner rolls to soak up the creamy sauce.
- Temperature: Serve the casserole warm, as it tastes best right after it comes out of the oven. Allow it to cool slightly before serving to prevent burns.
Storage Tips
- Cooling: Let the casserole cool to room temperature before storing to prevent condensation, which can make it soggy.
- Refrigeration: Store leftover casserole in an airtight container in the refrigerator. It can be kept for up to 3 days.
- Freezing:
- Before Baking: If you want to prepare it ahead of time, assemble the casserole but do not bake it. Cover tightly with foil and freeze. When ready to use, thaw overnight in the refrigerator and then bake as directed.
- After Baking: If you have leftover baked casserole, you can freeze it in portions. Cut into squares and place them in freezer-safe containers or bags. It can be frozen for up to 3 months.
- Reheating:
- Oven: For the best texture, reheat individual portions in the oven at 350°F (175°C) until heated through. Cover with foil to prevent drying out.
- Microwave: If you’re in a hurry, you can microwave individual servings. Heat in short increments, checking often to ensure it doesn’t overheat.
- Re-seasoning: Sometimes, leftover casseroles may benefit from a little extra seasoning after reheating. A sprinkle of salt, pepper, or a dash of hot sauce can revive the flavors.
By following these serving and storage tips, you can enjoy your No-Peek Chicken Casserole for days to come while maintaining its delicious taste and texture!
FAQ 1: Can I use brown rice instead of white rice in the casserole?
Answer: Yes, you can use brown rice in No-Peek Chicken Casserole, but you will need to adjust the cooking time. Brown rice typically takes longer to cook than white rice. To ensure the chicken and rice are both cooked properly, increase the baking time by about 15-20 minutes, and make sure to check that the rice is tender and the chicken is fully cooked before serving.
FAQ 2: Is it possible to make this casserole ahead of time?
Answer: Absolutely! You can prepare No-Peek Chicken Casserole ahead of time by assembling all the ingredients in the casserole dish without baking it. Cover it tightly and store it in the refrigerator for up to 24 hours before baking. If you want to freeze it, you can assemble the casserole, cover it with foil, and freeze it unbaked. When you’re ready to cook it, thaw it in the refrigerator overnight and bake as directed.
FAQ 3: Can I add vegetables to the casserole?
Answer: Yes! Adding vegetables is a great way to enhance the nutrition and flavor of your No-Peek Chicken Casserole. You can include vegetables like broccoli, bell peppers, peas, or carrots. Just be sure to chop them into small, even pieces to ensure they cook through during the baking process. You can mix them into the rice and sauce before adding the chicken.
FAQ 4: How do I know when the casserole is done cooking?
Answer: The No-Peek Chicken Casserole is done when the chicken reaches an internal temperature of 165°F (75°C) and the rice is tender. You can check the chicken using a meat thermometer. If you don’t have a thermometer, cut into a piece of chicken to ensure it’s no longer pink inside, and the juices run clear. The casserole should also be bubbly around the edges, and the cheese should be melted and slightly golden if you’ve added it on top.
Print
No-Peek Chicken Casserole
- Prep Time: 10 minutes
- Cook Time: 1 hour 30 minutes
- Total Time: 1 hour 40 minutes
- Yield: 6 servings 1x
- Category: Main Course
- Method: Baking
- Cuisine: American
Description
This No-Peek Chicken Casserole is an easy, hands-off dish where tender chicken and creamy rice come together with minimal effort. Just assemble, cover tightly, bake, and resist the urge to peek! The combination of chicken, creamy soup, and flavorful onion soup mix makes for a comforting, satisfying meal.
Ingredients
- 1 1/2 cups long-grain white rice (uncooked)
- 1 can cream of chicken soup (10.5 oz)
- 1 can cream of celery soup (10.5 oz)
- 1 1/2 cups low-sodium chicken broth (or water)
- 1 envelope onion soup mix
- 1 1/2 lbs boneless, skinless chicken breasts (or thighs)
- Salt and pepper, to taste
- Chopped fresh parsley for garnish (optional)
Instructions
-
Preheat the Oven:
- Preheat your oven to 350°F (175°C). Grease a 9×13-inch baking dish with cooking spray.
-
Prepare the Rice Mixture:
- In the baking dish, combine the uncooked rice, cream of chicken soup, cream of celery soup, and chicken broth. Stir until evenly mixed.
-
Add the Chicken:
- Season the chicken breasts with salt and pepper. Arrange the chicken on top of the rice mixture.
-
Add Onion Soup Mix:
- Sprinkle the onion soup mix evenly over the chicken and rice mixture.
-
Cover and Bake:
- Cover the baking dish tightly with aluminum foil. Bake for 1 hour and 30 minutes, or until the rice is tender and the chicken is fully cooked. Avoid removing the foil while baking.
-
Serve:
- Remove from the oven, let it rest for a few minutes, then garnish with fresh parsley if desired. Serve warm.
Notes
- Storage: Store leftovers in the fridge for up to 3 days. Reheat in the oven at 350°F until warmed through.
- Variations: Add frozen vegetables like peas or broccoli for extra nutrition
- Make Ahead: Assemble the casserole, cover tightly, and refrigerate for up to 1 day. Bake as directed.

