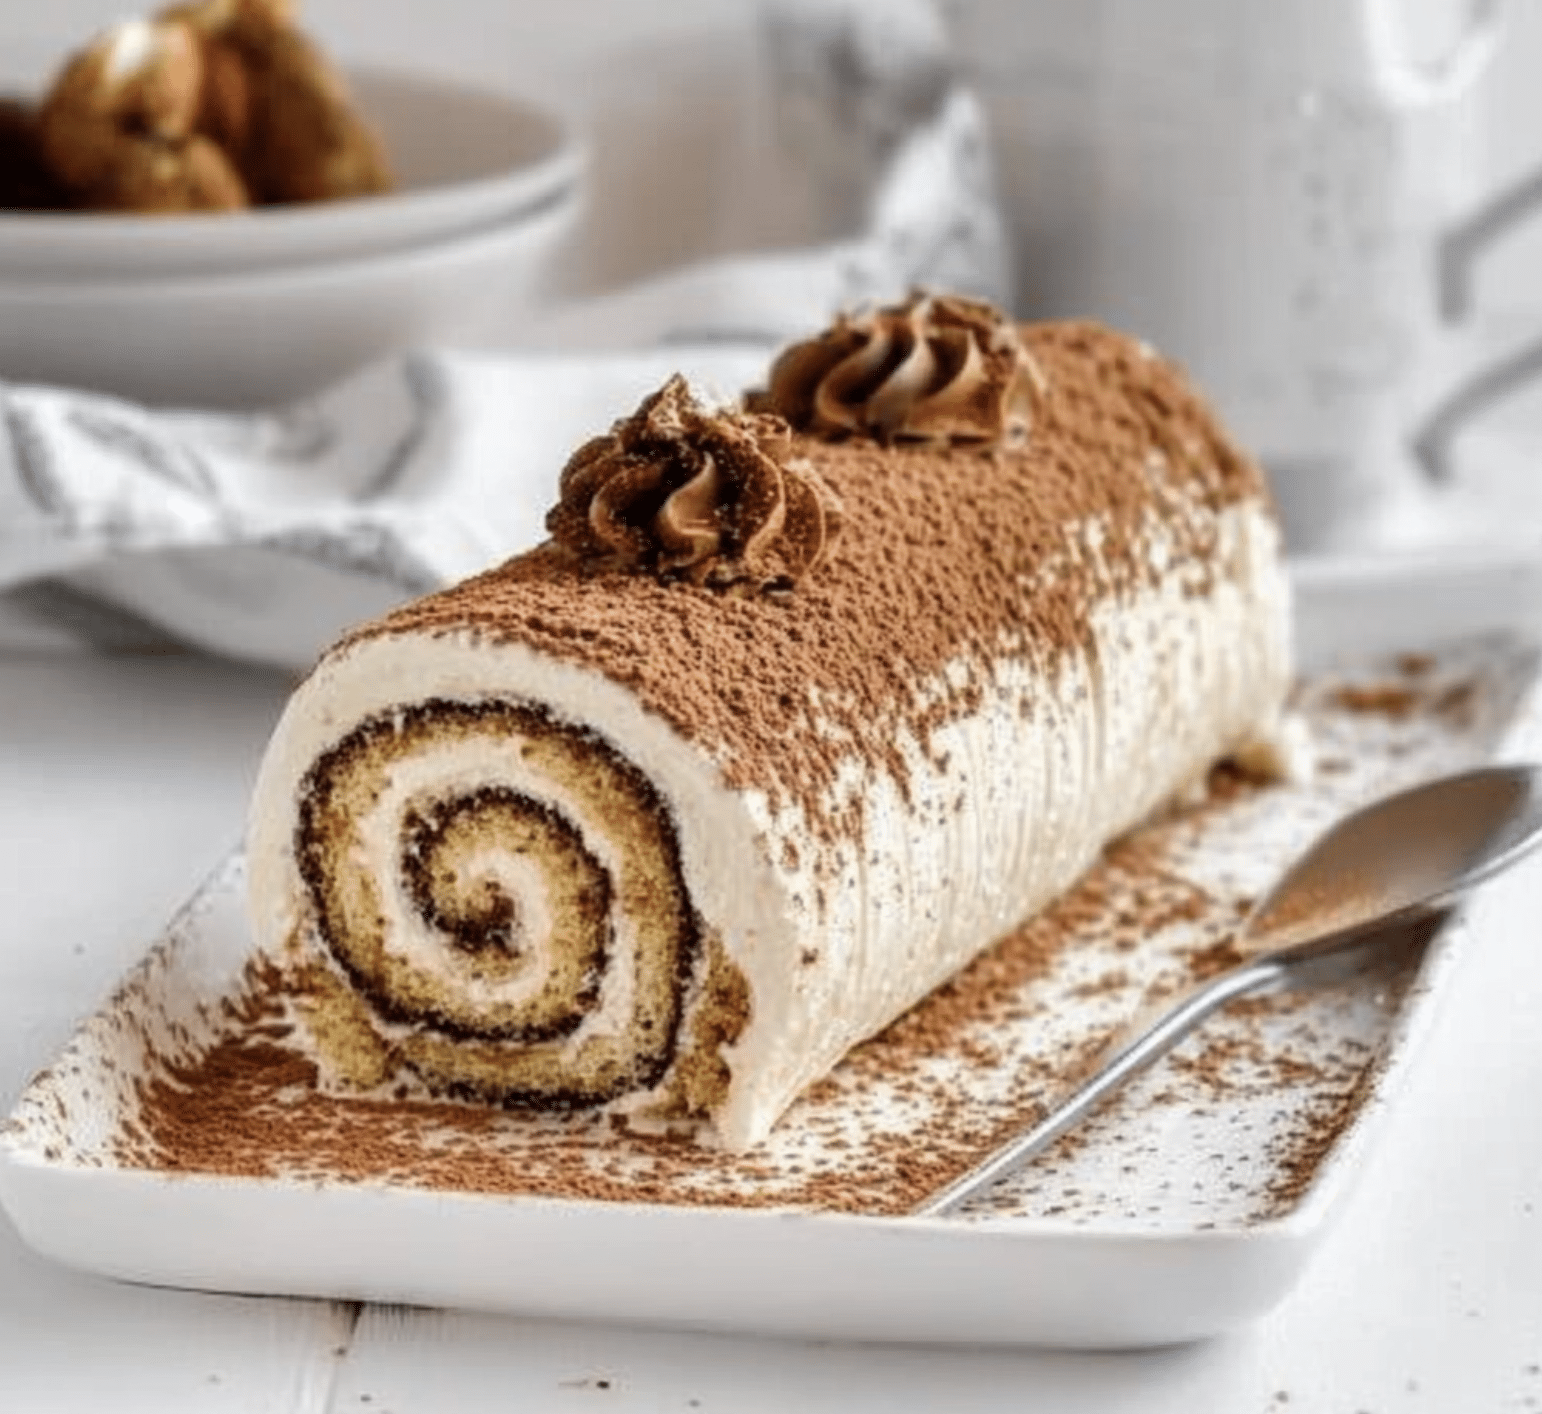
No-Bake Vanilla Tiramisu Roll is an elegant and decadent dessert that’s perfect for any celebration. This delightful twist on traditional tiramisu swaps out the layered presentation for a stunning roll made with vanilla sponge cookies, creamy mascarpone filling, and a hint of coffee. The best part? No oven required!
Why You’ll Love This Recipe
- No-Bake Delight: Perfect for when you want a show-stopping dessert without turning on the oven.
- Elegant Presentation: The rolled shape makes it a centerpiece-worthy dessert.
- Rich and Creamy: Mascarpone filling brings indulgence in every bite.
- Quick to Assemble: Minimal prep time with maximum visual and flavor impact.
- Customizable: Easily tweak flavors to suit your preferences.
Ingredients
(Tip: You’ll find the full list of ingredients and measurements in the recipe card below.)
For the Roll:
- Ladyfinger biscuits or vanilla sponge cookies
- Strong brewed coffee, cooled
- Vanilla extract
For the Filling:
- Mascarpone cheese
- Heavy cream
- Powdered sugar
- Vanilla extract
For the Garnish:
- Cocoa powder
- Shaved white chocolate or chocolate curls
- Optional: Fresh berries or mint leaves
Directions
- Prepare the Base:
- Lay a sheet of plastic wrap on a flat surface. Arrange ladyfinger biscuits or sponge cookies in a single layer, slightly overlapping to create a rectangle.
- Soak the Biscuits:
- Brush the biscuits lightly with the brewed coffee mixed with a splash of vanilla extract. Be careful not to oversoak, as they should remain firm enough to roll.
- Make the Filling:
- In a mixing bowl, beat mascarpone cheese, powdered sugar, and vanilla extract until smooth.
- In a separate bowl, whip the heavy cream until stiff peaks form, then fold it into the mascarpone mixture.
- Assemble the Roll:
- Spread the filling evenly over the biscuit layer, leaving a small border around the edges.
- Using the plastic wrap to assist, gently roll the biscuit layer into a log shape. Wrap the roll tightly in the plastic wrap and refrigerate for at least 4 hours, or until firm.
- Finish and Serve:
- Unwrap the chilled roll and transfer it to a serving platter. Dust with cocoa powder and garnish with shaved white chocolate, berries, or mint leaves. Slice and serve.
Servings and Timing
- Servings: 8–10 slices
- Prep Time: 20 minutes
- Chilling Time: 4 hours
- Total Time: 4 hours 20 minutes
Variations
- Chocolate Twist: Add a layer of melted chocolate or Nutella before rolling.
- Fruit-Flavored: Add a layer of strawberry jam or fresh fruit slices for a fruity twist.
- Alcohol-Infused: Add a splash of coffee liqueur, like Kahlúa, to the coffee mixture.
- Matcha Delight: Replace cocoa powder with matcha powder for a unique flavor profile.
- Gluten-Free: Use gluten-free biscuits to cater to dietary needs.
Storage/Reheating
- Storage: Keep leftovers in an airtight container in the refrigerator for up to 3 days.
- Freezing: The roll can be frozen for up to 1 month. Thaw in the refrigerator overnight before serving.
FAQs
1. Can I use cream cheese instead of mascarpone?
Yes, cream cheese can be substituted, but the flavor will be tangier and less traditional.
2. What if my biscuits break while rolling?
Use the filling as “glue” to patch any cracks or breaks, and the roll will still hold together beautifully.
3. Can I make this dessert ahead of time?
Absolutely! Prepare the roll up to 2 days in advance and garnish just before serving.
4. Do I have to use coffee?
No, you can replace coffee with hot chocolate or milk for a non-coffee version.
5. How do I prevent the biscuits from becoming too soggy?
Brush lightly with coffee rather than soaking them to maintain their structure.
6. Can I add other flavors to the filling?
Yes, try almond or hazelnut extract for a different twist.
7. What’s the best way to slice the roll cleanly?
Use a sharp knife and wipe it clean between slices for neat presentation.
8. Can I decorate the roll differently?
Yes, try drizzling with caramel or chocolate sauce for added flair.
9. Is this dessert kid-friendly?
For a kid-friendly version, replace coffee with milk or a flavored syrup.
10. Can I use a different type of cookie?
Yes, sponge cake strips or graham crackers can be used as alternatives to ladyfingers.
Conclusion
No-Bake Vanilla Tiramisu Roll is a luscious dessert that’s as easy to make as it is to impress. With its creamy filling, coffee-kissed biscuits, and stunning rolled presentation, it’s a versatile treat for any occasion, especially during the holidays. Whip up this quick and elegant dessert, and watch it disappear from the table!
Print
No-Bake Vanilla Tiramisu Roll
- Prep Time: 20 minutes
- Cook Time: 4 hours
- Total Time: 4 hours 20 minutes
- Yield: 8–10 servings 1x
- Category: Dessert
- Method: No-Bake
- Cuisine: Italian-inspired
Description
This no-bake vanilla tiramisu roll is a creamy and indulgent dessert with layers of coffee-soaked ladyfingers and a luscious mascarpone vanilla cream filling. Rolled up and chilled, it’s a modern twist on the classic Italian dessert that’s easy to prepare and perfect for the holidays.
Ingredients
For the roll:
- 24–30 ladyfingers (savoiardi)
- 1 cup (240ml) brewed coffee, cooled
- 1/4 cup (60ml) coffee liqueur (optional)
For the filling:
- 8 oz (225g) mascarpone cheese, softened
- 1 cup (240ml) heavy cream, whipped
- 1/2 cup (60g) powdered sugar
- 1 tsp vanilla extract
- 1/2 tsp almond extract (optional)
For the topping:
- 2 tbsp cocoa powder, for dusting
- Shaved white chocolate (optional)
Instructions
- Prepare the filling:
- In a large mixing bowl, beat mascarpone cheese, powdered sugar, vanilla extract, and almond extract until smooth.
- Gently fold in the whipped heavy cream until fully combined. Set aside.
- Prepare the ladyfingers:
- In a shallow dish, combine the brewed coffee and coffee liqueur (if using).
- Quickly dip each ladyfinger into the coffee mixture, ensuring they are moist but not soggy.
- Assemble the roll:
- On a large piece of plastic wrap, arrange the soaked ladyfingers in a single layer, slightly overlapping, to form a rectangle (approximately 10×12 inches).
- Spread the mascarpone filling evenly over the ladyfingers, leaving a small border around the edges.
- Roll the dessert:
- Using the plastic wrap to help, gently roll the ladyfingers into a tight log, starting from the short side. Wrap the roll tightly in the plastic wrap and refrigerate for at least 4 hours, or overnight for best results.
- Finish and serve:
- Remove the roll from the refrigerator and carefully unwrap. Dust the top with cocoa powder and garnish with shaved white chocolate, if desired.
- Slice into 1-inch pieces and serve chilled.
Notes
- For a non-alcoholic version, replace the coffee liqueur with vanilla or almond extract in the soaking liquid.
- To stabilize the whipped cream, you can add 1/2 tsp of unflavored gelatin dissolved in a little warm water before folding it into the mascarpone.


