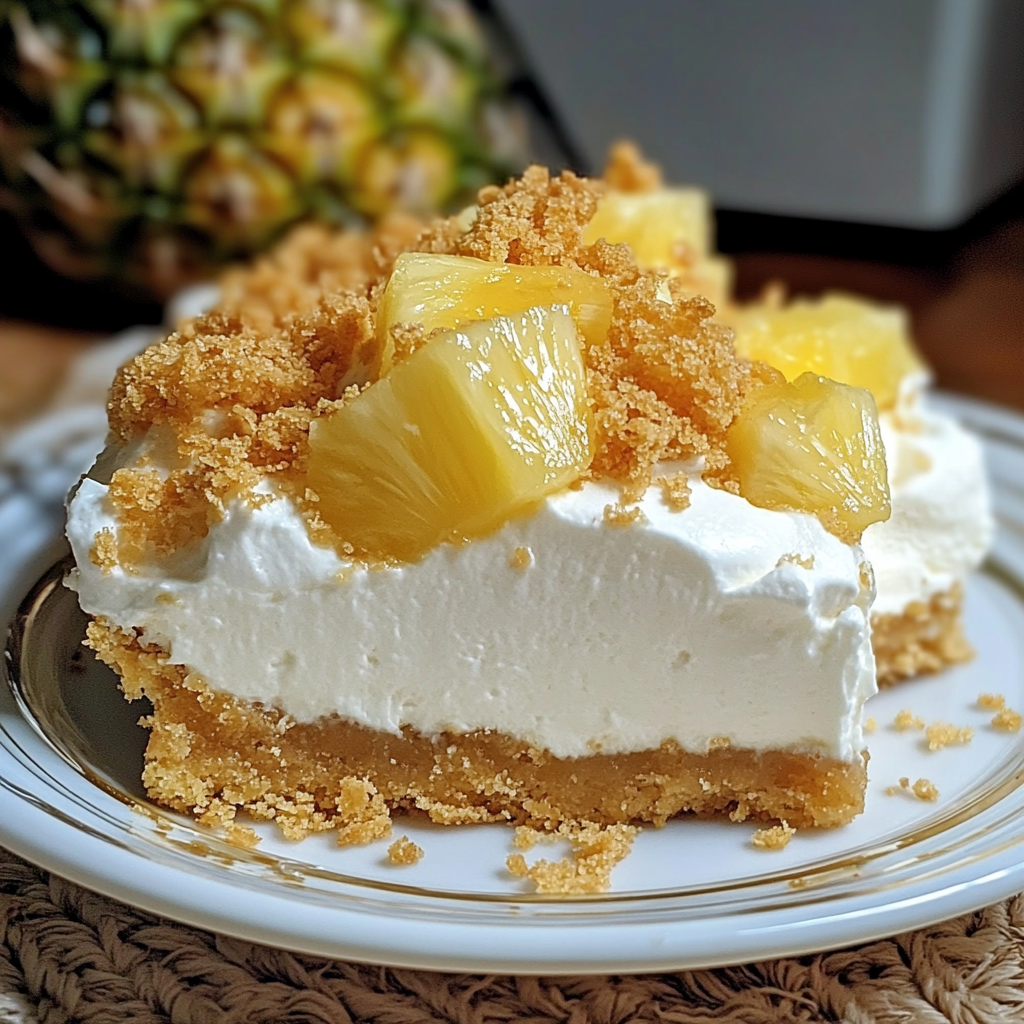
If you’re craving a light, tropical dessert that’s both creamy and delicious without turning on your oven, look no further than this No-Bake Pineapple Heaven Cheesecake Dessert. With its refreshing pineapple flavor and smooth, creamy texture, this dessert is perfect for any occasion, from summer barbecues to holiday gatherings. Plus, it’s incredibly easy to make!
Ingredients for No-Bake Pineapple Heaven Cheesecake Dessert
Here’s what you’ll need to make this creamy, pineapple-flavored dessert:
For the Crust:
- 1 ½ cups graham cracker crumbs
- ½ cup unsalted butter, melted
- 2 tablespoons sugar
For the Cheesecake Filling:
- 2 (8 oz) packages cream cheese, softened
- 1 cup powdered sugar
- 1 teaspoon vanilla extract
- 1 (8 oz) container whipped topping
- 1 can (20 oz) crushed pineapple, drained
- ½ cup pineapple juice (reserve from can)
For Topping (optional):
- Shredded coconut
- Fresh pineapple chunks
- Extra whipped cream
How to Make No-Bake Pineapple Heaven Cheesecake Dessert
Step 1: Prepare the Crust
Start by making the graham cracker crust. In a medium bowl, combine the graham cracker crumbs, melted butter, and sugar. Mix until the crumbs are well-coated with butter. Press the mixture into the bottom of a 9-inch springform pan or pie dish, creating an even layer. Refrigerate while you prepare the filling.
Step 2: Make the Cheesecake Filling
In a large mixing bowl, beat the softened cream cheese and powdered sugar until smooth and fluffy. Add the vanilla extract and continue to beat until combined. Gently fold in the whipped topping until fully incorporated, creating a light and airy filling.
Step 3: Add the Pineapple
Stir in the drained crushed pineapple and reserved pineapple juice into the cheesecake filling. This adds the tropical flavor that makes this dessert so special. Mix until everything is well combined.
Step 4: Assemble the Dessert
Pour the pineapple cheesecake filling over the prepared crust, spreading it into an even layer. Smooth the top with a spatula and refrigerate for at least 4 hours, or overnight, to allow it to set.
Step 5: Add the Toppings
Before serving, feel free to add a little extra flair to your No-Bake Pineapple Heaven Cheesecake Dessert. Sprinkle with shredded coconut, top with fresh pineapple chunks, or garnish with a dollop of whipped cream for that extra touch of indulgence.
Tips for the Perfect No-Bake Pineapple Heaven Cheesecake Dessert
- Use Fresh Pineapple: For an extra burst of flavor, you can use fresh pineapple instead of canned. Just chop it finely and drain it well to avoid excess moisture.
- Make Ahead: This dessert is perfect for making ahead! Prepare it the day before and let it chill in the fridge overnight for an even firmer texture.
- Customize: Get creative with your toppings. You can use toasted coconut, a drizzle of caramel, or even some maraschino cherries for a fun twist!
Healthier Alternative
If you want to make this dessert a bit lighter, you can substitute low-fat cream cheese and whipped topping, or use a graham cracker crust alternative like crushed nuts or oats for a more wholesome base.
Conclusion
This No-Bake Pineapple Heaven Cheesecake Dessert is a must-try for anyone who loves tropical flavors and easy-to-make desserts. Whether you’re hosting a party, looking for a refreshing summer treat, or just need something quick and indulgent, this dessert will be the star of the show. It’s light, creamy, and bursting with tropical goodness—what’s not to love?
Serving and Storage Tips for No-Bake Pineapple Heaven Cheesecake Dessert
Serving Tips:
- Chill Before Serving: For the best texture and flavor, allow the dessert to chill in the fridge for at least 4 hours, or overnight if possible. This allows the cheesecake filling to set and firm up, making it easier to slice and serve.
- Garnish with Fresh Toppings: Before serving, enhance the dessert with a few fresh toppings like shredded coconut, fresh pineapple chunks, or a drizzle of honey or caramel sauce. A dollop of whipped cream also adds a nice touch of extra indulgence.
- Slice Neatly: To get clean slices, use a sharp knife dipped in warm water and wiped dry between cuts. This will help maintain the beautiful layers and prevent sticking.
- Serve in Individual Portions: For a more elegant presentation, consider serving the dessert in individual cups or small bowls, especially if you’re hosting a party or gathering.
Storage Tips:
- Refrigeration: Store any leftover No-Bake Pineapple Heaven Cheesecake Dessert in the refrigerator. Cover it tightly with plastic wrap or store it in an airtight container to keep it fresh for up to 3-4 days.
- Freezing: If you want to make the dessert ahead of time or save leftovers for later, this cheesecake can be frozen! Wrap it tightly with plastic wrap and foil, then freeze for up to 1-2 months. Let it thaw in the refrigerator for a few hours before serving.
- Avoid Toppings Before Storing: If you plan on storing leftovers, it’s best to keep the toppings (like shredded coconut or fresh pineapple) separate, as they can become soggy when stored in the fridge. Add them fresh just before serving.
By following these simple serving and storage tips, you can enjoy your No-Bake Pineapple Heaven Cheesecake Dessert at its best for days to come!
1. Can I use fresh pineapple instead of canned?
Yes, you can absolutely use fresh pineapple! Simply chop it finely and drain any excess juice before adding it to the cheesecake filling. Fresh pineapple can provide an extra burst of flavor, but make sure to remove any excess moisture to prevent the dessert from becoming too watery.
2. Can I make this dessert ahead of time?
Yes, this no-bake dessert is perfect for making ahead! You can prepare it the day before and let it chill in the fridge overnight, allowing it to set and develop even more flavor. Just be sure to cover it tightly to keep it fresh.
3. How long can I store the No-Bake Pineapple Heaven Cheesecake Dessert?
You can store leftovers in the refrigerator for up to 3-4 days. Make sure to cover the dessert with plastic wrap or store it in an airtight container to maintain its freshness. If you need to store it longer, you can freeze it for up to 1-2 months. Just remember to thaw it in the refrigerator before serving.
4. Can I substitute the graham cracker crust with something else?
Yes! If you prefer a different crust, you can substitute the graham cracker crust with crushed digestive biscuits, vanilla wafer cookies, or even a nut-based crust for a gluten-free option. Just make sure to adjust the butter amount to help bind the crust together.

No-Bake Pineapple Heaven Cheesecake Dessert
- Prep Time: 20 minutes
- Cook Time: 4 hours
- Total Time: 4 hours 20 minutes
- Yield: 12–16 1x
- Category: Dessert
- Cuisine: American
Description
This No-Bake Pineapple Heaven Cheesecake Dessert is a light, creamy, and fruity treat that’s perfect for any occasion. With layers of crushed pineapple, a smooth cream cheese filling, and a buttery graham cracker crust, it’s an easy-to-make dessert that’s sure to impress!
Ingredients
For the Crust:
- 2 cups graham cracker crumbs
- 1/2 cup unsalted butter, melted
- 1/4 cup granulated sugar
For the Filling:
- 1 (8 oz) package cream cheese, softened
- 1/2 cup powdered sugar
- 1 (8 oz) container whipped topping (like Cool Whip), thawed
- 1 (20 oz) can crushed pineapple, drained well
For the Topping:
- 1/2 cup shredded sweetened coconut (optional)
- 1/2 cup chopped pecans or walnuts (optional)
- Maraschino cherries for garnish (optional)
Instructions
1. Prepare the Crust:
- In a medium bowl, combine the graham cracker crumbs, melted butter, and sugar. Mix until the crumbs are evenly coated.
- Press the mixture firmly into the bottom of a 9×13-inch dish or pan to form an even layer. Chill in the refrigerator while preparing the filling.
2. Make the Filling:
- In a large bowl, beat the softened cream cheese and powdered sugar until smooth and creamy.
- Gently fold in the whipped topping until fully combined.
- Stir in the drained crushed pineapple, making sure it’s evenly distributed.
3. Assemble the Dessert:
- Spread the cream cheese and pineapple filling evenly over the chilled crust.
- Sprinkle the top with shredded coconut and chopped nuts if desired.
4. Chill and Serve:
- Cover the dish and refrigerate for at least 4 hours, or overnight, to allow the flavors to meld and the filling to set.
- Before serving, garnish with maraschino cherries for a decorative touch. Slice into squares and enjoy!
Notes
- Drain Thoroughly: Ensure the crushed pineapple is well-drained to prevent the filling from becoming runny.
- Make Ahead: This dessert tastes even better the next day, making it a great option for prepping ahead of time.
- Variations: Substitute the graham cracker crust with a vanilla wafer or shortbread crust for a twist.

