If you’re looking for a sweet treat that’s easy to make and even easier to enjoy, mini cheesecakes are the perfect solution. These bite-sized delights are rich, creamy, and customizable, making them an ideal dessert for parties, gatherings, or simply a fun treat at home. In this article, we’ll guide you through a simple mini cheesecake recipe, share tips for perfecting your cheesecakes, and suggest delicious variations.
Why Mini Cheesecakes?
Mini cheesecakes offer the same rich flavor and creamy texture of traditional cheesecakes but in a more manageable size. They are perfect for serving at events where you want to provide guests with a variety of desserts without overwhelming them. Plus, their small size makes them an excellent choice for portion control, allowing everyone to indulge without overdoing it.
Ingredients
To make approximately 12 mini cheesecakes, you will need:
For the Crust:
- 1 cup of graham cracker crumbs
- 1/4 cup of granulated sugar
- 1/4 cup of unsalted butter, melted
For the Filling:
- 16 ounces of cream cheese, softened
- 1/2 cup of granulated sugar
- 2 large eggs
- 1 teaspoon of vanilla extract
- 1/4 cup of sour cream (optional for extra creaminess)
Optional Toppings:
- Fresh fruit (berries, sliced strawberries, etc.)
- Chocolate ganache
- Whipped cream
- Caramel sauce
Instructions
Step 1: Prepare the Crust
- Preheat your oven to 325°F (160°C).
- In a medium bowl, combine the graham cracker crumbs, sugar, and melted butter. Mix until well combined.
- Line a muffin tin with paper liners and evenly distribute the crust mixture into each cup. Press down firmly to create a solid base.
- Bake for 5-7 minutes until golden. Remove from the oven and let cool.
Step 2: Make the Filling
- In a large mixing bowl, beat the softened cream cheese with an electric mixer until smooth and creamy.
- Gradually add the sugar and continue to beat until well combined.
- Add the eggs one at a time, mixing well after each addition. Then, mix in the vanilla extract and sour cream until smooth.
- Pour the filling over the cooled crusts, filling each cup about 2/3 full.
Step 3: Bake
- Bake the mini cheesecakes for 15-20 minutes, or until the edges are set, and the centers are slightly jiggly.
- Turn off the oven and let the cheesecakes cool in the oven with the door ajar for about an hour. This helps prevent cracks on the surface.
- Once cooled, transfer them to the refrigerator and chill for at least 4 hours, preferably overnight.
Step 4: Serve
- Once chilled, remove the mini cheesecakes from the muffin tin and peel off the liners.
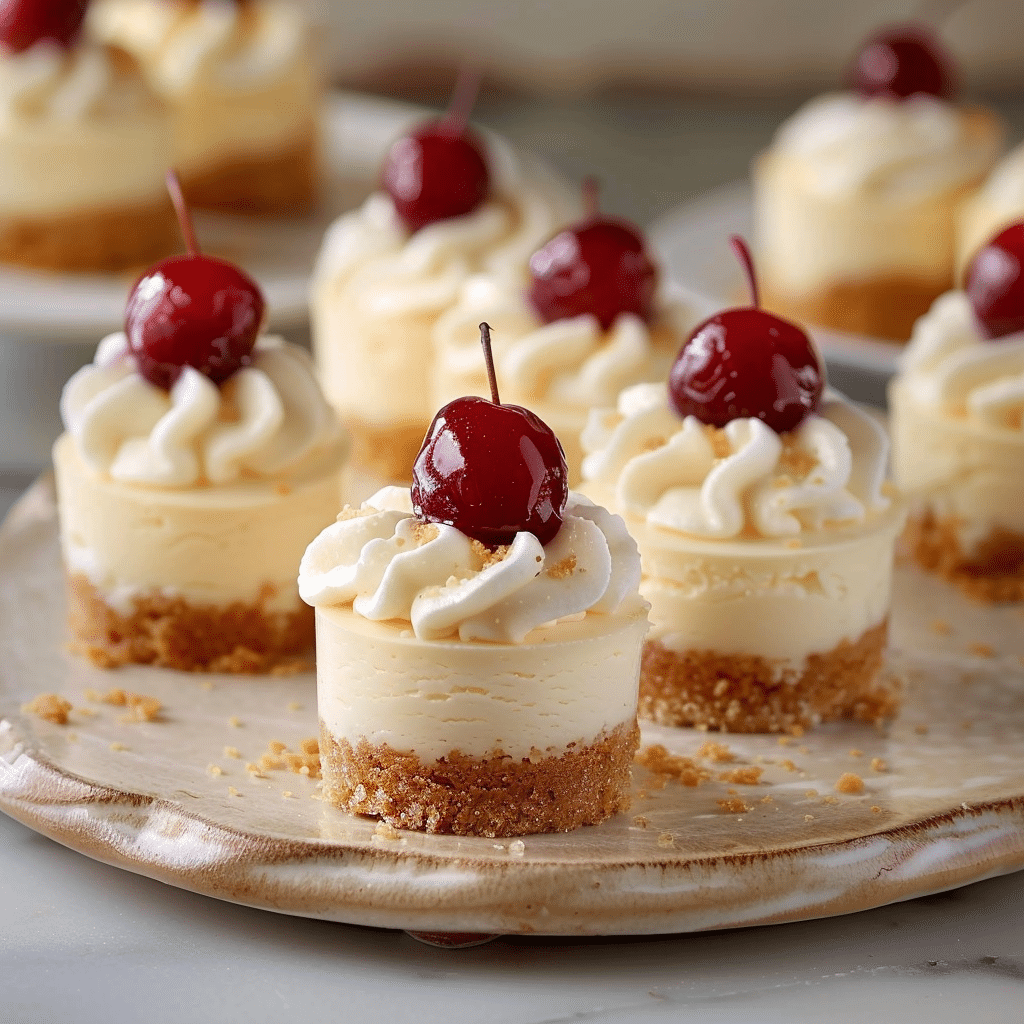
- Top with your favorite toppings and enjoy!
Tips for the Perfect Mini Cheesecakes
- Room Temperature Ingredients: Ensure your cream cheese and eggs are at room temperature for a smooth filling.
- Don’t Overmix: Overmixing can incorporate too much air, causing the cheesecakes to crack while baking. Mix until just combined.
- Chill Thoroughly: Chilling the cheesecakes is crucial for setting their texture and enhancing the flavor.
Delicious Variations
Mini cheesecakes are incredibly versatile! Here are some variations to try:
- Chocolate Mini Cheesecakes: Add cocoa powder to the filling for a chocolatey twist or mix in chocolate chips.
- Fruit Swirl Cheesecakes: Add fruit purée (like raspberry or strawberry) into the filling before baking for a delightful swirl effect.
- Pumpkin Spice Cheesecakes: Mix in pumpkin puree and spices for a fall-inspired treat.
- Lemon Mini Cheesecakes: Add lemon juice and zest for a refreshing citrus flavor.
Conclusion
Mini cheesecakes are a delightful dessert that everyone will love. Their individual servings make them perfect for any occasion, whether it’s a birthday party, holiday gathering, or just a cozy night in. With this easy recipe and the options for customization, you can impress your friends and family with your baking skills. So roll up your sleeves and whip up a batch of these scrumptious mini cheesecakes today! Enjoy the compliments that follow!
Certainly! Here are some helpful serving and storage tips for your mini cheesecakes to ensure they remain delicious and visually appealing:
Serving Tips
- Presentation:
- Serve mini cheesecakes on a decorative platter or cake stand for an eye-catching display.
- Garnish with fresh fruit, a drizzle of chocolate or caramel sauce, or a dollop of whipped cream just before serving to enhance their visual appeal.
- Serving Temperature:
- Mini cheesecakes are best served chilled. Let them sit at room temperature for about 10-15 minutes before serving to enhance the flavor and creaminess.
- Portion Control:
- Consider providing small dessert forks or spoons for easy enjoyment, allowing guests to savor each bite without fuss.
- Pairings:
- Mini cheesecakes pair wonderfully with coffee, tea, or dessert wines. Offering a drink option can elevate the dessert experience.
- Flavor Combinations:
- Mix and match flavors for variety. For instance, if you’ve made different types (like chocolate and fruit), consider creating a mini cheesecake flight for guests to sample.
Storage Tips
- Refrigeration:
- Store mini cheesecakes in an airtight container in the refrigerator. They should be kept chilled, especially if you have added perishable toppings like whipped cream or fruit.
- Longevity:
- Mini cheesecakes can last for up to one week in the refrigerator. However, they are best enjoyed within the first few days for optimal flavor and texture.
- Freezing:
- If you want to make mini cheesecakes in advance, they can be frozen. Wrap each cheesecake tightly in plastic wrap and then in aluminum foil to prevent freezer burn.
- They can be stored in the freezer for up to three months. To serve, thaw them in the refrigerator overnight.
- Avoid Toppings Until Serving:
- If you plan to store your mini cheesecakes for more than a day, it’s best to wait to add toppings until just before serving. This helps maintain their freshness and prevents sogginess.
- Labeling:
- If you freeze them, consider labeling the containers with the flavor and date made, so you can easily identify them later.
By following these serving and storage tips, you can ensure that your mini cheesecakes remain a delightful treat for everyone to enjoy, no matter when they are served!
FAQ 1: Can I use a different type of crust for mini cheesecakes?
Answer: Absolutely! While graham cracker crust is the most common choice, you can experiment with other options such as Oreo cookie crumbs, crushed shortbread cookies, or even a nut-based crust for a gluten-free alternative. Just be sure to adjust the amount of butter or sugar based on the type of crust you choose to maintain the right consistency.
FAQ 2: How do I know when mini cheesecakes are done baking?
Answer: Mini cheesecakes are done baking when the edges are set but the center still has a slight jiggle. It’s important not to overbake them, as this can lead to cracks and a dry texture. They will continue to firm up as they cool, so keep an eye on them in the oven and use the “jiggle test” for best results.
FAQ 3: Can I make mini cheesecakes ahead of time?
Answer: Yes, mini cheesecakes can be made ahead of time, which makes them a great choice for events. You can prepare them a day or two in advance and store them in the refrigerator. If you want to make them further ahead, consider freezing them. Just be sure to thaw them in the refrigerator overnight before serving.
FAQ 4: What are some creative topping ideas for mini cheesecakes?
Answer: There are endless possibilities when it comes to topping mini cheesecakes! Some popular options include fresh fruit (like berries or sliced peaches), chocolate ganache, caramel sauce, or whipped cream. You can also try crushed cookies, chopped nuts, or even a drizzle of fruit puree for an artistic touch. Feel free to mix and match to create unique flavor combinations!
Print
Mini Cheesecakes
- Prep Time: 15 minutes
- Chill Time: 3 hours
- Cook Time: 20 minutes
- Total Time: 3 hours 35 minutes
- Yield: 12 mini cheesecakes 1x
- Category: Dessert
- Method: Baking
- Cuisine: American
Description
These mini cheesecakes are creamy, bite-sized treats made with a graham cracker crust and smooth cheesecake filling. Perfect for parties or individual servings, they’re easy to make and can be topped with fruit, caramel, or whipped cream for added flavor.
Ingredients
For the Crust:
- 1 cup graham cracker crumbs
- 3 tablespoons granulated sugar
- 3 1/2 tablespoons unsalted butter, melted
For the Cheesecake Filling:
- 16 oz cream cheese, softened
- 1/3 cup sour cream
- 1/2 cup granulated sugar
- 1 teaspoon vanilla extract
- 2 large eggs
Optional Toppings:
- Cherry pie filling, caramel sauce, fresh berries, or whipped cream
Instructions
-
Prepare the Crust:
- Preheat oven to 325°F (163°C). Line a 12-cup muffin pan with cupcake liners.
- In a bowl, combine the graham cracker crumbs, sugar, and melted butter until the crumbs are evenly moistened.
- Divide the mixture between the liners and press firmly into the bottoms. Bake for 5 minutes, then set aside to cool slightly.
-
Make the Cheesecake Filling:
- In a mixing bowl, beat the softened cream cheese and sour cream until smooth.
- Add the sugar and vanilla extract, mixing until fully combined.
- Beat in the eggs one at a time on low speed, just until incorporated.
-
Assemble and Bake:
- Evenly distribute the cheesecake filling over each crust, filling each liner nearly to the top.
- Bake for 17-20 minutes, or until the centers are set but still slightly jiggly.
- Remove from the oven and let cool in the pan for 1 hour. Then transfer to the fridge to chill for at least 3 hours or overnight.
-
Serve with Toppings:
- Once fully chilled, add your desired toppings such as fruit filling, whipped cream, or chocolate sauce.
Notes
- Storage: Store in an airtight container in the refrigerator for up to 4 days.
- Freezing: Freeze individual cheesecakes without toppings for up to 3 months. Thaw in the fridge overnight before serving.

