
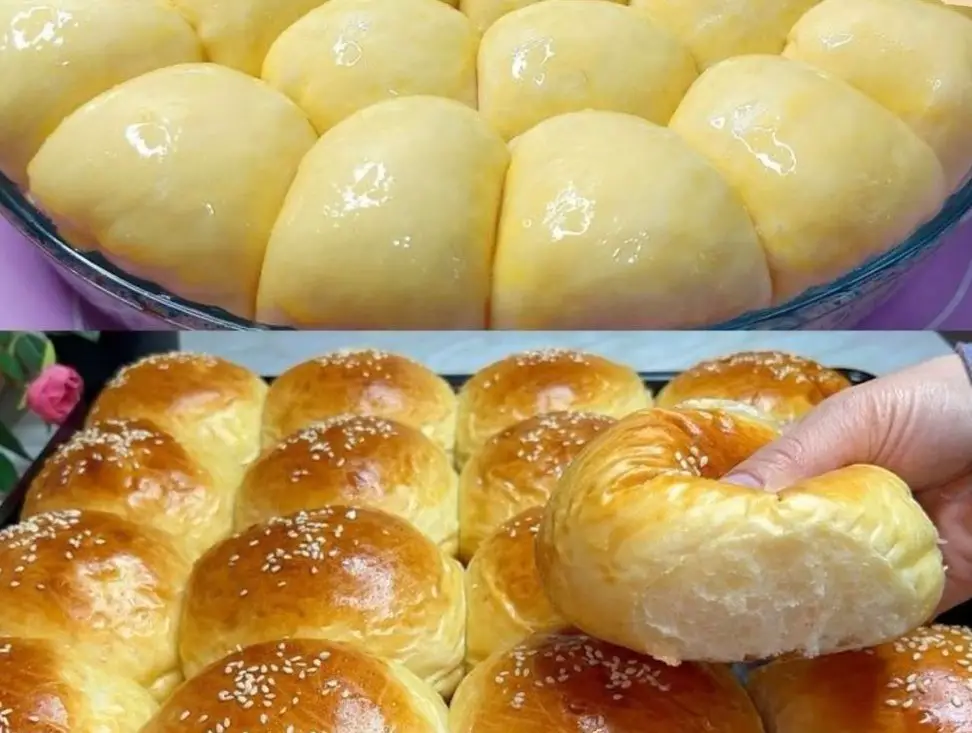
Milk brioche rolls are a delightful treat that blend the richness of whole milk with the softness of brioche dough. These rolls make for a perfect addition to any meal or a tasty snack on their own. With a few simple ingredients and straightforward instructions, you can easily whip up a batch of these homemade rolls to impress your family and friends.
Ingredients:
- 4 cups all-purpose flour
- 2 eggs, at room temperature
- 1 cup whole milk, heated to about 110 degrees Fahrenheit
Directions:

- In a large mixing bowl, start by combining the all-purpose flour and creating a well in the center.
- Crack the eggs into the well and pour in the warmed whole milk.
- Gradually incorporate the flour into the wet ingredients until a dough forms.
- Transfer the dough onto a floured surface and knead it for approximately 10 minutes, or until it becomes smooth and elastic.
- Place the dough in a lightly oiled bowl, cover it with a damp cloth, and let it rise in a warm place until it doubles in size.
- Preheat your oven to 375 degrees Fahrenheit (190 degrees Celsius).
- Once the dough has doubled in size, punch it down and divide it into equal portions to form rolls.
- Arrange the rolls on a baking sheet, leaving some space between each one.
- Allow the rolls to rise again for about 20-30 minutes until they puff up.
- Bake the rolls in the preheated oven for 15-20 minutes, or until they turn golden brown.
- After baking, transfer the brioche rolls to a wire rack and allow them to cool before serving.
Tips:
- Ensure the milk is warmed to around 110 degrees Fahrenheit to activate the yeast without being too hot.
- Knead the dough thoroughly to develop the gluten, which contributes to the texture of the rolls.
- Letting the dough rise in a warm place helps to facilitate the yeast activity and encourages proper fermentation.
- Keep an eye on the rolls while baking to prevent them from over-browning.
Conclusion:
Milk brioche rolls offer a delectable combination of fluffy texture and rich flavor, making them a favorite among bread enthusiasts. By following these simple steps and tips, you can create batches of these irresistible rolls to enjoy with your loved ones. Whether served alongside a meal or savored on their own, these homemade brioche rolls are sure to delight your taste buds. Enjoy the process of baking and savoring these delightful treats!
- Can I use a different type of flour for this recipe, such as whole wheat flour or bread flour?
- While the recipe calls for all-purpose flour, you can certainly experiment with different types of flour to achieve variations in texture and flavor. Whole wheat flour will impart a heartier taste and denser texture to the rolls, while bread flour will result in a chewier texture due to its higher protein content. Keep in mind that you may need to adjust the amount of liquid in the recipe accordingly, as different flours absorb moisture differently.
- What can I substitute for whole milk if I don’t have any on hand?
- If you don’t have whole milk available, you can use alternative dairy or non-dairy options such as skim milk, 2% milk, almond milk, or soy milk. Keep in mind that using lower-fat milk alternatives may result in slightly less richness and tenderness in the brioche rolls compared to using whole milk. You can also experiment with adding a bit of heavy cream or melted butter to mimic the richness of whole milk if desired.
- How can I tell if the dough has risen enough during the proofing process?
- The dough should roughly double in size during the proofing stage, which typically takes about 1 to 2 hours depending on ambient temperature and yeast activity. To check if the dough has risen enough, gently press your finger into the dough; if the indentation remains, the dough is ready to be punched down and shaped into rolls. Be careful not to over-proof the dough, as this can cause it to collapse during baking and result in dense rolls with poor texture.
- Can I prepare the dough ahead of time and bake the rolls later?
- Yes, you can prepare the dough ahead of time and refrigerate it for up to 24 hours before shaping and baking the rolls. After kneading the dough and allowing it to rise for the first proofing, punch it down and shape it into a ball. Lightly coat the dough with oil, place it in a sealed container, and refrigerate until ready to use. When you’re ready to bake the rolls, remove the dough from the refrigerator, let it come to room temperature, then proceed with shaping, proofing, and baking as directed in the recipe. Keep in mind that the final proofing may take longer if the dough is cold from refrigeration.