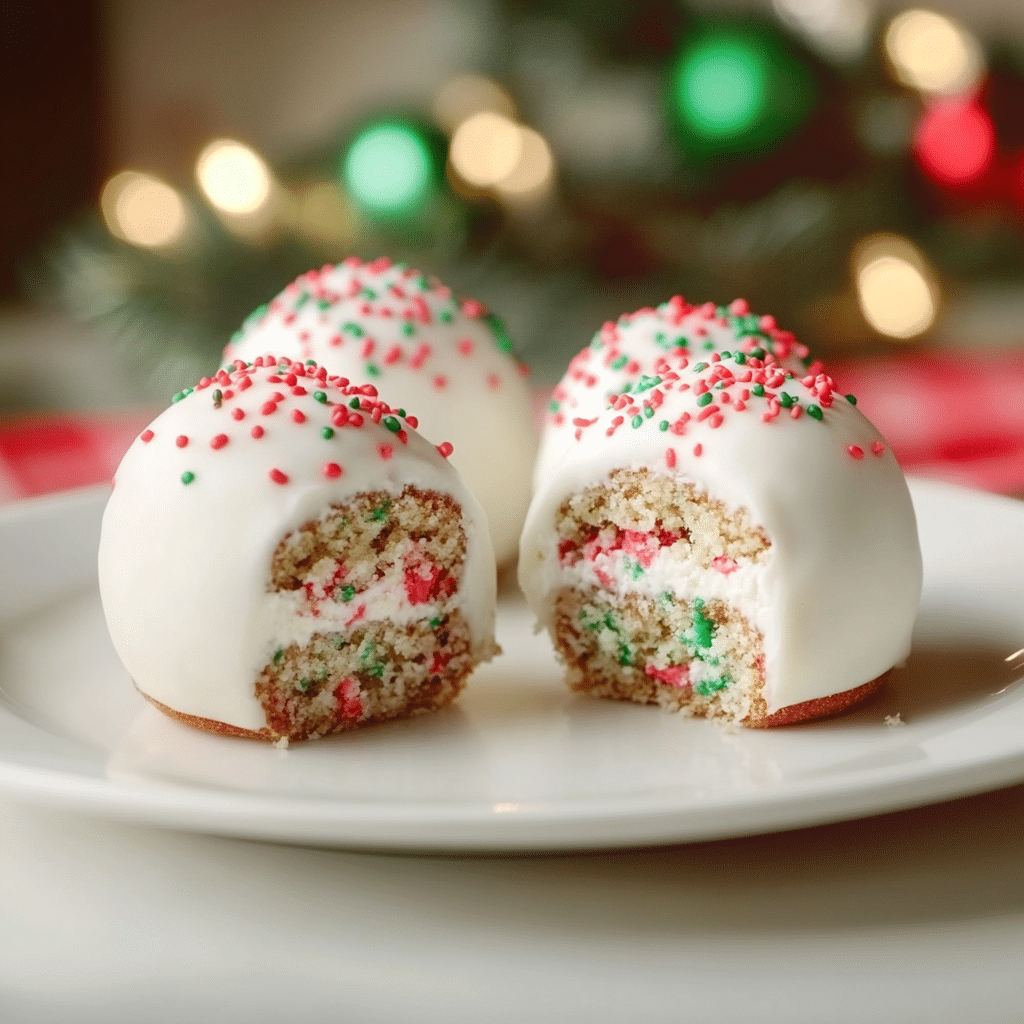
If you love the festive spirit of the holiday season and want to add a touch of sweetness to your celebrations, Little Debbie Christmas Cake Balls are the perfect treat! These easy-to-make cake balls are inspired by the famous Little Debbie Christmas Tree Cakes, but with a fun twist. Soft, delicious, and coated in colorful sprinkles, these cake balls are the perfect combination of nostalgia and creativity. Whether you’re planning a holiday party, gift-giving, or just indulging in some holiday cheer, this recipe will bring joy to your table.
Ingredients You’ll Need
- 1 box of Little Debbie Christmas Tree Cakes: These iconic cakes are the base of your cake balls and give them that signature festive flavor.
- 1 package of cream cheese (8 oz): The cream cheese helps bind the cake and adds richness to the texture.
- White or milk chocolate chips: These will be used to coat the cake balls, making them extra indulgent.
- Holiday sprinkles: For that perfect finishing touch and festive look.
How to Make Little Debbie Christmas Cake Balls
Step 1: Prepare the Cake
Start by taking the Little Debbie Christmas Tree Cakes and crumbling them into small pieces. You can do this by hand or in a food processor. The cake should resemble fine crumbs, and you should have about 3-4 cups of crumbs.
Step 2: Mix with Cream Cheese
In a large bowl, mix the crumbled cakes with softened cream cheese. Use a spoon or your hands to combine the mixture until it’s fully blended and holds together when pressed.
Step 3: Form the Cake Balls
Roll the cake mixture into small, bite-sized balls, about 1 inch in diameter. Place the formed cake balls on a baking sheet lined with parchment paper. Refrigerate the cake balls for at least 30 minutes to set.
Step 4: Coat the Cake Balls
Melt your white or milk chocolate chips in a microwave-safe bowl. Start by heating the chocolate in 30-second intervals, stirring after each, until it’s smooth and fully melted.
Once melted, dip each cake ball into the chocolate, ensuring it’s fully coated. You can use a fork to help with the dipping process, letting any excess chocolate drip off before transferring the cake balls back to the parchment paper.
Step 5: Add Sprinkles
While the chocolate coating is still wet, sprinkle your favorite holiday sprinkles on top of each cake ball. This step adds that extra festive flair!
Step 6: Let the Chocolate Set
Allow the cake balls to sit at room temperature or refrigerate them until the chocolate hardens. Once set, they’re ready to enjoy!
Storage Tips
- Store your Little Debbie Christmas Cake Balls in an airtight container in the refrigerator for up to 1 week.
- If you want to freeze them, place the cake balls on a baking sheet and freeze them until solid. Then transfer them to a freezer-safe container or bag, where they will last for up to 2-3 months.
Final Thoughts
Little Debbie Christmas Cake Balls are a fun and festive treat that is sure to bring holiday cheer to your family and friends. With the soft, sweet flavor of Little Debbie Christmas Tree Cakes and the creamy, rich chocolate coating, these cake balls are perfect for any occasion. Easy to make, colorful, and packed with flavor, they’re a must-try this holiday season!
Serving Tips for Little Debbie Christmas Cake Balls
- Serve on a Festive Platter: Display your cake balls on a decorative holiday platter for an extra touch of festive flair. You can even add some greenery, candy canes, or small ornaments around the platter to make it look even more holiday-themed.
- Pair with Hot Drinks: These cake balls go perfectly with a warm cup of hot cocoa, coffee, or even a spiced cider. The rich chocolate coating complements the warmth of these beverages, making them a delightful pairing for your holiday celebrations.
- Serve at Room Temperature: For the best texture and flavor, serve the cake balls at room temperature. Allow them to sit out for about 10-15 minutes after removing them from the fridge before serving.
- Perfect for Dessert Tables: If you’re hosting a holiday party or potluck, arrange these cake balls on a dessert table alongside other sweet treats like cookies and brownies. Their bright colors and festive design will add a pop of holiday cheer.
- Individual Portions: For a more elegant touch, you can serve each cake ball individually on mini cupcake liners or skewered on decorative sticks. This makes them easy to grab and eat while mingling at parties.
Storage Tips for Little Debbie Christmas Cake Balls
- Refrigerate for Freshness: To keep the cake balls fresh, store them in an airtight container in the refrigerator. They can last for up to a week if properly stored, and chilling helps keep the chocolate coating intact.
- Freezing for Later Use: If you’d like to make these cake balls ahead of time or preserve extras, freeze them. Place the cake balls on a baking sheet and freeze them until firm (about 2 hours). Then transfer them to a freezer-safe bag or container. They can be frozen for up to 2-3 months. Just let them thaw at room temperature for about 10 minutes before serving.
- Layering with Parchment Paper: If you’re stacking cake balls in a container for storage, place parchment paper between layers to prevent them from sticking together and ensure they maintain their shape.
By following these serving and storage tips, you can enjoy these Little Debbie Christmas Cake Balls for days to come while maintaining their fresh taste and festive appearance!
1. Can I use a different type of cake instead of Little Debbie Christmas Tree Cakes?
Yes, you can substitute Little Debbie Christmas Tree Cakes with other types of cake, such as a vanilla or chocolate cake mix. However, the unique flavor and festive colors of the Christmas Tree Cakes give these cake balls their signature look and taste, so using a different cake may alter the final result.
2. Can I make these cake balls ahead of time?
Absolutely! These cake balls can be made ahead of time. You can prepare and coat them, then store them in an airtight container in the refrigerator for up to a week. Alternatively, you can freeze them for up to 2-3 months. Just let them thaw at room temperature before serving.
3. What kind of chocolate should I use for the coating?
You can use either white or milk chocolate chips for coating the cake balls. White chocolate will give a brighter, festive look, while milk chocolate provides a richer, more decadent flavor. You can also use dark chocolate if you prefer a more intense chocolate taste.
4. Can I decorate these cake balls with something other than sprinkles?
Yes! While sprinkles are a popular choice for a festive touch, you can get creative with decorations. Try using holiday-themed edible glitter, colored sugar, crushed candy canes, or even drizzles of melted chocolate. The possibilities are endless to make these cake balls as decorative as you like!

Little Debbie Christmas Cake Balls
- Prep Time: 15 minutes
- Cook Time: 30 minutes
- Total Time: 45 minutes
- Yield: 12–15 cake balls 1x
- Category: Dessert, No-Bake
- Cuisine: American
Description
These Little Debbie Christmas Cake Balls are a fun and festive no-bake treat made with the iconic Little Debbie Christmas Tree Cakes. They’re easy to make, full of holiday cheer, and perfect for parties or gifting.
Ingredients
- 6 Little Debbie Christmas Tree Cakes (any flavor)
- 4 oz cream cheese, softened
- 1 cup white chocolate chips or candy melts
- 1 tbsp coconut oil or vegetable shortening (optional, for smoother coating)
- Holiday sprinkles for decoration
Instructions
1. Prepare the Cake Mixture:
- Crumble the Little Debbie Christmas Tree Cakes into a large mixing bowl.
- Add the softened cream cheese and mix until the mixture becomes smooth and sticky, forming a dough-like consistency.
2. Shape the Cake Balls:
- Roll about 1 tablespoon of the mixture into a ball and place it on a parchment-lined baking sheet.
- Repeat with the remaining mixture. You should get about 12-15 cake balls.
- Freeze the cake balls for 20-30 minutes to firm up.
3. Melt the Chocolate:
- In a microwave-safe bowl, melt the white chocolate chips or candy melts in 20-second intervals, stirring after each, until smooth.
- Stir in the coconut oil or vegetable shortening if the chocolate is too thick.
4. Coat the Cake Balls:
- Using a fork or toothpick, dip each cake ball into the melted chocolate, ensuring it’s fully coated.
- Allow excess chocolate to drip off before placing the cake ball back onto the parchment paper.
- Immediately decorate with holiday sprinkles before the chocolate hardens.
5. Chill and Serve:
- Place the coated cake balls in the refrigerator for 30 minutes, or until the chocolate is fully set.
- Serve chilled or at room temperature.
Notes
- Storage: Store the cake balls in an airtight container in the refrigerator for up to a week.
- Freezing: These cake balls can be frozen for up to 3 months. Thaw in the refrigerator before serving.
- Flavor Options: Experiment with different flavors of Little Debbie cakes for variety.
- Decorative Touch: Drizzle with red or green melted candy melts for extra holiday flair.

