
Looking for a deliciously unique twist on a traditional dessert? This Hawaiian Carrot Cake with Coconut Icing recipe offers a tropical spin that’s sure to impress at your next gathering or provide a sweet escape in your everyday dessert routine. Combining the classic flavors of carrot cake with the lush, aromatic appeal of coconut, this cake is not only mouthwatering but also visually stunning.
Ingredients You’ll Need:
For the Cake:
- 2 cups all-purpose flour
- 2 teaspoons baking soda
- 1/2 teaspoon salt
- 2 teaspoons ground cinnamon
- 3 large eggs
- 2 cups sugar
- 3/4 cup vegetable oil
- 3/4 cup buttermilk
- 2 teaspoons vanilla extract
- 2 cups grated carrot
- 1 cup crushed pineapple (drained)
- 1 cup shredded coconut
- 1 cup chopped macadamia nuts or walnuts
For the Coconut Icing:
- 1/2 cup butter (room temperature)
- 8 oz cream cheese (room temperature)
- 4 cups powdered sugar
- 2 teaspoons vanilla extract
- 1 cup shredded coconut
Step-by-Step Baking Instructions:
- Preheat Oven and Prepare Pans:
Start by preheating your oven to 350°F (175°C). Grease and flour two 9-inch cake pans or line them with parchment paper to prevent sticking. - Mix Dry Ingredients:
In a large bowl, whisk together the flour, baking soda, salt, and ground cinnamon. Ensuring these ingredients are well mixed will help avoid clumps in your batter. - Combine Wet Ingredients:
In a separate bowl, beat the eggs and sugar together until smooth. Gradually add the vegetable oil, buttermilk, and vanilla extract while continuing to beat the mixture. This combination provides the liquid base of your cake. - Incorporate Dry Mix into Wet Mix:
Slowly add the dry ingredients to the wet mix, stirring until just combined. Over-mixing can make the cake tough, so mix until it’s just uniform. - Fold in Carrots and More:
Fold in the grated carrots, drained pineapple, shredded coconut, and chopped nuts to the batter. Each of these ingredients adds to the moistness and tropical flavor of the cake. - Bake the Cake:
Divide the batter evenly between the prepared cake pans. Bake in the preheated oven for 25-30 minutes, or until a toothpick inserted into the center of the cakes comes out clean. - Cool and Prepare Icing:
Let the cakes cool in the pans for about 10 minutes, then turn them out onto wire racks to cool completely. While the cakes are cooling, prepare the icing by beating together butter, cream cheese, powdered sugar, and vanilla extract until smooth and creamy. - Add Coconut to Icing:
Stir in the shredded coconut into the icing, mixing well to distribute evenly. - Assemble the Cake:
Once the cakes are completely cooled, spread a layer of coconut icing on the first layer of the cake. Top with the second cake layer and cover the entire cake with the remaining icing. - Garnish and Serve:
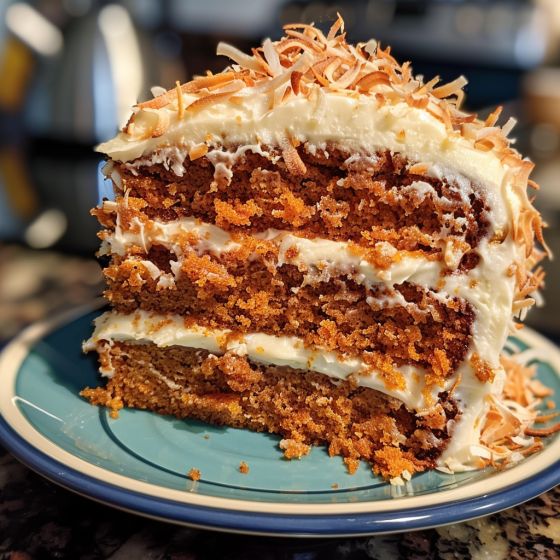
Optionally, you can garnish the cake with additional nuts or toasted coconut flakes. Slice and serve!
Why Try This Recipe?
This Hawaiian Carrot Cake with Coconut Icing recipe is perfect for those who love to combine rich and vibrant flavors. It’s not just a cake; it’s a statement dessert that brings a piece of tropical paradise to your table. Whether it’s for a festive occasion or a casual coffee break, this cake promises to deliver a delightful experience.
Enjoy baking this lush dessert that promises not just to satisfy your sweet tooth but also to transport you to the tropical beaches of Hawaii with every bite!
Serving and Storage Tips for Hawaiian Carrot Cake with Coconut Icing
Serving Tips:
- Room Temperature Serving: For the best flavor and texture, serve the Hawaiian Carrot Cake at room temperature. If you’ve refrigerated the cake, take it out at least 30 minutes before serving to allow it to come to room temperature.
- Pair with Beverages: This cake pairs wonderfully with a variety of beverages. Serve it with coffee or tea for a classic combination, or go tropical by pairing it with a cold glass of pineapple juice or a coconut milk latte.
- Garnishing for Extra Flair: Just before serving, consider adding a touch of extra garnish to enhance the cake’s tropical vibe. Sprinkle with toasted coconut flakes, extra chopped nuts, or even edible flowers for a decorative touch.
- Portion Sizes: The richness of the cake with its moist texture and creamy icing means a little goes a long way. Consider slicing smaller portions, especially if serving as part of a larger meal or dessert spread.
Storage Tips:
- Refrigerate for Freshness: Because of the cream cheese in the icing, it’s best to store this cake in the refrigerator. Cover it loosely with plastic wrap or keep it in an airtight container. Properly stored, the cake can last up to 5 days.
- Freezing for Longevity: If you need to store the cake longer, Hawaiian Carrot Cake freezes exceptionally well. To freeze, wrap the cake slices individually in plastic wrap and then place them in a sealable freezer bag. The cake can be frozen for up to 3 months. Thaw overnight in the refrigerator before serving.
- Avoiding Sogginess: If you’re storing the cake in the refrigerator, place a piece of parchment paper directly on the surface of the icing before covering it with plastic wrap. This helps prevent the icing from sticking to the wrap and keeps the surface moist.
- Revitalizing the Cake: If the cake has been refrigerated and feels a bit dry, you can revitalize it slightly by warming it in the microwave for a few seconds. Be careful not to overheat, especially if the cake is iced, as the icing may melt.
By following these serving and storage tips, you can ensure that your Hawaiian Carrot Cake remains as delicious as the day it was made, providing that perfect blend of sweet, spice, and everything nice for a bit longer. Whether enjoying it at a festive occasion or savoring it over a few days, this cake is a treat that keeps on giving.
1. Can I make this cake gluten-free?
Absolutely! To make this Hawaiian Carrot Cake gluten-free, substitute the all-purpose flour with a gluten-free flour blend that is designed for baking. Be sure to check that other ingredients like baking soda and powdered sugar are also gluten-free certified to avoid cross-contamination.
2. What can I use if I don’t have buttermilk?
If you don’t have buttermilk on hand, you can easily make a substitute. For each cup of buttermilk required, you can use 1 cup of regular milk mixed with 1 tablespoon of lemon juice or white vinegar. Stir the mixture and let it sit for about 5 minutes before using it in your recipe.
3. How do I know when the carrot cake is done baking?
The best way to check if your carrot cake is done is to insert a toothpick into the center of the cake. If it comes out clean or with just a few moist crumbs (but no wet batter), the cake is done. Additionally, the cake should spring back when touched lightly in the center.
4. Can I add or replace some ingredients in the recipe?
Yes, this recipe is quite flexible. If you prefer not to include nuts due to allergies or personal taste, you can omit them without affecting the overall cake. You could also consider adding raisins or dried cranberries for a different texture and flavor. Some people like to add a bit of coconut extract to the cake batter or icing for an enhanced coconut flavor. Adjusting the recipe to suit your taste or dietary requirements can be done easily with a bit of experimentation.