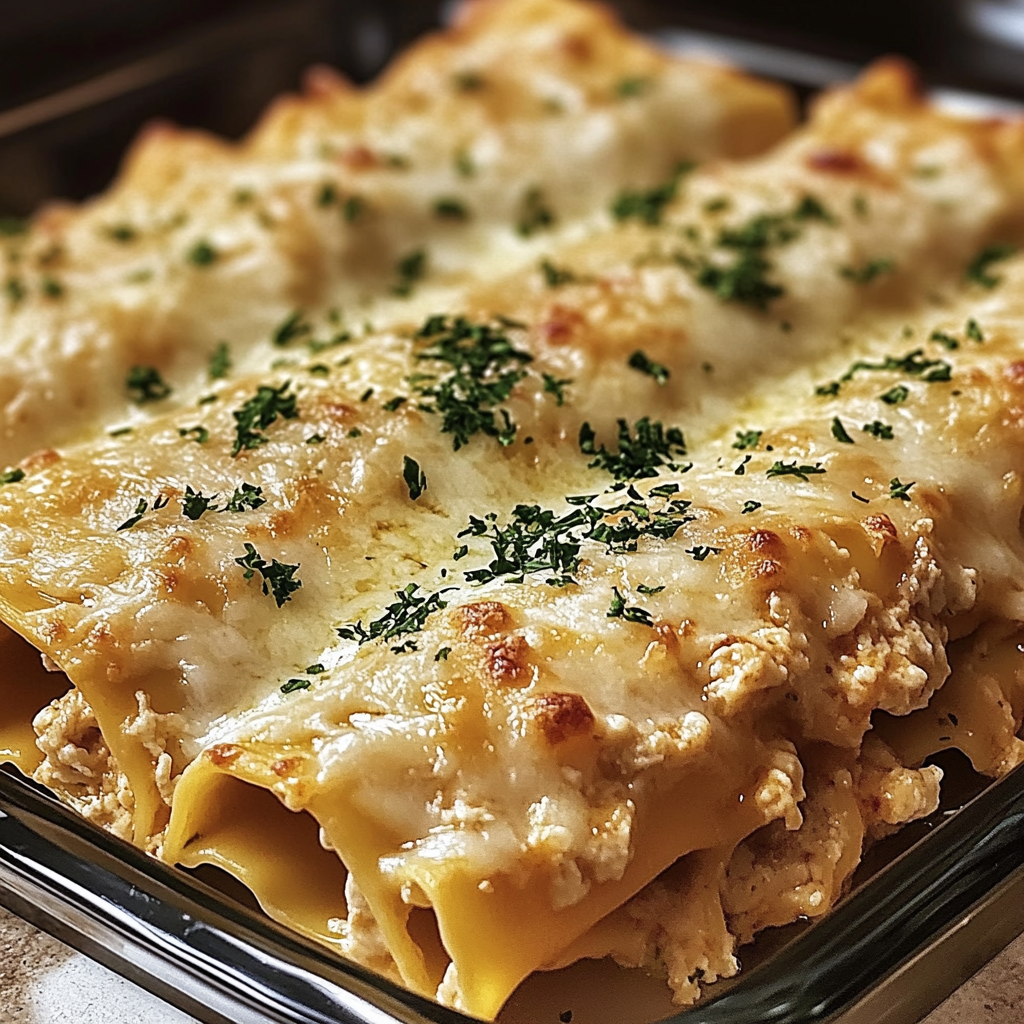
If you’re looking for a unique twist on traditional lasagna that’s both delicious and easy to prepare, these Garlic Parmesan Chicken Lasagna Roll-Ups are sure to impress. Perfect for weeknight dinners or a family gathering, this recipe combines the comfort of lasagna with the savory richness of garlic, Parmesan, and tender chicken. Read on to discover how to make this mouthwatering dish step-by-step!
Ingredients You’ll Need
- 12 lasagna noodles
- 2 cups cooked chicken, shredded (rotisserie chicken works great)
- 2 cups ricotta cheese
- 1 ½ cups shredded mozzarella cheese
- 1 cup grated Parmesan cheese
- 2 cups spinach (optional, for extra greens)
- 3 cloves garlic, minced
- 1 egg
- 1 ½ cups marinara sauce
- 2 tablespoons butter
- Salt and pepper, to taste
- Fresh parsley, chopped (for garnish)
How to Make Garlic Parmesan Chicken Lasagna Roll-Ups
Step 1: Prepare the Lasagna Noodles
Start by cooking the lasagna noodles according to the package directions. Once cooked, drain and lay the noodles flat on a large sheet of parchment paper or a clean kitchen towel to prevent sticking.
Step 2: Make the Filling
In a large bowl, combine the shredded chicken, ricotta cheese, 1 cup of mozzarella cheese, Parmesan cheese, garlic, and spinach (if using). Add the egg and season with salt and pepper. Mix everything together until the ingredients are well combined and the filling is creamy.
Step 3: Roll the Lasagna Noodles
Preheat your oven to 375°F (190°C). Spread a little marinara sauce on the bottom of a baking dish. Take one cooked lasagna noodle at a time and place a generous amount of the chicken and cheese mixture along the length of the noodle. Carefully roll up the noodle and place it seam side down in the baking dish. Repeat with the remaining noodles.
Step 4: Add Sauce and Cheese
Once all the roll-ups are in the baking dish, spoon the remaining marinara sauce over the top of the roll-ups. Sprinkle the remaining mozzarella cheese on top and dot with small pieces of butter for added richness.
Step 5: Bake
Cover the dish with aluminum foil and bake in the preheated oven for 25 minutes. After 25 minutes, remove the foil and bake for an additional 10 minutes or until the cheese is melted and bubbly. Garnish with freshly chopped parsley before serving.
Tips for the Best Garlic Parmesan Chicken Lasagna Roll-Ups
- Use Rotisserie Chicken: For a shortcut, grab a rotisserie chicken from your local grocery store. It saves time and adds a savory depth of flavor.
- Customize the Filling: Add vegetables like zucchini, mushrooms, or bell peppers to the filling for extra nutrients and flavor.
- Make it Ahead: You can assemble the roll-ups earlier in the day and refrigerate them. Simply bake when ready to serve.
- Freeze for Later: This dish freezes well. After assembling, cover and freeze before baking. When ready to bake, just add an extra 10 minutes to the baking time.
Why This Recipe is Perfect for Any Occasion
Whether you’re feeding a crowd or enjoying a quiet dinner with your family, Garlic Parmesan Chicken Lasagna Roll-Ups are a versatile dish that works for any occasion. They are comforting yet sophisticated, making them a hit at both casual meals and more elegant gatherings.
Conclusion
With its rich garlic and Parmesan flavor, tender chicken filling, and gooey mozzarella cheese, Garlic Parmesan Chicken Lasagna Roll-Ups are an exciting and delicious take on traditional lasagna. This easy-to-make recipe is perfect for busy weeknights or special occasions when you want to serve something both comforting and impressive. Try it today and enjoy a cheesy, savory, and satisfying meal that everyone will love!
Serving and Storage Tips for Garlic Parmesan Chicken Lasagna Roll-Ups
Serving Tips
- Perfect Pairings: Serve your Garlic Parmesan Chicken Lasagna Roll-Ups with a side of garlic bread and a crisp green salad for a well-rounded meal. A fresh Caesar salad or a simple arugula salad with a light vinaigrette complements the richness of the roll-ups.
- Garnish: Finish the dish with a sprinkle of fresh parsley or basil for a burst of color and added flavor. You can also add extra Parmesan cheese on top before serving for an even cheesier experience.
- Family-Friendly: These roll-ups are easy to serve in individual portions, making them perfect for kids or guests who prefer smaller, neat servings.
- Drizzle Extra Sauce: If you prefer a saucier dish, serve extra marinara sauce on the side for drizzling or dipping.
Storage Tips
- Refrigeration: Allow the lasagna roll-ups to cool completely before storing. Place them in an airtight container and store in the refrigerator for up to 3-4 days.
- Freezing: These roll-ups freeze wonderfully! To freeze, assemble the roll-ups and place them in a baking dish. Cover tightly with plastic wrap and aluminum foil, then freeze for up to 3 months. When ready to bake, allow the dish to thaw in the refrigerator overnight, and bake as directed (add a little extra time to ensure they’re heated through).
- Reheating: To reheat leftovers, place the roll-ups in an oven-safe dish, cover with foil to keep them from drying out, and bake at 350°F (175°C) for 15-20 minutes, or until heated through. You can also microwave individual roll-ups on a microwave-safe plate for about 1-2 minutes.
- Storing Sauces: If you have leftover marinara sauce, store it separately in an airtight container in the fridge for up to a week, or freeze it for later use in other dishes.
By following these serving and storage tips, you can enjoy your Garlic Parmesan Chicken Lasagna Roll-Ups over multiple meals and keep the flavors fresh and delicious!
1. Can I use store-bought rotisserie chicken for this recipe?
Yes, using store-bought rotisserie chicken is a great time-saver! Simply shred the chicken and add it to the filling mixture. It adds great flavor and reduces preparation time.
2. Can I make these roll-ups ahead of time?
Absolutely! You can assemble the Garlic Parmesan Chicken Lasagna Roll-Ups earlier in the day and store them in the fridge until you’re ready to bake. Just cover the dish tightly with plastic wrap or foil. When you’re ready, bake as directed, adding a few extra minutes if the dish is cold from the fridge.
3. Can I freeze the lasagna roll-ups?
Yes, these roll-ups freeze well! To freeze, assemble the roll-ups in a baking dish, cover tightly with plastic wrap and foil, and freeze for up to 3 months. When you’re ready to bake, let them thaw in the refrigerator overnight, then bake as instructed. If baking from frozen, add an additional 10-15 minutes to the cooking time.
4. Can I make this dish vegetarian?
Yes, you can easily make this dish vegetarian by substituting the chicken with vegetables like spinach, mushrooms, or zucchini. You can also add some ricotta cheese or other vegetables to enhance the filling and flavor.

Garlic Parmesan Chicken Lasagna Roll-Ups Recipe
- Prep Time: 20 minutes
- Cook Time: 35 minutes
- Total Time: 55 minutes
- Yield: 6-8 1x
- Category: Main Dish
- Cuisine: Italian-American
Description
These Garlic Parmesan Chicken Lasagna Roll-Ups are a creamy and cheesy twist on traditional lasagna. Tender lasagna noodles are rolled with a delicious chicken and ricotta filling, topped with a creamy garlic Parmesan sauce, and baked to perfection. Perfect for a comforting dinner!
Ingredients
(Serves 6-8)
For the Roll-Ups:
- 12 lasagna noodles, cooked al dente
- 2 cups cooked chicken, shredded (rotisserie chicken works great)
- 1 cup ricotta cheese
- 1 cup shredded mozzarella cheese
- 1/2 cup grated Parmesan cheese
- 1 egg, lightly beaten
- 1 tsp garlic powder
- 1 tsp Italian seasoning
- Salt and pepper, to taste
For the Garlic Parmesan Sauce:
- 3 tbsp unsalted butter
- 3 cloves garlic, minced
- 3 tbsp all-purpose flour
- 2 cups milk (whole milk or 2%)
- 1/2 cup grated Parmesan cheese
- Salt and pepper, to taste
For Topping:
- 1 cup shredded mozzarella cheese
- 1/4 cup grated Parmesan cheese
- Fresh parsley or basil, chopped (optional, for garnish)
Instructions
1. Preheat the Oven:
- Preheat your oven to 375°F (190°C).
- Lightly grease a 9×13-inch baking dish.
2. Prepare the Roll-Up Filling:
- In a large bowl, combine shredded chicken, ricotta cheese, mozzarella cheese, Parmesan cheese, egg, garlic powder, Italian seasoning, salt, and pepper. Mix until well combined.
3. Cook the Lasagna Noodles:
- Boil lasagna noodles in salted water until al dente. Drain and lay flat on a clean surface to prevent sticking.
4. Make the Garlic Parmesan Sauce:
- In a medium saucepan, melt the butter over medium heat. Add the minced garlic and sauté for 1 minute until fragrant.
- Whisk in the flour and cook for 1-2 minutes to eliminate the raw flour taste.
- Slowly whisk in the milk and cook, stirring constantly, until the sauce thickens (about 5 minutes).
- Remove from heat and stir in the Parmesan cheese. Season with salt and pepper to taste.
5. Assemble the Roll-Ups:
- Spread a thin layer of the garlic Parmesan sauce in the bottom of the prepared baking dish.
- Spread 2-3 tablespoons of the chicken filling evenly over each lasagna noodle. Roll the noodles up tightly and place them seam-side down in the baking dish.
6. Top and Bake:
- Pour the remaining garlic Parmesan sauce over the roll-ups.
- Sprinkle with mozzarella and Parmesan cheese.
- Cover with foil and bake for 20 minutes. Remove the foil and bake for an additional 10-15 minutes, or until the cheese is melted and bubbly.
7. Serve:
- Let the lasagna roll-ups cool for 5 minutes before serving.
- Garnish with fresh parsley or basil if desired, and serve warm with a side salad or garlic bread.
Notes
- Make Ahead: Assemble the roll-ups and refrigerate for up to 1 day before baking.
- Add Veggies: Include sautéed spinach, mushrooms, or chopped broccoli in the filling for added nutrition.
- Storage: Store leftovers in an airtight container in the fridge for up to 3 days. Reheat in the oven or microwave.

