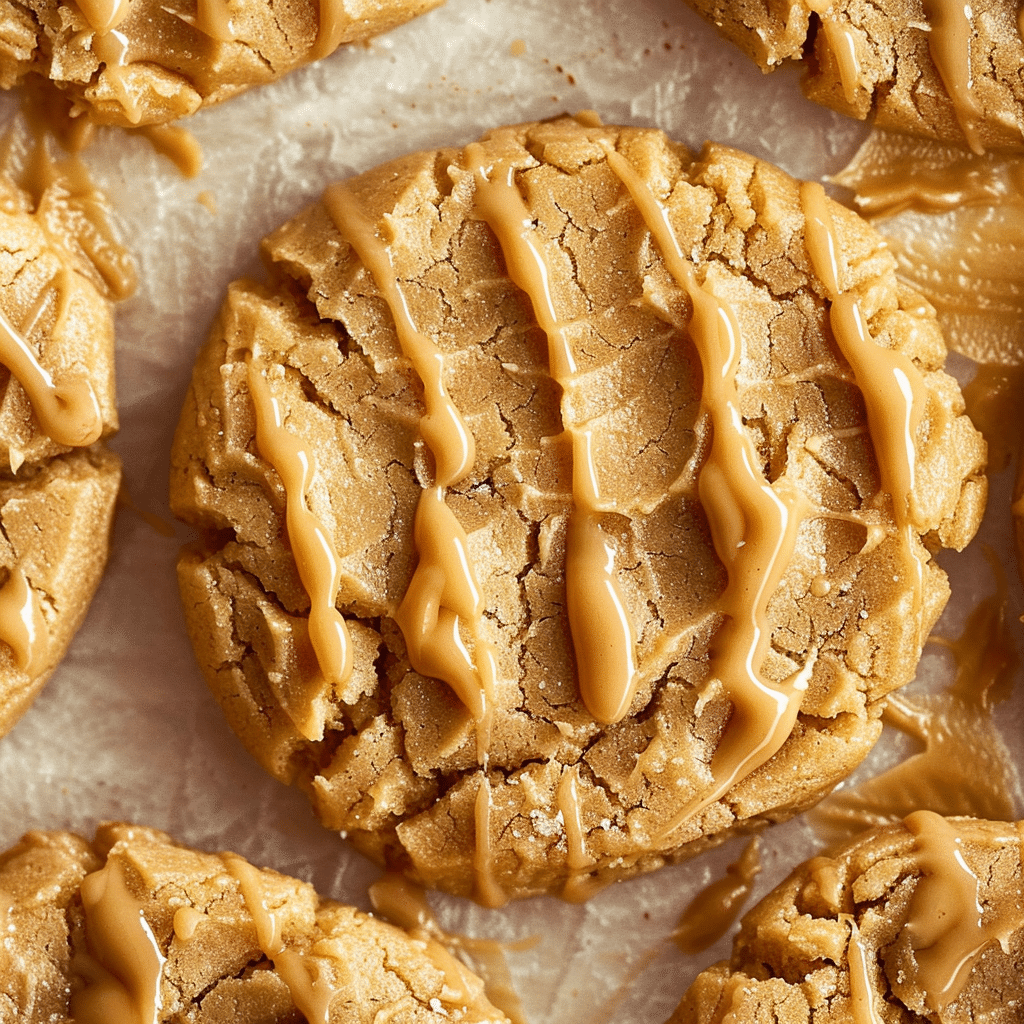
If you’re craving a sweet treat that’s quick to make and gluten-free, look no further than flourless peanut butter cookies. This delightful recipe combines the rich flavor of peanut butter with just a few simple ingredients, resulting in cookies that are chewy, delicious, and utterly satisfying. Perfect for any occasion, these cookies are a hit with both kids and adults alike!
Why Choose Flourless Peanut Butter Cookies?
Flourless peanut butter cookies are an excellent choice for several reasons:
- Gluten-Free: Ideal for those with gluten intolerance or celiac disease, these cookies eliminate the need for traditional flour.
- Nutritious: Peanut butter is packed with protein and healthy fats, making these cookies a more wholesome option compared to typical baked goods.
- Quick and Easy: With only five ingredients, this recipe can be whipped up in no time, making it perfect for last-minute cravings or unexpected guests.
- Versatile: You can easily customize these cookies by adding chocolate chips, oats, or your favorite nuts to the batter.
Ingredients
To make these delicious flourless peanut butter cookies, you will need:
- 1 cup creamy or crunchy peanut butter (make sure it’s unsweetened for a healthier option)
- 1 cup brown sugar (or coconut sugar for a lower glycemic index)
- 1 large egg
- 1 teaspoon vanilla extract
- 1 teaspoon baking soda
- A pinch of salt
- Optional: ½ cup chocolate chips or chopped nuts for added texture
Instructions
Follow these simple steps to make your flourless peanut butter cookies:
- Preheat the Oven: Preheat your oven to 350°F (175°C) and line a baking sheet with parchment paper to prevent sticking.
- Mix the Ingredients: In a large mixing bowl, combine the peanut butter, brown sugar, egg, vanilla extract, baking soda, and salt. Stir until the mixture is smooth and all ingredients are fully incorporated.
- Shape the Cookies: Using a tablespoon or cookie scoop, drop heaping spoonfuls of the cookie dough onto the prepared baking sheet, spacing them about 2 inches apart. Flatten each ball slightly with a fork, creating a crisscross pattern on top.
- Bake: Bake the cookies in the preheated oven for 10-12 minutes, or until the edges are lightly golden. The cookies will continue to firm up as they cool.
- Cool: Remove the cookies from the oven and let them cool on the baking sheet for about 5 minutes before transferring them to a wire rack to cool completely.
Tips for Perfect Cookies
- Storage: Store your flourless peanut butter cookies in an airtight container at room temperature for up to a week. For longer storage, freeze them for up to three months.
- Add-Ins: Feel free to get creative! Mix in chocolate chips, raisins, or even a dash of cinnamon for a unique twist.
- Vegan Option: To make these cookies vegan, substitute the egg with a flax egg (1 tablespoon of ground flaxseed mixed with 2.5 tablespoons of water) and ensure your peanut butter and sugar are vegan-friendly.
Nutritional Benefits
Flourless peanut butter cookies are not just a tasty treat; they also provide several health benefits:
- High Protein Content: Peanut butter is an excellent source of protein, helping to keep you feeling full longer.
- Healthy Fats: The fats in peanut butter are primarily unsaturated, which are beneficial for heart health.
- Minimal Ingredients: With just a handful of ingredients, these cookies are free from unnecessary additives and preservatives often found in store-bought options.
Conclusion
Flourless peanut butter cookies are a simple, delicious, and nutritious treat that everyone will love. Whether you’re gluten-free or simply looking for a quick and easy dessert, this recipe is sure to satisfy your sweet tooth without the guilt. Give it a try today, and enjoy the delightful flavors of these homemade cookies!
Here are some serving and storage tips for your flourless peanut butter cookies to ensure they stay fresh and delicious:
Serving Tips
- Presentation: Arrange the cookies on a decorative plate or tiered stand for a beautiful presentation at gatherings or parties.
- Pairing Options: Serve the cookies alongside a glass of milk, a cup of tea, or coffee for a delightful treat. For a fun twist, try pairing them with a scoop of vanilla ice cream for a quick cookie sandwich.
- Flavor Variations: Consider adding toppings like a drizzle of melted chocolate, a sprinkle of sea salt, or a dusting of powdered sugar for added flavor and visual appeal.
- Custom Serving Sizes: Use a cookie scoop to ensure uniform sizes for even baking and easy serving. Smaller cookies can be served as bite-sized snacks, while larger cookies can be a decadent treat.
Storage Tips
- Room Temperature: Store cookies in an airtight container at room temperature for up to a week. This will help them maintain their chewy texture.
- Refrigeration: If you live in a warm climate or want to extend the shelf life, consider refrigerating the cookies in an airtight container. They can last up to two weeks when refrigerated.
- Freezing: For longer storage, freeze the cookies. Place them in a single layer on a baking sheet to freeze until solid, then transfer to a freezer-safe bag or container. They can be stored in the freezer for up to three months.
- Thawing: When you’re ready to enjoy the frozen cookies, simply let them thaw at room temperature for about 30 minutes or microwave them for a few seconds for a warm treat.
- Labeling: If you freeze multiple batches or different types of cookies, be sure to label them with the date and type for easy identification.
By following these serving and storage tips, you can enjoy your flourless peanut butter cookies fresh and tasty for days or even weeks!
1. Can I use natural peanut butter in this recipe?
Yes, you can use natural peanut butter! Just make sure it’s creamy and well-stirred, as natural peanut butter can separate. Keep in mind that using a no-stir variety may yield a slightly different texture, but it will still work well in the recipe.
2. Are flourless peanut butter cookies gluten-free?
Absolutely! Flourless peanut butter cookies are naturally gluten-free, making them an excellent option for those with gluten intolerance or celiac disease. Just ensure that all the ingredients you use, including the peanut butter and sugar, are certified gluten-free.
3. How can I make these cookies vegan?
To make flourless peanut butter cookies vegan, you can substitute the egg with a flax egg. To do this, mix 1 tablespoon of ground flaxseed with 2.5 tablespoons of water, let it sit for a few minutes to thicken, and then use it in place of the egg in the recipe.
4. What can I add to enhance the flavor of the cookies?
You can customize your flourless peanut butter cookies by adding ingredients such as chocolate chips, chopped nuts, shredded coconut, or even a sprinkle of cinnamon. Experimenting with different add-ins can create new flavor combinations to enjoy!
Print
Flourless Peanut Butter Cookies
- Prep Time: 10 minutes
- Cook Time: 8 minutes
- Total Time: 18 minutes
- Yield: 12 cookies 1x
- Category: Dessert, Snack
- Method: Baking
- Cuisine: American
Description
These flourless peanut butter cookies are soft, chewy, and packed with rich peanut butter flavor. Made with just a handful of ingredients, they’re naturally gluten-free and perfect for a quick, satisfying snack!
Ingredients
- 1 cup creamy peanut butter (avoid natural, drippy varieties)
- 3/4 cup light brown sugar, packed
- 1/4 cup granulated sugar
- 1 large egg
- 1 teaspoon vanilla extract
- 1/2 teaspoon baking soda
- 1/4 teaspoon salt
- 1/2 cup chocolate chips or peanut butter chips (optional)
Instructions
- Preheat the Oven: Preheat oven to 350°F (175°C). Line a baking sheet with parchment paper.
- Mix Ingredients: In a large bowl, whisk together the egg, brown sugar, granulated sugar, vanilla extract, baking soda, and salt until smooth.
- Add Peanut Butter: Stir in the peanut butter until fully combined. Fold in chocolate chips if desired.
- Chill Dough (optional but recommended): Chill the dough for at least 30 minutes to help the cookies hold their shape.
- Form Cookies: Using a spoon or cookie scoop, drop heaping tablespoon-sized balls onto the baking sheet, about 2 inches apart. Flatten slightly with a fork, making a crisscross pattern.
- Bake: Bake for 8-10 minutes or until the edges are set. The centers should still look soft—they’ll firm up as they cool.
- Cool: Allow cookies to cool on the baking sheet for a few minutes before transferring to a wire rack to cool completely.
Notes
- Storage: Store cookies in an airtight container at room temperature for up to 3 days or in the refrigerator for up to 5 days.
- Freezing: Freeze baked cookies in an airtight container for up to 3 months. Let thaw overnight in the refrigerator before serving.

