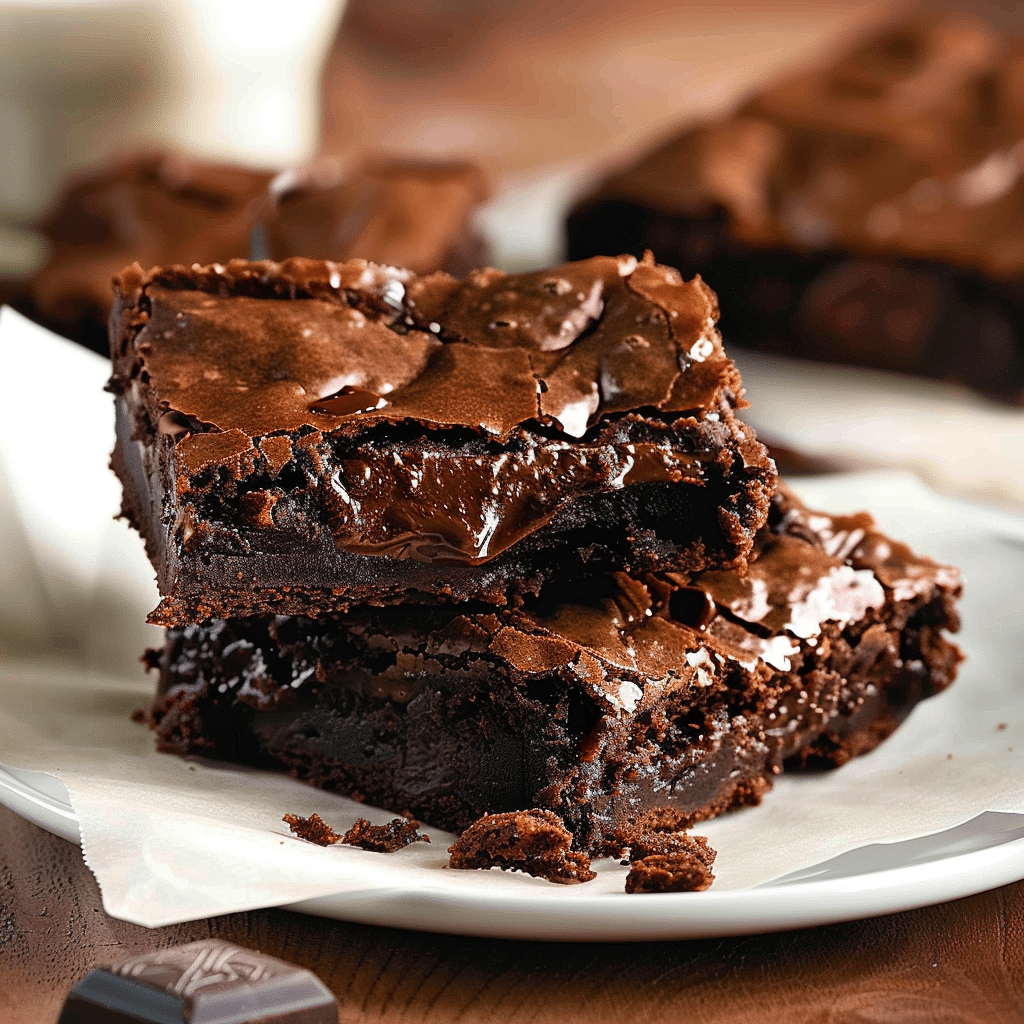
Are you craving a rich, fudgy dessert that’s quick and easy to make? Look no further than this delightful Easy Chocolate Brownies recipe! Perfect for novice bakers and chocolate lovers alike, these brownies are sure to satisfy your sweet tooth with their luscious chocolate flavor and chewy texture. Whether you’re preparing for a family gathering, a bake sale, or just want to indulge yourself, this recipe is a must-try!
Ingredients You’ll Need
To whip up a batch of these scrumptious brownies, gather the following ingredients:
- 1 cup (226g) unsalted butter: For that rich, buttery flavor.
- 2 cups (400g) granulated sugar: Sweetness that balances the cocoa.
- 4 large eggs: These add moisture and structure.
- 1 teaspoon vanilla extract: For a hint of warm flavor.
- 1 cup (125g) all-purpose flour: The base of your brownies.
- 1 cup (100g) unsweetened cocoa powder: The star ingredient for chocolate flavor.
- 1/2 teaspoon salt: To enhance all the flavors.
- 1/2 teaspoon baking powder: For a light, fluffy texture.
- 1 cup (175g) chocolate chips (optional): For extra chocolatey goodness!
Step-by-Step Instructions
Step 1: Preheat Your Oven
Begin by preheating your oven to 350°F (175°C). Grease a 9×13 inch baking pan or line it with parchment paper for easy removal.
Step 2: Melt the Butter
In a medium saucepan, melt the unsalted butter over low heat. Once melted, remove it from the heat and let it cool slightly.
Step 3: Combine the Wet Ingredients
In a large mixing bowl, whisk together the melted butter and granulated sugar until well combined. Add the eggs, one at a time, mixing well after each addition. Stir in the vanilla extract.
Step 4: Mix the Dry Ingredients
In another bowl, combine the all-purpose flour, unsweetened cocoa powder, salt, and baking powder. Mix well to ensure there are no lumps.
Step 5: Combine Wet and Dry Ingredients
Gradually add the dry ingredient mixture to the wet ingredients, stirring until just combined. Avoid overmixing to keep your brownies tender. If using, fold in the chocolate chips.
Step 6: Bake
Pour the brownie batter into the prepared baking pan, spreading it evenly. Bake in the preheated oven for 25-30 minutes, or until a toothpick inserted into the center comes out with a few moist crumbs (not wet batter).
Step 7: Cool and Serve
Once baked, remove the brownies from the oven and let them cool in the pan for at least 10 minutes. Then, transfer them to a wire rack to cool completely before cutting into squares. Enjoy them warm, or let them cool completely for a more fudgy texture.
Tips for the Best Brownies
- Don’t Overmix: To keep your brownies chewy and fudgy, mix until just combined.
- Add Nuts: For added crunch, consider folding in chopped walnuts or pecans.
- Use Quality Cocoa Powder: The better the cocoa, the richer the brownies will taste.
- Store Properly: Keep leftover brownies in an airtight container at room temperature for up to a week.
Why You’ll Love These Easy Chocolate Brownies
These brownies are not only simple to make, but they also boast a rich chocolate flavor that’s perfect for any occasion. They’re ideal for birthday parties, holiday celebrations, or even a quiet night in with a good book. Plus, the addition of chocolate chips makes them extra decadent!
Final Thoughts
With just a handful of ingredients and simple steps, these Easy Chocolate Brownies are sure to become a family favorite. Whether you serve them plain or with a scoop of vanilla ice cream, these brownies are a delightful treat that will impress anyone who tries them. So, gather your ingredients and get ready to bake your way to chocolate heaven!
Serving and Storage Tips for Easy Chocolate Brownies
Once you’ve baked a batch of Easy Chocolate Brownies, you’ll want to make the most of their rich flavor and delightful texture. Here are some tips for serving and storing your brownies to keep them fresh and delicious!
Serving Tips
- Cutting Brownies: Use a sharp knife to cut your brownies into even squares. For cleaner cuts, wipe the knife with a damp cloth between cuts. If you want to make them extra special, consider cutting them into fun shapes using cookie cutters.
- Serving Warm: Brownies are delicious on their own, but serving them warm adds an extra level of indulgence. Heat them in the microwave for about 10-15 seconds before serving for a gooey texture that complements their chocolate richness.
- Pairing Suggestions: Enhance your brownie experience by serving them with:
- Vanilla ice cream or whipped cream for a classic dessert.
- Fresh berries such as strawberries or raspberries for a fruity contrast.
- Chocolate sauce or caramel drizzle for an extra layer of sweetness.
- A sprinkle of sea salt to balance the sweetness and enhance the chocolate flavor.
- Garnishing: Top your brownies with a dusting of powdered sugar, a scoop of ice cream, or a dollop of whipped cream just before serving for an elegant touch.
Storage Tips
- Room Temperature: If you plan to enjoy your brownies within a few days, store them in an airtight container at room temperature. They will stay fresh for up to 5-7 days.
- Refrigeration: For longer storage, you can refrigerate brownies. Place them in an airtight container or wrap them tightly in plastic wrap. Refrigerated brownies can last up to 2 weeks. Note that refrigeration may slightly change their texture, making them a bit firmer.
- Freezing Brownies: To keep your brownies fresh for an even longer period, consider freezing them. Follow these steps:
- Allow the brownies to cool completely.
- Cut them into squares or leave them whole, depending on your preference.
- Wrap each piece tightly in plastic wrap or aluminum foil, then place them in a freezer-safe container or a resealable plastic bag.
- Label with the date and freeze for up to 3 months.
- When you’re ready to enjoy, simply thaw at room temperature or warm in the microwave for a few seconds.
- Avoiding Dryness: To prevent brownies from drying out, consider placing a slice of bread or a piece of apple in the storage container. This can help maintain moisture levels.
By following these serving and storage tips, you can enjoy your Easy Chocolate Brownies at their best, whether freshly baked or saved for later indulgence!
FAQ 1: Can I use cocoa powder instead of chocolate bars for brownies?
Answer: Yes, using cocoa powder is actually common in brownie recipes. In the Easy Chocolate Brownies recipe, unsweetened cocoa powder provides a rich chocolate flavor without the need for melting chocolate bars. If you prefer a deeper flavor, you can combine cocoa powder with some melted chocolate.
FAQ 2: How can I make my brownies more fudgy?
Answer: To achieve a fudgier texture in your brownies, consider the following tips:
- Reduce the flour: Using slightly less flour can enhance the fudginess.
- Add more fat: Increasing the amount of butter or adding an extra egg yolk can make your brownies denser and richer.
- Don’t overbake: Be sure to check your brownies a few minutes before the suggested baking time. They should be set but still slightly moist in the center.
FAQ 3: Can I add mix-ins to my brownies?
Answer: Absolutely! Adding mix-ins is a great way to customize your brownies. You can fold in chocolate chips, nuts (like walnuts or pecans), dried fruit, or even swirls of peanut butter or caramel before baking. Just be mindful not to overmix the batter.
FAQ 4: How do I know when my brownies are done baking?
Answer: The best way to check if your brownies are done is to use the toothpick test. Insert a toothpick into the center of the brownies; if it comes out with a few moist crumbs (not wet batter), they’re ready. If it comes out clean, the brownies may be overbaked, so keep an eye on them as they approach the end of the baking time. Remember, brownies will continue to firm up slightly as they cool.
Print
Easy Chocolate Brownies
- Prep Time: 10 minutes
- Cook Time: 25 minutes
- Total Time: 35 minutes
- Yield: 9–12 brownies 1x
- Category: Dessert
- Method: Baking
- Cuisine: American
Description
These Easy Chocolate Brownies are perfectly fudgy, chocolatey, and come together with minimal ingredients. With a crackly top and rich flavor, they’re perfect for any chocolate lover and make a great dessert or snack.
Ingredients
- 1/2 cup unsalted butter, melted
- 1 cup granulated sugar
- 2 large eggs
- 1 teaspoon vanilla extract
- 1/3 cup unsweetened cocoa powder
- 1/2 cup all-purpose flour
- 1/4 teaspoon salt
- 1/4 teaspoon baking powder
- 1/2 cup chocolate chips or chunks (optional for extra gooeyness)
Instructions
-
Preheat the Oven:
- Preheat your oven to 350°F (175°C). Grease an 8×8-inch baking pan or line it with parchment paper.
-
Prepare the Batter:
- In a medium mixing bowl, whisk together the melted butter and sugar until well combined.
- Add the eggs and vanilla extract, mixing until smooth and glossy.
-
Add the Dry Ingredients:
- Sift in the cocoa powder, flour, salt, and baking powder. Stir until just combined, being careful not to overmix. Fold in chocolate chips if desired.
-
Bake the Brownies:
- Pour the batter into the prepared baking pan, spreading it evenly. Bake for 20-25 minutes, or until a toothpick inserted into the center comes out with a few moist crumbs (for fudgy brownies).
-
Cool and Serve:
- Allow the brownies to cool in the pan before slicing. Cut into squares and enjoy!
Notes
- Storage: Store in an airtight container at room temperature for up to 3 days, or refrigerate for up to a week.
- Variations: Add nuts like walnuts or pecans, or swirl in peanut butter or caramel before baking for extra flavor.

