
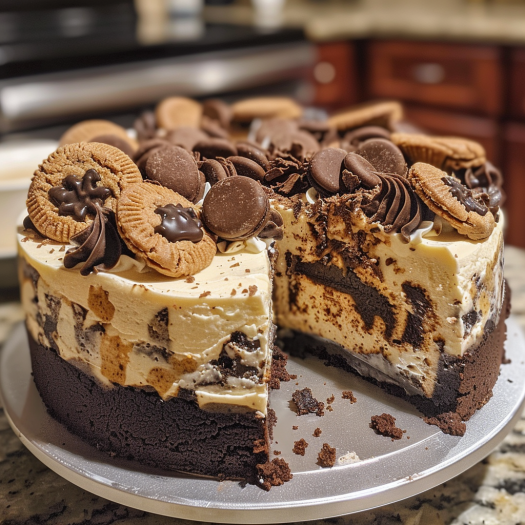
If you’re looking for a fun, visually striking dessert that combines the crunchy goodness of cookies with the creamy indulgence of cheesecake, then this Cookie Monster Cheesecake recipe is just what you need. This recipe not only brings a burst of blue and a treasure trove of cookies in every slice but also serves as a delightful centerpiece for any party or gathering. Here’s how to make this eye-catching dessert that’s as delicious as it is vibrant.
Ingredients:
- For the Crust:
- 2 cups crushed chocolate sandwich cookies (about 20 cookies)
- 5 tablespoons unsalted butter, melted
- For the Filling:
- 24 ounces cream cheese, softened
- 1 cup granulated sugar
- 1 cup sour cream
- 1 teaspoon vanilla extract
- 3 large eggs
- 2 tablespoons all-purpose flour
- Blue food coloring (gel works best for vibrant color)
- 1 cup crushed chocolate sandwich cookies, plus more for topping
- For the Decoration:
- Whole chocolate sandwich cookies
- Mini chocolate chip cookies
- Chocolate chip cookie crumbs
- Edible googly eyes (optional but recommended for the Cookie Monster look)
Instructions:
Step 1: Prepare the Crust
- Preheat your oven to 350°F (175°C).
- Blend the 2 cups of crushed chocolate sandwich cookies in a food processor until finely ground. Mix in the melted butter until the texture resembles wet sand.
- Press the mixture into the bottom of a 9-inch springform pan, ensuring it is even and compact.
- Bake in the preheated oven for 10 minutes, then remove and allow to cool.
Step 2: Make the Filling
- In a large mixing bowl, beat the softened cream cheese with granulated sugar until smooth and creamy.
- Add sour cream and vanilla extract, mixing until well combined.
- Beat in the eggs one at a time, then stir in the flour and as much blue food coloring as needed to reach your desired shade of Cookie Monster blue.
- Fold in the cup of crushed cookies.
- Pour the filling over the prepared crust, smoothing out the top with a spatula.
Step 3: Bake
- Bake the cheesecake in the preheated oven for about 50 minutes, or until the edges are set but the center is still slightly jiggly.
- Turn off the oven, crack open the door, and allow the cheesecake to cool inside the oven for 1 hour to prevent cracking.
- Chill the cheesecake in the refrigerator for at least 4 hours, or overnight.
Step 4: Decorate
- Before serving, top the cheesecake with whole and mini chocolate sandwich cookies, cookie crumbs, and edible googly eyes to give it the classic Cookie Monster appearance.
- You can arrange the cookies to make it look as if Cookie Monster is munching on them, adding a fun and playful touch.
Conclusion:
This Cookie Monster Cheesecake is not just a treat for the taste buds but also a feast for the eyes. Its vibrant blue color, combined with the rich, creamy texture and the crunchy cookie bits, make for a perfect party dessert that’s sure to impress. Whether for a birthday, a special occasion, or just because, this cheesecake promises to be a hit with both kids and adults alike.
Serving and Storage Tips for Cookie Monster Cheesecake
Creating a dessert as delightful as the Cookie Monster Cheesecake is only half the fun; serving and storing it properly is equally important to maintain its taste and appearance. Here are some expert tips on how to serve and store your cheesecake to ensure it stays as irresistible as when it first came out of the oven.
Serving Tips:
- Temperature Matters: Cheesecake is best served chilled. Before serving, let it sit in the refrigerator for at least 4 hours, but ideally overnight. This waiting period allows the cheesecake to set properly, making it easier to slice.
- Clean Slicing: For clean cuts, use a sharp, thin-bladed knife. Dip the knife in hot water and wipe it dry between each slice. This technique helps you get those pristine cuts that make each slice look as good as it tastes.
- Adding Freshness: While the cheesecake has a lot of flavors from the cookies and the creamy filling, adding a dollop of whipped cream or a sprinkle of fresh cookie crumbs right before serving can enhance the visual appeal and add a touch of freshness.
- Let It Rest: Pull the cheesecake from the refrigerator about 10 to 15 minutes before serving. This slight tempering can help enhance the flavors and make the texture slightly softer, delivering the perfect cheesecake experience.
Storage Tips:
- Refrigerate: Cheesecake should be stored in the refrigerator. Cover loosely with aluminum foil or plastic wrap to protect it from absorbing odors of other foods in the fridge. Properly stored, your cheesecake can last up to 5 days.
- Freezing for Longer Storage: If you want to keep the cheesecake for a longer period, freezing is an option. Wrap the entire cheesecake or individual slices tightly in plastic wrap and then again in aluminum foil. Properly wrapped, the cheesecake can be frozen for up to 2 months. Thaw overnight in the refrigerator before serving.
- Avoid Humidity: Store your cheesecake away from the fridge’s high-humidity areas (usually the crisper drawers); excess moisture can lead to a soggy crust.
- Maintaining the Look: If you’ve decorated your cheesecake with cookies and edible eyes, consider adding these elements only to the portions you plan to serve immediately. This strategy helps maintain the textures and appearance, as the cookies might soften if left on the cheesecake in the refrigerator over a few days.
By following these serving and storage tips, you can ensure that your Cookie Monster Cheesecake remains delicious and visually appealing from the first slice to the last. Whether you’re serving it at a party or enjoying a piece as a treat, these tips will help you get the most out of your dessert.
1. Can I use a different type of cookie for the crust or filling?
Yes, you can customize the cheesecake by using various types of cookies. While chocolate sandwich cookies are recommended for their color contrast and flavor, feel free to experiment with other cookies like chocolate chip cookies, graham crackers, or even oatmeal cookies for a different twist. Just ensure that they are finely crushed for the crust, and coarsely chopped for the filling to maintain texture.
2. How do I prevent my cheesecake from cracking?
Cheesecakes often crack due to sudden temperature changes. To minimize this risk, ensure all your ingredients are at room temperature before starting, don’t overmix the batter (especially after adding the eggs), and avoid opening the oven door while baking. After baking, turn off the oven and let the cheesecake cool inside with the door slightly open for about an hour. This slow cooling process helps prevent cracks.
3. What’s the best way to add food coloring without affecting the texture?
For the best color and texture, use a gel-based food coloring, which is more concentrated and vibrant without adding excess moisture to the batter. Add the coloring a little at a time until you achieve the desired shade of blue. It’s important to mix gently to avoid introducing too much air into the batter, which can affect the final texture of the cheesecake.
4. Can I make this cheesecake ahead of time?
Absolutely! Cheesecake is an excellent dessert to make ahead of time. You can prepare and bake the cheesecake up to 2-3 days before you need it. Keep it in the refrigerator, covered lightly with foil or plastic wrap. Add the cookie decorations and edible eyes just before serving to maintain their texture and appearance. This makes Cookie Monster Cheesecake a convenient option for parties and gatherings.