
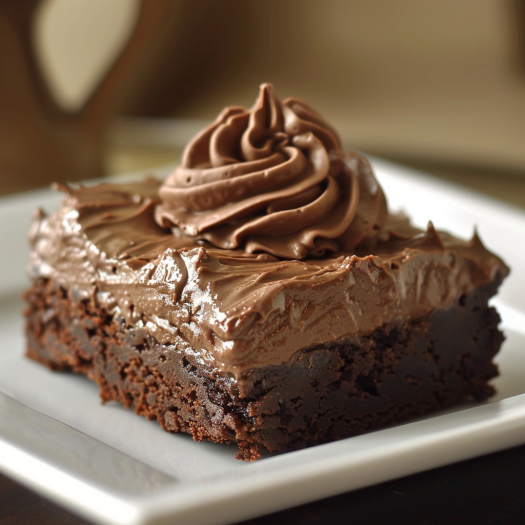
Are you ready to take your brownie game to the next level? Chocolate lovers, rejoice! Today, we’re blending the fudgy goodness of classic brownies with the creamy, silky smoothness of chocolate mousse to create a dessert that’s truly divine. This Chocolate Mousse Brownies recipe is not just a treat for your taste buds but a feast for your eyes as well. Perfect for parties, family gatherings, or a quiet night in, these brownies promise to be the star of any dessert table.
Ingredients You’ll Need:
For the Brownie Base:
- 1/2 cup (115g) unsalted butter
- 1 cup (200g) granulated sugar
- 2 large eggs
- 1 teaspoon vanilla extract
- 1/3 cup (40g) unsweetened cocoa powder
- 1/2 cup (60g) all-purpose flour
- 1/4 teaspoon salt
- 1/4 teaspoon baking powder
For the Chocolate Mousse:
- 1 cup (240ml) heavy cream
- 1 cup (175g) semi-sweet chocolate chips
- 2 tablespoons sugar
- 1 teaspoon vanilla extract
- 1/2 cup (120ml) cold heavy cream (for whipping)
Step-by-Step Instructions:
1. Prepare the Brownie Base:
Preheat your oven to 350°F (175°C). Grease a 9-inch square baking pan or line it with parchment paper for easy removal.
In a medium saucepan, melt the butter over medium heat. Remove from heat, and stir in sugar, eggs, and vanilla. Beat in cocoa, flour, salt, and baking powder. Spread batter into the prepared pan.
Bake in preheated oven for 20 to 25 minutes. Do not overcook; the brownies should be soft in the center. Let them cool in the pan while you prepare the mousse.
2. Make the Chocolate Mousse:
In a small saucepan, heat 1 cup of heavy cream until it just begins to simmer. Do not boil. Remove from heat and pour over chocolate chips in a bowl. Let sit for one minute, then stir until smooth. Add sugar and vanilla extract, mixing until well incorporated. Allow the mixture to cool to room temperature.
In another bowl, whip the 1/2 cup of cold heavy cream until stiff peaks form. Gently fold the whipped cream into the cooled chocolate mixture until no streaks remain.
3. Assemble the Dessert:
Pour the chocolate mousse over the cooled brownies in the pan. Smooth the top with a spatula. Refrigerate for at least 2 hours, or until the mousse is set.
4. Serving:
Lift the brownies from the pan using the edges of the parchment paper as handles. Slice into squares and serve. Optionally, garnish with chocolate shavings, a sprinkle of powdered sugar, or fresh berries for an added touch of elegance.
Tips for Perfect Chocolate Mousse Brownies:
- Quality Matters: Use high-quality chocolate and cocoa powder for the best flavor.
- Cooling Time: Ensure the brownies are completely cool before adding the mousse to prevent it from melting.
- Chill Well: The mousse needs time to set properly, so don’t rush this step.
Why This Recipe Works:
This Chocolate Mousse Brownies recipe combines the dense, rich texture of brownies with the light, airy feel of mousse, making it a sophisticated twist on two beloved desserts. It’s perfect for those who love a multi-textured dessert experience.
Whether you’re looking to impress guests, treat your family, or simply satisfy your chocolate cravings, this recipe is guaranteed to delight. Try it today and understand why this dessert is more than just a treat—it’s a multi-sensory experience that’s bound to leave everyone craving more. Happy baking and indulging!
Serving and Storage Tips for Chocolate Mousse Brownies
Once you’ve mastered the art of making these delectable Chocolate Mousse Brownies, knowing how to serve and store them can make all the difference in enjoying their full flavor and texture. Here are some essential tips to ensure your brownies remain as irresistible as the moment they were made.
Serving Tips:
- Room Temperature or Chilled: These brownies can be enjoyed at room temperature or chilled. Serving them chilled will give the mousse a firmer texture, which contrasts delightfully with the denser brownie base.
- Add a Garnish: Before serving, consider adding a garnish to enhance both the flavor and appearance. A sprinkle of cocoa powder, powdered sugar, or even a few fresh berries can add an elegant touch. Chocolate shavings or a dollop of whipped cream can also be delightful.
- Pairing: For an extra special dessert, pair your brownie with a cup of freshly brewed coffee or a glass of red wine. These beverages complement the rich chocolate flavor wonderfully.
- Pre-Cut: Use a sharp knife to cut the brownies. To achieve clean cuts, dip the knife in hot water and wipe it dry between each cut. This method helps slice through the mousse layer neatly.
Storage Tips:
- Refrigeration is Key: Due to the chocolate mousse topping, these brownies need to be stored in the refrigerator. Keep them in an airtight container to maintain freshness and prevent them from absorbing odors from other foods.
- Short-Term Storage: When stored in the refrigerator, the brownies will keep well for up to 3-4 days. The texture of the mousse and brownie will remain most optimal within this timeframe.
- Freezing for Longevity: If you wish to keep the brownies for longer, freezing is a viable option. Wrap individual brownie squares tightly in plastic wrap and then place them in a zip-lock freezer bag. They can be stored frozen for up to a month. To serve, thaw them in the refrigerator overnight.
- Serving After Freezing: Once thawed, if the mousse appears to have condensed or looks slightly wet, simply dab the top gently with a paper towel before serving. This will help restore the appearance of the mousse.
By following these serving and storage tips, your Chocolate Mousse Brownies will always come out looking and tasting their best. Whether preparing them for a special event or a delightful treat, these tips ensure your brownies are always ready to impress.
1. Can I use boxed brownie mix instead of making the brownie layer from scratch?
Yes, you can absolutely use a boxed brownie mix for convenience. Simply follow the package instructions to prepare the brownie batter and bake it as directed. Allow the baked brownies to cool completely before adding the chocolate mousse layer on top. This shortcut can save time while still delivering delicious results.
2. What can I do if my chocolate mousse doesn’t set properly?
If your chocolate mousse hasn’t set, it may be due to not chilling it long enough. Make sure to refrigerate the mousse-topped brownies for at least 2 hours. If after this time the mousse is still not set, check that the heavy cream was whipped into stiff peaks before folding into the chocolate mixture, as under-whipped cream can cause the mousse to be too soft.
3. Can I make these brownies vegan or gluten-free?
To make vegan or gluten-free Chocolate Mousse Brownies, you will need to make a few substitutions:
- For Vegan: Use a vegan brownie base by substituting the butter with coconut oil or a plant-based butter and replacing the eggs with a vegan alternative like flax eggs. For the mousse, use full-fat coconut milk instead of heavy cream and ensure your chocolate is dairy-free.
- For Gluten-Free: Substitute the all-purpose flour in the brownie recipe with a gluten-free flour blend. Make sure all other ingredients, such as baking powder and vanilla extract, are certified gluten-free.
4. How can I enhance the flavor of my Chocolate Mousse Brownies?
To elevate the flavor of your brownies, consider adding a touch of espresso powder to the brownie batter; this enhances the chocolate flavor without making the brownies taste like coffee. For the mousse, a splash of liqueur such as Grand Marnier or Baileys can add a delightful depth. Additionally, incorporating a pinch of sea salt over the mousse layer before it sets can bring out the sweetness and complexity of the chocolate.
Chocolate Mousse Brownies Recipe
- Prep Time: 20 minutes
- Cook Time: 25 minutes
- Total Time: 2 hours 45 minutes (includes chilling)
- Yield: 9 squares 1x
- Category: Dessert
- Method: Baking
- Cuisine: American
- Diet: Vegetarian
Description
Rich and decadent chocolate mousse brownies featuring a fudgy brownie base topped with a light and creamy chocolate mousse layer, perfect for dessert lovers.
Ingredients
- 1/2 cup unsalted butter
- 1 cup semi-sweet chocolate chips
- 3/4 cup granulated sugar
- 2 large eggs
- 1 tsp vanilla extract
- 1/2 cup all-purpose flour
- 1/4 tsp salt
- 1 cup heavy whipping cream
- 1 cup semi-sweet chocolate chips (for mousse)
- 1 tbsp powdered sugar
- Chocolate shavings or cocoa powder for garnish (optional)
Instructions
- Preheat oven to 350°F (175°C) and line an 8×8-inch baking pan with parchment paper.
- Melt butter and 1 cup chocolate chips in a saucepan over low heat, stirring until smooth. Remove from heat and let cool slightly.
- Whisk in sugar, eggs, and vanilla until combined.
- Stir in flour and salt just until incorporated.
- Pour batter into prepared pan and bake for 20-25 minutes, or until a toothpick inserted comes out with a few moist crumbs. Cool completely.
- To make mousse, melt 1 cup chocolate chips in a microwave-safe bowl or double boiler. Let cool slightly.
- In a separate bowl, beat heavy cream and powdered sugar until stiff peaks form.
- Fold cooled melted chocolate into whipped cream until fully combined and smooth.
- Spread mousse over cooled brownies and chill for at least 2 hours to set.
- Garnish with chocolate shavings or dust with cocoa powder before serving.
Notes
- Ensure brownie layer is fully cooled before adding mousse.
- Use high-quality chocolate for best flavor.
- Can be made a day ahead and stored in the refrigerator.
Nutrition
- Serving Size: 1 square
- Calories: 370
- Sugar: 27g
- Sodium: 80mg
- Fat: 24g
- Saturated Fat: 14g
- Unsaturated Fat: 8g
- Trans Fat: 0g
- Carbohydrates: 36g
- Fiber: 2g
- Protein: 4g
- Cholesterol: 70mg