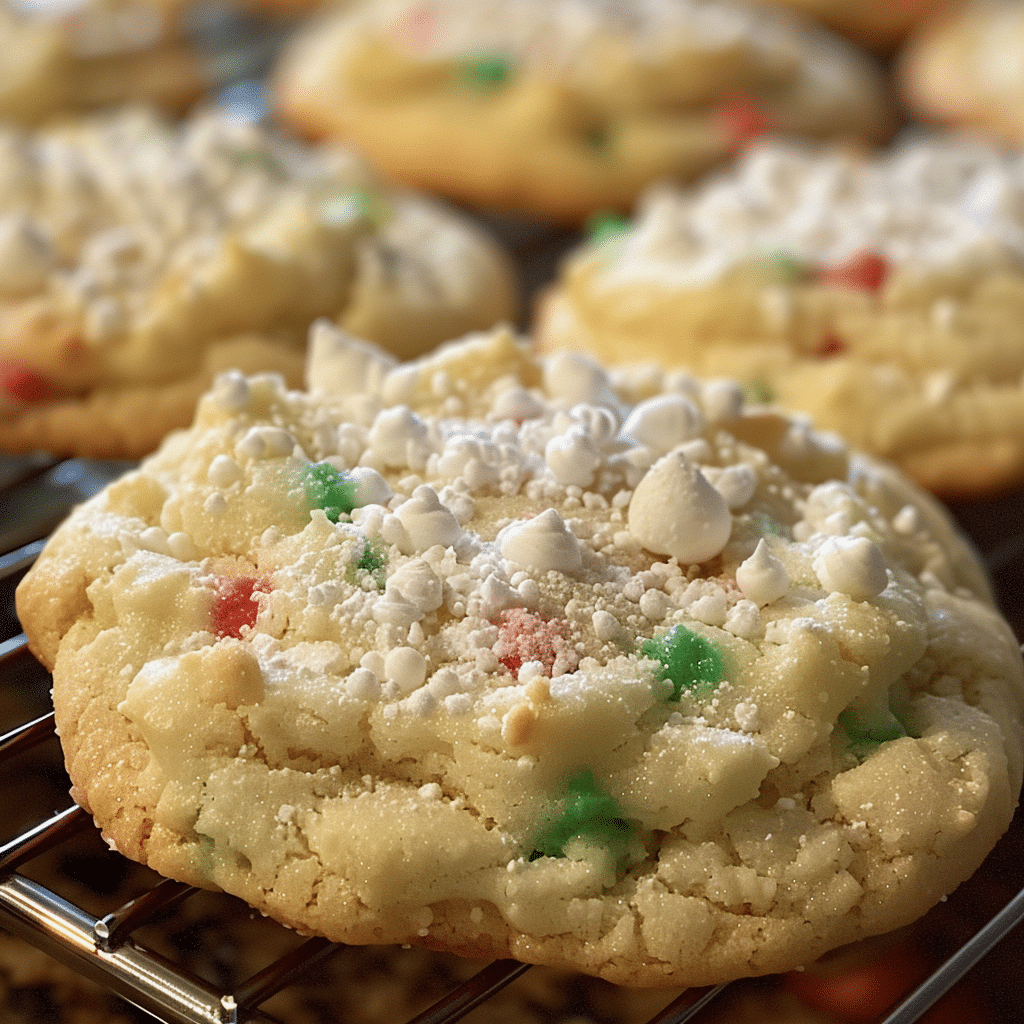
The holiday season calls for easy, delicious, and festive treats, and Cake Mix Christmas Cookies are the perfect solution! With minimal prep time and endless possibilities for customization, this recipe is a go-to for busy holiday bakers. Using cake mix as a base, these cookies are soft, flavorful, and ideal for Christmas gatherings or as a thoughtful homemade gift.
Ingredients
- 1 box of cake mix (white, vanilla, or chocolate)
- 2 large eggs
- 1/2 cup vegetable oil (or melted butter for extra richness)
- 1 teaspoon vanilla extract
- 1 cup holiday sprinkles or candy-coated chocolates (red, green, white)
Instructions
- Prepare the Dough
Preheat your oven to 350°F (175°C). In a large mixing bowl, combine the cake mix, eggs, and vegetable oil. Mix well until smooth and fully incorporated. Stir in the vanilla extract for an added touch of flavor. - Add Festive Toppings
Gently fold in holiday sprinkles or candy-coated chocolates, ensuring they’re evenly distributed throughout the dough. - Form the Cookies
Using a tablespoon, scoop dough portions and roll them into small balls. Place each ball on a baking sheet lined with parchment paper, leaving about 2 inches between cookies. - Bake
Bake in the preheated oven for 8-10 minutes or until the edges are set and the centers look slightly undercooked. Allow the cookies to cool on the baking sheet for 5 minutes before transferring them to a wire rack. - Decorate (Optional)
Once cooled, add a drizzle of white or dark chocolate, or dust with powdered sugar for extra flair.
Tips for the Best Cake Mix Christmas Cookies
- Variety of Flavors: Try different cake mix flavors like red velvet or chocolate to make your cookies even more festive.
- Add-ins: Experiment with mix-ins like white chocolate chips, crushed peppermint, or nuts for a unique twist.
- Storing: Store these cookies in an airtight container for up to a week or freeze them for up to a month.
Why Cake Mix Christmas Cookies?
These cookies are a fantastic shortcut that brings holiday cheer without the hassle. The cake mix provides a soft, cake-like texture, making them both chewy and melt-in-your-mouth delicious. Plus, this recipe is customizable to suit any Christmas color theme or flavor preference. Perfect for last-minute holiday treats, cake mix Christmas cookies are a must-try!
Whether you’re new to holiday baking or a seasoned pro, Cake Mix Christmas Cookies are a fantastic way to make merry moments in the kitchen. Give them a try this season!
Serving and Storage Tips for Cake Mix Christmas Cookies
Serving Tips
- Presentation: Arrange your cookies on a festive platter or cookie stand. You can enhance the holiday feel by adding decorative elements like small ornaments or pine branches.
- Pairing Suggestions: These cookies pair wonderfully with hot beverages such as cocoa, coffee, or spiced tea. Consider serving them alongside a glass of cold milk for a nostalgic treat.
- Cookie Sandwiches: For a fun twist, consider making cookie sandwiches by spreading frosting, whipped cream, or a flavored filling between two cookies. This adds an extra layer of indulgence!
- Gifting: If you’re giving these cookies as gifts, consider packaging them in clear cellophane bags tied with festive ribbons. Add a personalized tag to make your gift extra special.
Storage Tips
- Room Temperature: Store your cookies in an airtight container at room temperature for up to one week. This keeps them fresh and prevents them from becoming too dry.
- Refrigeration: If your kitchen is particularly warm, you might want to store the cookies in the refrigerator. Just make sure to let them come to room temperature before serving, as they will taste best when slightly warm.
- Freezing: For longer storage, you can freeze these cookies. Place them in a single layer in a freezer-safe container or zip-top bag, separating layers with parchment paper. They can be frozen for up to a month. When you’re ready to enjoy them, thaw at room temperature or warm them in the oven for a few minutes.
- Cookie Dough Storage: If you want to bake fresh cookies later, you can also freeze the cookie dough. Scoop and shape the dough balls, freeze them on a baking sheet, then transfer to a zip-top bag. When you’re ready to bake, just pop the frozen dough balls straight into the oven, adding an extra minute or two to the baking time.
By following these serving and storage tips, you can ensure that your Cake Mix Christmas Cookies remain delicious and festive throughout the holiday season. Enjoy the joy of baking and sharing these delightful treats!
1. Can I use any type of cake mix for these cookies?
Absolutely! While classic choices like white or yellow cake mix are popular, you can use any flavor you prefer. Chocolate, red velvet, or even funfetti cake mixes work beautifully, allowing you to customize the flavor and color of your cookies.
2. How can I make these cookies more festive?
To enhance the festive vibe, you can add various holiday-themed toppings and mix-ins. Consider using red and green sprinkles, crushed peppermint, or seasonal M&M’s. Additionally, drizzling the cookies with melted chocolate or adding a dusting of powdered sugar can make them look even more appealing.
3. Can I make these cookies gluten-free?
Yes, you can make gluten-free Cake Mix Christmas Cookies by using a gluten-free cake mix. Be sure to check the other ingredients you use (like baking powder or toppings) to ensure they are also gluten-free. The texture and taste will still be delicious!
4. How do I know when the cookies are done baking?
These cookies are typically done when the edges are lightly golden, and the centers look slightly underbaked. They will continue to firm up as they cool, so be cautious not to overbake them. If you’re unsure, it’s better to err on the side of slightly underbaking for a soft and chewy cookie!

Cake Mix Christmas Cookies
- Prep Time: 10 minutes
- Cook Time: 10 minutes
- Total Time: 20 minutes
- Yield: 24 cookies 1x
- Category: Dessert
- Method: Baking
- Cuisine: American
Description
These Cake Mix Christmas Cookies are soft, chewy, and perfect for the holidays! Made with just a few ingredients, they’re easy to whip up and decorate with festive sprinkles or candies. Perfect for cookie swaps, gifts, or leaving out for Santa.
Ingredients
- 1 box white or vanilla cake mix (15.25 oz)
- 2 large eggs
- 1/2 cup vegetable oil
- 1 tsp vanilla extract (optional)
- 1 cup red and green M&Ms or festive sprinkles
- 1/2 cup white chocolate chips (optional)
Instructions
- Prepare Dough: In a large mixing bowl, combine the cake mix, eggs, oil, and vanilla extract (if using). Stir until smooth. The dough will be thick. Fold in 3/4 cup of the M&Ms or sprinkles, reserving some for decorating.
- Chill (optional): For thicker cookies, cover the dough and refrigerate for 20 minutes. This step helps prevent spreading, especially if your kitchen is warm.
- Preheat Oven: Preheat your oven to 350°F (175°C). Line two baking sheets with parchment paper or silicone baking mats.
- Form Cookies: Use a cookie scoop or tablespoon to drop balls of dough onto the prepared baking sheets, about 1 inch apart. Lightly press down on each cookie and add extra M&Ms or sprinkles on top for decoration.
- Bake: Bake for 9-11 minutes, until the edges are slightly golden. The centers may look soft; they will firm up as they cool.
- Cool: Allow cookies to cool on the baking sheet for 2-3 minutes, then transfer to a wire rack to cool completely.
Notes
- Storage: Store in an airtight container at room temperature for up to 1 week.
- Freezing: Freeze the baked cookies for up to 3 months, or freeze the dough balls to bake later.
- Variations: Try different cake mix flavors like chocolate or red velvet, or add crushed candy canes for a peppermint twist.

