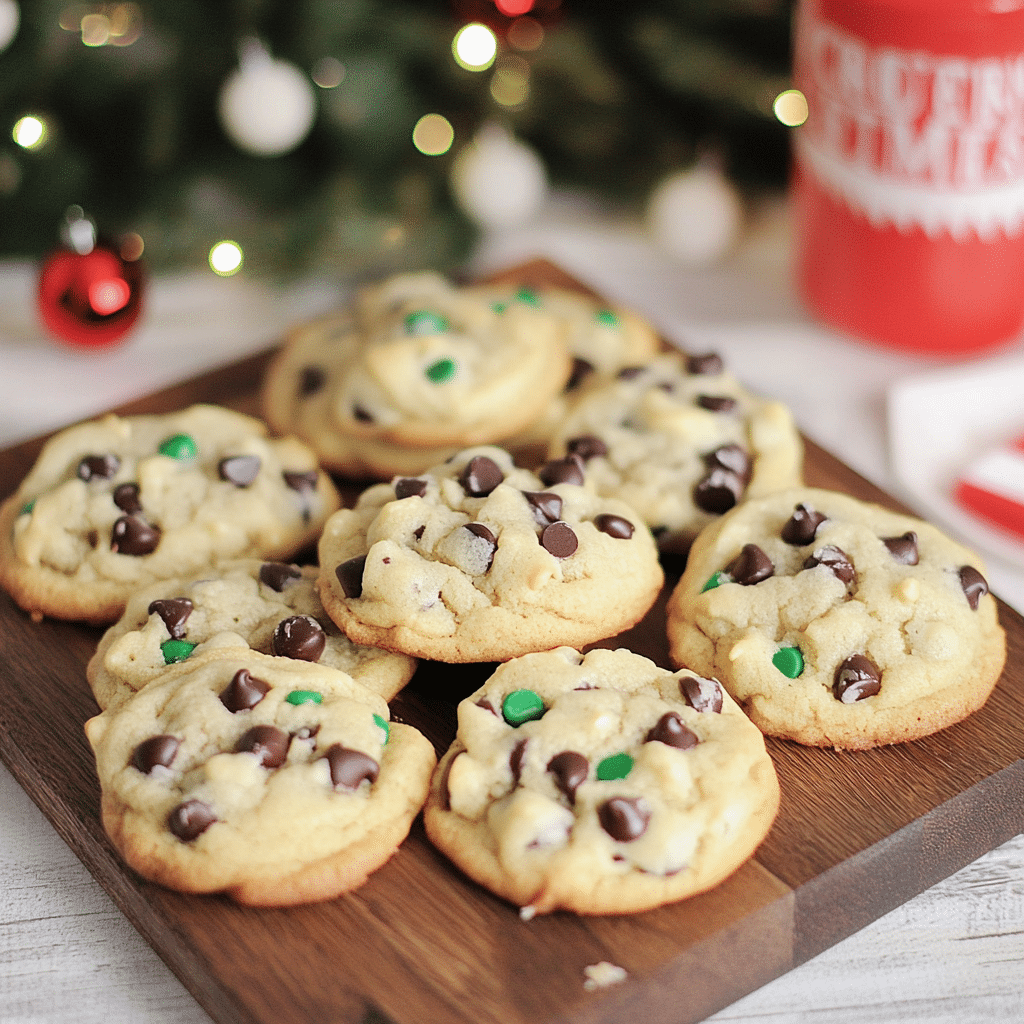
When the holiday season rolls around, there’s nothing better than filling your home with the scent of freshly baked cookies. This Cake Mix Chocolate Chip Santa Cookies recipe is an easy, festive twist on a classic treat. With just a few ingredients, you can bake soft, chewy cookies that are perfect for sharing with friends and family. Whether you’re preparing for a Christmas party, or simply want to treat yourself, these Santa-shaped cookies are sure to bring a smile to everyone’s face.
Ingredients:
- 1 box of yellow cake mix (any brand will do)
- 1/2 cup of unsalted butter, softened
- 2 large eggs
- 1 cup of semi-sweet chocolate chips
- 1/2 teaspoon vanilla extract
- Red and white sprinkles (for Santa’s hat and beard)
- Santa-shaped cookie cutter (optional)
How to Make Cake Mix Chocolate Chip Santa Cookies:
- Preheat the Oven:
Start by preheating your oven to 350°F (175°C). Line a baking sheet with parchment paper for easy cleanup. - Prepare the Dough:
In a large mixing bowl, combine the cake mix, softened butter, eggs, and vanilla extract. Stir until the dough is smooth and well mixed. If the dough feels a bit too sticky, you can chill it for about 10 minutes. - Add the Chocolate Chips:
Fold in the chocolate chips until evenly distributed throughout the dough. This will give your cookies that rich, chocolatey goodness we all love. - Shape the Cookies:
Using a Santa-shaped cookie cutter, press the dough into the cutter and place the shaped cookies on the prepared baking sheet. If you don’t have a Santa cutter, you can form the dough into small round balls. - Decorate the Cookies:
Before baking, use the red and white sprinkles to create Santa’s hat and beard on the cookies. Sprinkle red on the top part of the cookie to form the hat, and white on the bottom for the beard. - Bake:
Place the baking sheet in the preheated oven and bake for 8-10 minutes or until the edges of the cookies are slightly golden. Be careful not to overbake, as these cookies are meant to stay soft and chewy. - Cool and Enjoy:
Allow the cookies to cool on the baking sheet for a few minutes before transferring them to a wire rack to cool completely. Once cooled, they’re ready to serve or package up as gifts!
Tips for Perfect Santa Cookies:
- Chill the Dough: If you’re having trouble shaping the cookies, chill the dough for 10-15 minutes in the fridge before cutting into shapes.
- Customize the Sprinkles: You can get creative with the sprinkles! Try adding green sprinkles for a fun Christmas twist, or use red and white for a more traditional look.
- Add More Chocolate: If you’re a chocolate lover, feel free to add extra chocolate chips or even some M&Ms for a colorful addition to the cookies.
Storage Instructions:
Store your Cake Mix Chocolate Chip Santa Cookies in an airtight container at room temperature for up to one week. If you want to keep them fresh for longer, you can freeze them for up to 3 months.
Conclusion:
These Cake Mix Chocolate Chip Santa Cookies are the ultimate holiday treat. They’re quick to prepare, soft and chewy, and a fun way to spread holiday cheer. Whether you’re baking with family, sharing with friends, or leaving out a plate for Santa, these cookies will bring a smile to everyone’s face. So, grab your cake mix, preheat the oven, and start baking – Santa will be thrilled!
Serving and Storage Tips for Cake Mix Chocolate Chip Santa Cookies
Serving Tips:
- Festive Presentation: For a special touch, serve your Cake Mix Chocolate Chip Santa Cookies on a festive platter or in a decorated holiday tin. You can even arrange them in the shape of a Christmas tree for an extra wow factor at holiday parties or gatherings.
- Pair with Drinks: These cookies pair wonderfully with a glass of cold milk, hot chocolate, or even a warm cup of coffee. They’re also a great addition to a dessert table or holiday cookie exchange.
- Serving Size: Depending on the size of your cookie cutter, each Santa-shaped cookie is perfect as a single serving. For smaller cookies, you can arrange a few on a plate for guests to enjoy.
- Make It a Gift: Package these cookies in a cute gift box or jar tied with a ribbon. They make for thoughtful homemade holiday gifts that friends and family will appreciate.
Storage Tips:
- Room Temperature: Store your cookies in an airtight container at room temperature for up to 1 week. Keeping them in a container will help retain their soft, chewy texture.
- Freezing: For longer storage, you can freeze the cookies. Place the cooled cookies in a single layer on a baking sheet and freeze for 1-2 hours. Once frozen, transfer the cookies into an airtight container or freezer bag. They will stay fresh for up to 3 months.
- Thawing Frozen Cookies: When ready to enjoy your frozen cookies, let them thaw at room temperature for about 20-30 minutes. For an even warmer treat, you can reheat them in the microwave for a few seconds or in a preheated oven at 300°F (150°C) for 3-5 minutes.
By following these simple serving and storage tips, you can ensure that your Cake Mix Chocolate Chip Santa Cookies stay fresh and delicious throughout the holiday season!
1. Can I use a different cake mix for this recipe?
Yes, you can! While this recipe calls for a yellow cake mix, you can experiment with other flavors such as chocolate, vanilla, or even spice cake for a unique twist. Keep in mind that different cake mixes may alter the flavor or texture of the cookies slightly, but they will still turn out delicious!
2. Can I make these cookies without a Santa-shaped cookie cutter?
Absolutely! If you don’t have a Santa-shaped cookie cutter, you can simply roll the dough into small balls and press them flat with your hands. You can also use any other cookie cutter shape you have on hand or just shape them into regular rounds. The red and white sprinkles will still give them a festive touch!
3. How can I make these cookies more festive?
In addition to using Santa-shaped cookie cutters, you can add more holiday-themed decorations like colored sugar, edible glitter, or holiday-themed M&Ms. You can also drizzle melted white chocolate on top for a snow-like effect or add a few candy cane pieces for a peppermint twist.
4. Can I make the dough ahead of time?
Yes! You can prepare the dough ahead of time and store it in the refrigerator for up to 24 hours. Just make sure to wrap the dough tightly in plastic wrap or store it in an airtight container. When you’re ready to bake, let the dough sit at room temperature for a few minutes to soften slightly before shaping and baking.

Cake Mix Chocolate Chip Santa Cookies Recipe
- Prep Time: 10 minutes
- Cook Time: 12 minutes
- Total Time: 22 minutes
- Yield: 24 cookies 1x
- Category: Dessert
- Cuisine: American
Description
These Cake Mix Chocolate Chip Santa Cookies are the ultimate holiday treat! Made with boxed cake mix, festive sprinkles, and chocolate chips, these cookies are soft, chewy, and full of holiday cheer. They’re quick, easy, and perfect for baking with kids or whipping up last-minute for a holiday gathering.
Ingredients
- 1 box (15.25 oz) vanilla or yellow cake mix
- 1/2 cup unsalted butter, melted
- 2 large eggs
- 1 tsp vanilla extract
- 1 cup semi-sweet chocolate chips
- 1/2 cup holiday sprinkles (red, green, and white)
Instructions
1. Preheat Oven:
- Preheat your oven to 350°F (175°C). Line a baking sheet with parchment paper or a silicone baking mat.
2. Make the Dough:
- In a large mixing bowl, combine the cake mix, melted butter, eggs, and vanilla extract. Mix until a soft dough forms.
- Fold in the chocolate chips and sprinkles, distributing them evenly throughout the dough.
3. Scoop and Shape:
- Use a cookie scoop or spoon to drop rounded tablespoons of dough onto the prepared baking sheet, spacing them about 2 inches apart.
- For an extra festive touch, press a few extra sprinkles or chocolate chips onto the tops of the dough balls.
4. Bake the Cookies:
- Bake in the preheated oven for 10-12 minutes, or until the edges are set and the tops are slightly puffed.
- Remove from the oven and let the cookies cool on the baking sheet for 5 minutes before transferring them to a wire rack to cool completely.
Notes
- Storage: Store the cookies in an airtight container at room temperature for up to 5 days.
- Freezing: Freeze the unbaked cookie dough balls on a baking sheet, then transfer to a freezer bag. Bake directly from frozen, adding 1-2 extra minutes to the baking time.
- Customization: Swap out the chocolate chips for white chocolate or add crushed candy canes for a peppermint twist.

