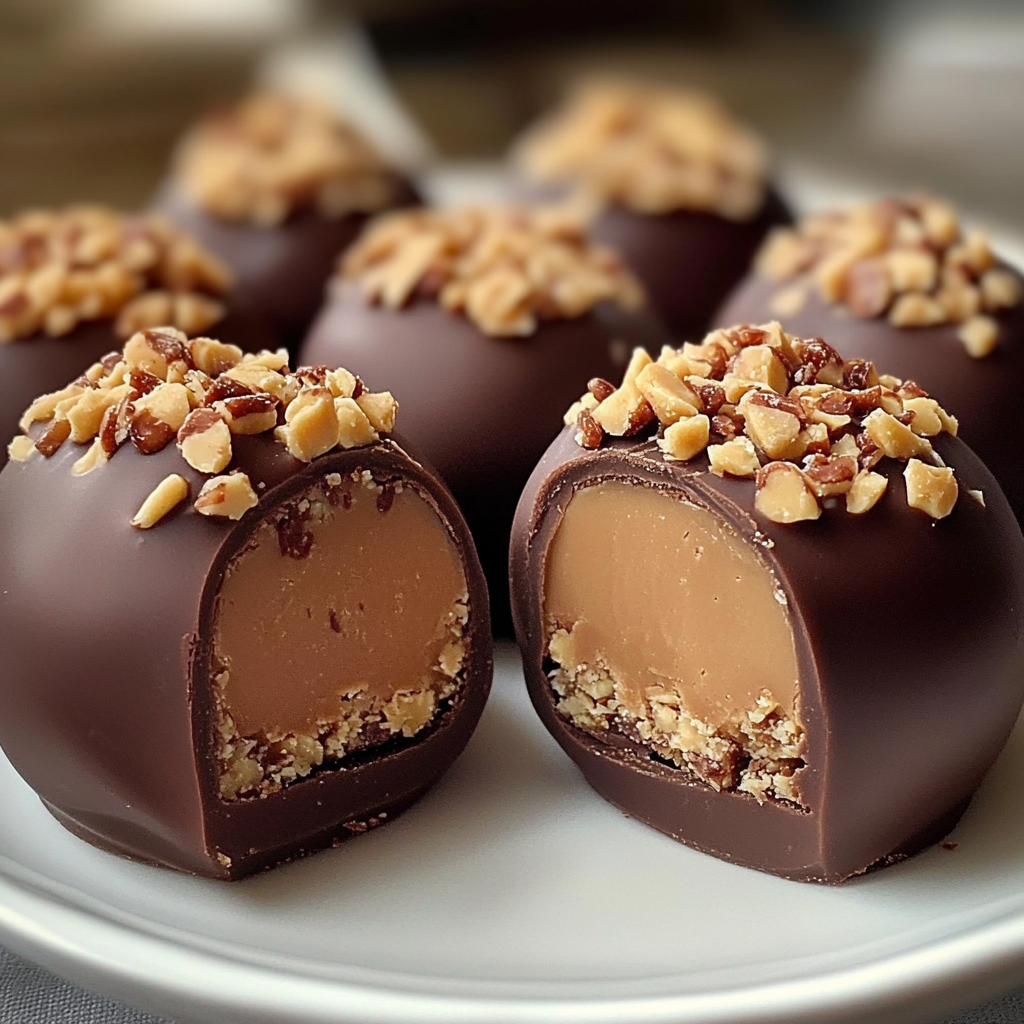
If you’re looking for a decadent and easy-to-make treat, look no further than Butterfinger Peanut Butter Bombs. This no-bake dessert is a perfect combination of creamy peanut butter, crispy Butterfinger candy pieces, and rich chocolate coating. Ideal for satisfying your sweet tooth, these peanut butter bombs are quick to prepare and perfect for any occasion—whether you’re hosting a party, preparing a gift, or simply craving a homemade dessert.
Ingredients
To make these tasty Butterfinger Peanut Butter Bombs, you’ll need:
- 1 cup creamy peanut butter: Choose a high-quality peanut butter for a smooth texture.
- 1 ½ cups powdered sugar: This sweetens the mixture and helps bind everything together.
- 1 cup Butterfinger candy bars: Crushed into small pieces for that signature crunch.
- 1 ½ cups milk chocolate chips: For the chocolate coating that brings it all together.
- 1 teaspoon vanilla extract: Adds a touch of flavor to the peanut butter mixture.
- Pinch of salt: Balances the sweetness of the dessert.
Instructions
- Mix the Peanut Butter Mixture: In a medium-sized mixing bowl, combine the creamy peanut butter, powdered sugar, vanilla extract, and a pinch of salt. Stir until smooth and well-blended. The mixture should be thick but not too sticky.
- Add Butterfinger Pieces: Take the crushed Butterfinger candy bars and fold them into the peanut butter mixture. The crunchy candy pieces add texture and flavor, giving your peanut butter bombs their signature twist.
- Shape the Bombs: Using your hands, roll the mixture into small balls, about 1 inch in diameter. Place the formed balls onto a parchment-lined baking sheet or tray.
- Chill the Peanut Butter Bombs: Place the tray of peanut butter balls in the freezer for about 20-30 minutes, or until firm. This step helps the balls hold their shape when coated in chocolate.
- Coat with Chocolate: Once the peanut butter bombs are firm, melt the chocolate chips in a microwave-safe bowl in 20-30 second intervals, stirring between each, until smooth. Dip each peanut butter ball into the melted chocolate, covering it completely. You can use a fork to help dip and lift the balls out of the chocolate.
- Set the Chocolate Coating: Return the chocolate-coated peanut butter bombs to the tray and place them back in the freezer for an additional 10-15 minutes to allow the chocolate to harden.
- Serve and Enjoy: Once the chocolate is set, your Butterfinger Peanut Butter Bombs are ready to serve! Keep them stored in the fridge for the best texture.
Tips for the Perfect Peanut Butter Bombs
- Use smooth peanut butter: While chunky peanut butter can add extra texture, creamy peanut butter gives the best result for these bombs.
- Be patient with the chocolate: Allow the chocolate to cool slightly before dipping the peanut butter balls to avoid melting the filling.
- Customize with toppings: Feel free to sprinkle some extra crushed Butterfinger pieces on top of the chocolate for a decorative touch and added crunch.
Storage Tips
Store your Butterfinger Peanut Butter Bombs in an airtight container in the fridge. They will stay fresh for up to one week. You can also freeze them for longer storage—just be sure to separate each layer with parchment paper to prevent them from sticking together.
Conclusion
Butterfinger Peanut Butter Bombs are the perfect treat for anyone who loves the combination of chocolate and peanut butter with a bit of crunch. Whether you’re preparing them for a party, as a sweet snack, or simply for yourself, these easy-to-make, no-bake bombs are sure to become a favorite. Whip up a batch today and enjoy the sweet, creamy, and crunchy goodness of these irresistible peanut butter delights!
Serving and Storage Tips for Butterfinger Peanut Butter Bombs
Serving Tips:
- Serve Chilled: These peanut butter bombs are best served chilled. The cold temperature keeps the chocolate coating firm and the peanut butter filling creamy.
- Portion Sizes: While these treats are rich and indulgent, you can easily make them smaller for bite-sized portions, which is great for parties or gatherings.
- Garnish for Extra Flair: Consider sprinkling extra crushed Butterfinger pieces on top of the chocolate coating or drizzle with melted chocolate to enhance the appearance and texture.
- Pairing: These peanut butter bombs pair perfectly with a glass of cold milk or a hot cup of coffee, making them a delightful treat any time of the day.
Storage Tips:
- Refrigeration: Store your Butterfinger Peanut Butter Bombs in an airtight container in the fridge. This will keep them fresh for up to one week. The cool temperature helps maintain the perfect texture for the peanut butter and chocolate coating.
- Freezing: For longer storage, you can freeze these treats! Place the peanut butter bombs in a single layer on a baking sheet and freeze them until firm. Once frozen, transfer them to an airtight container or freezer bag for up to 3 months. When ready to eat, simply thaw in the refrigerator for a few hours.
- Avoid Humidity: When storing, make sure the container is tightly sealed to prevent the treats from absorbing moisture, which could affect their texture and flavor.
1. Can I use crunchy peanut butter instead of creamy?
Yes, you can use crunchy peanut butter, but the texture will change. While creamy peanut butter provides a smooth and uniform consistency, crunchy peanut butter will add extra texture and bite to the peanut butter filling. It’s all about personal preference!
2. How can I make these peanut butter bombs without Butterfinger candy?
If you don’t have Butterfinger candy, you can substitute it with any crunchy candy or chocolate bars, such as chopped-up Butterfingers or even Heath bars, for that same toffee and crunch. You can also use crushed graham crackers for a simpler alternative.
3. Can I make these peanut butter bombs ahead of time?
Yes! These Butterfinger Peanut Butter Bombs can be made ahead of time. In fact, they taste even better when they’ve had time to set in the fridge. Simply store them in an airtight container in the fridge for up to one week, or freeze them for longer storage.
4. Can I use white chocolate or dark chocolate instead of milk chocolate for the coating?
Absolutely! You can swap the milk chocolate for dark chocolate or white chocolate depending on your taste preferences. Each option will give a different flavor profile, but they will all complement the peanut butter filling beautifully. Just make sure to melt the chocolate properly for a smooth coating.

Butterfinger Peanut Butter Bombs
- Prep Time: 15 minutes
- Cook Time: 30 minutes
- Total Time: 45 minutes
- Yield: 20–24 bombs 1x
- Category: Dessert, No-Bake
- Cuisine: American
Description
These Butterfinger Peanut Butter Bombs are a decadent no-bake treat packed with creamy peanut butter, crunchy Butterfinger bits, and a chocolate coating. Perfect for parties, holidays, or whenever you need a quick and delicious dessert!
Ingredients
- 1 cup creamy peanut butter
- 1/2 cup unsalted butter, softened
- 1 tsp vanilla extract
- 2 cups powdered sugar
- 1 cup crushed Butterfinger candy bars (about 3 full-size bars)
- 2 cups semi-sweet or milk chocolate chips
- 1 tbsp coconut oil or vegetable shortening (optional, for smoother chocolate coating)
Instructions
1. Make the Peanut Butter Filling:
- In a large mixing bowl, combine the peanut butter, softened butter, and vanilla extract. Mix until smooth and creamy.
- Gradually add the powdered sugar, mixing until a dough-like consistency forms.
- Fold in the crushed Butterfinger pieces until evenly distributed.
2. Shape the Bombs:
- Scoop about 1 tablespoon of the peanut butter mixture and roll it into a ball. Repeat with the remaining mixture.
- Place the balls on a baking sheet lined with parchment paper and freeze for 20-30 minutes, or until firm.
3. Melt the Chocolate:
- In a microwave-safe bowl, melt the chocolate chips and coconut oil (if using) in 20-second intervals, stirring after each, until smooth and fully melted. Alternatively, use a double boiler to melt the chocolate.
4. Coat the Bombs:
- Using a fork or dipping tool, dip each peanut butter ball into the melted chocolate, ensuring it’s fully coated.
- Gently tap off any excess chocolate and place the coated ball back onto the parchment-lined baking sheet.
5. Chill and Serve:
- Refrigerate the chocolate-coated bombs for 15-20 minutes, or until the chocolate is set.
- Store in an airtight container in the refrigerator for up to a week.
Notes
- Decorate: Sprinkle extra crushed Butterfinger pieces on top of the bombs before the chocolate sets for a decorative touch.
- Freezing: These bombs freeze well! Store in a freezer-safe container for up to 3 months. Thaw in the refrigerator before serving.
- Mini Version: Make bite-sized versions by using a teaspoon of filling for each ball.

