
Introduction
Craving a satisfying, crispy, and flavorful dish that’s also a bit lighter on the calories? Look no further than Baked Chicken Chimichangas! This twist on the traditional deep-fried chimichanga offers all the deliciousness you love without the extra grease. Whether you’re feeding a family or hosting a casual get-together, these baked chicken chimichangas are sure to be a hit. Read on to discover how to make this delightful recipe and why it’s a fantastic choice for a healthier meal.
Ingredients
- 2 cups cooked, shredded chicken (preferably from a rotisserie chicken)
- 1 cup shredded cheese (cheddar or a blend works great)
- 1 cup black beans, drained and rinsed
- 1 cup corn kernels (fresh or frozen)
- 1/2 cup diced onions
- 1/2 cup diced bell peppers (red or green)
- 1/2 cup salsa (or more to taste)
- 1 tablespoon taco seasoning (or more to taste)
- 8 large flour tortillas
- Olive oil spray
- Fresh cilantro, chopped (for garnish)
- Sour cream and guacamole (for serving, optional)
Instructions

- Preheat the Oven: Set your oven to 400°F (200°C) and line a baking sheet with parchment paper or lightly grease it with cooking spray.
- Prepare the Filling: In a large bowl, combine the shredded chicken, cheese, black beans, corn, onions, bell peppers, salsa, and taco seasoning. Mix well to ensure all ingredients are evenly distributed.
- Assemble the Chimichangas: Lay a tortilla flat on a clean surface. Spoon approximately 1/4 cup of the filling mixture into the center of the tortilla. Fold the sides in and then roll up from the bottom, securing the filling inside. Place each rolled chimichanga seam-side down on the prepared baking sheet.
- Bake: Lightly spray the tops of the chimichangas with olive oil spray to help them crisp up. Bake in the preheated oven for 20-25 minutes, or until the tortillas are golden brown and crispy.
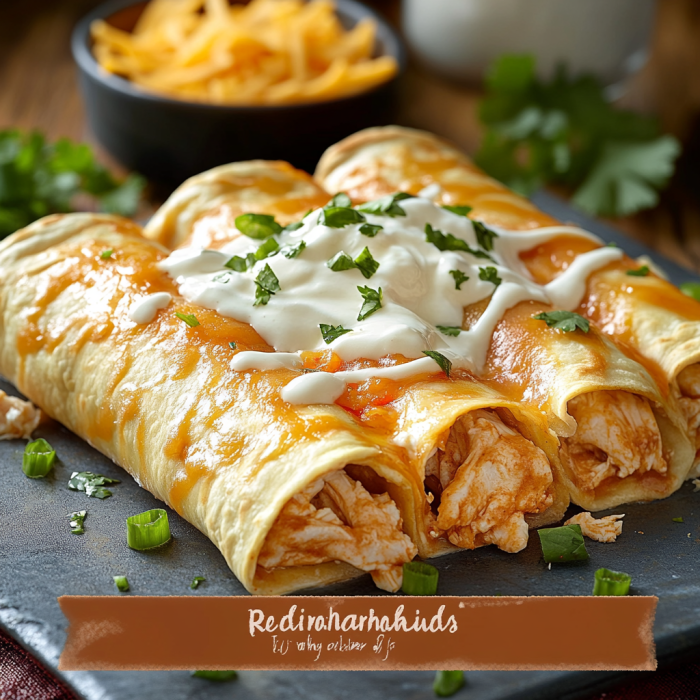
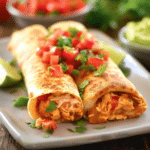
- Serve: Once baked, let the chimichangas cool for a few minutes before serving. Garnish with fresh cilantro and serve with sour cream and guacamole if desired.
Tips for the Perfect Baked Chicken Chimichangas
- Use Rotisserie Chicken: For a convenient and flavorful option, shredded rotisserie chicken is an excellent choice. It saves time and adds a delicious depth of flavor to your chimichangas.
- Customize Your Filling: Feel free to add other vegetables or ingredients to the filling based on your preferences. Sautéed mushrooms, spinach, or even some diced tomatoes can be great additions.
- Crispier Chimichangas: For an extra crispy exterior, brush the tortillas with a thin layer of olive oil before baking. This step enhances the crunch and golden color.
Why Choose Baked Chicken Chimichangas?
Baked Chicken Chimichangas offer a healthier alternative to the traditional fried version, without sacrificing any of the flavor. Baking instead of frying reduces the amount of added fat and calories, making this dish a more nutritious choice for those watching their diet. Additionally, this recipe is easy to prepare, making it perfect for busy weeknights or meal prepping for the week.
Conclusion
Enjoy the delightful crunch and savory flavors of Baked Chicken Chimichangas, a healthier twist on a beloved classic. With simple ingredients and easy preparation, this recipe is a fantastic option for a quick dinner or a tasty party dish. Give it a try and savor the deliciousness without the guilt!
Serving and Storage Tips for Baked Chicken Chimichangas
Serving Tips:
- Garnish with Fresh Herbs: Sprinkle freshly chopped cilantro over the chimichangas just before serving. This adds a burst of color and a fresh flavor that complements the dish beautifully.
- Pair with Sides: Serve your baked chicken chimichangas with traditional Mexican sides such as Mexican rice, refried beans, or a simple salad. Adding a side of salsa, sour cream, and guacamole provides extra flavor and richness.
- Cut for Easy Eating: For a fun twist, cut the chimichangas into smaller pieces or strips and serve them as appetizers or party snacks. They pair wonderfully with dipping sauces like salsa, queso, or a creamy chipotle sauce.
- Warm and Crispy: For the best texture, serve the chimichangas warm and crispy. If they sit for a while, the exterior may lose some of its crunch. Reheat them in the oven to help restore their crispiness.
Storage Tips:
- Refrigeration: Store any leftover chimichangas in an airtight container in the refrigerator. They will keep for up to 3-4 days. Allow them to cool completely before storing to prevent condensation from making them soggy.
- Freezing: For longer storage, you can freeze baked chicken chimichangas. Place them in a single layer on a baking sheet and freeze until solid. Transfer the frozen chimichangas to a freezer-safe bag or container. They can be stored in the freezer for up to 2-3 months.
- Reheating: To reheat, preheat your oven to 375°F (190°C). Place the chimichangas on a baking sheet and heat for about 10-15 minutes, or until they are heated through and the exterior is crispy again. You can also reheat them in an air fryer for an even crisper result.
- Avoid Microwave Reheating: While you can use a microwave to reheat the chimichangas, this method may make the tortillas soggy. If you must use a microwave, place the chimichangas on a microwave-safe plate and cover them with a damp paper towel to help retain moisture.
By following these serving and storage tips, you can ensure that your Baked Chicken Chimichangas remain delicious and enjoyable, whether you’re serving them fresh or saving them for later.
- Can I use a different type of cheese in this recipe? Yes, you can use any cheese you prefer or have on hand. Cheddar, Monterey Jack, or a blend of Mexican cheeses all work well in this recipe. Feel free to experiment with different varieties to find your favorite combination.
- Can I make these chimichangas ahead of time? Absolutely! You can prepare the chimichangas in advance and freeze them before baking. To do this, assemble and roll the chimichangas, then freeze them on a baking sheet until solid. Transfer to a freezer-safe bag or container. When ready to bake, preheat your oven to 400°F (200°C) and bake from frozen for 25-30 minutes, or until crispy and heated through.
- Can I use a different protein instead of chicken? Yes, you can substitute chicken with other proteins like ground beef, turkey, or even tofu for a vegetarian option. Just make sure to cook and season the protein before adding it to the filling mixture. Adjust the seasoning and ingredients based on your choice to suit your taste.
- What can I serve with Baked Chicken Chimichangas? Baked Chicken Chimichangas pair wonderfully with a variety of sides. Consider serving them with Mexican rice, refried beans, or a fresh salad. Complement the meal with traditional toppings like salsa, sour cream, guacamole, and shredded lettuce for added flavor and texture.
Baked Chicken Chimichangas
- Prep Time: 15 minutes
- Cook Time: 25 minutes
- Total Time: 40 minutes
- Yield: 4 servings 1x
- Category: Main Course
- Method: Frying, Baking
- Cuisine: Mexican-Inspired
Description
Chicken Chimichangas are crispy, golden burritos filled with seasoned shredded chicken, cheese, and beans, then fried or baked until crisp. These Mexican-inspired delights are perfect for a satisfying meal served with salsa, guacamole, or sour cream.
Ingredients
- 2 cups (450g) cooked, shredded chicken
- 1 tbsp olive oil
- 1 small onion, diced
- 1 green bell pepper, diced
- 2 garlic cloves, minced
- 1 can (4 oz) diced green chilies
- 1 tbsp taco seasoning
- 1/2 cup (120ml) chicken broth
- 1 cup (120g) shredded cheddar or Monterey Jack cheese
- 1 can (15 oz) refried beans (optional)
- 8 large flour tortillas
- Vegetable oil, for frying
For Serving:
- Sour cream
- Salsa
- Guacamole
- Chopped fresh cilantro
Instructions
-
Prepare the Chicken Filling:
- Heat olive oil in a skillet over medium heat. Add diced onion and green bell pepper, cooking until softened (about 5 minutes).
- Add minced garlic and cook for an additional 1-2 minutes.
- Stir in shredded chicken, diced green chilies, taco seasoning, and chicken broth. Cook for 3-5 minutes until the mixture is heated through and well combined.
- Remove from heat and stir in the shredded cheese.
-
Assemble the Chimichangas:
- Lay a tortilla flat and spread a layer of refried beans (if using) in the center.
- Add a generous scoop of the chicken mixture on top.
- Fold the sides of the tortilla over the filling, then roll it up tightly from the bottom to create a burrito. Secure with toothpicks if needed.
- Repeat with the remaining tortillas and filling.
-
Fry the Chimichangas:
- Heat about 1 inch of vegetable oil in a large skillet over medium-high heat.
- Once hot, carefully add the chimichangas seam-side down and cook for 2-3 minutes per side, or until golden brown and crispy.
- Transfer to a plate lined with paper towels to drain excess oil.
(Alternative Baking Method)
- Preheat the oven to 400°F (200°C). Place assembled chimichangas on a baking sheet, brush with oil or melted butter, and bake for 20-25 minutes, or until golden and crispy.
-
Serve:
- Top with sour cream, salsa, guacamole, and chopped fresh cilantro. Serve hot!
Notes
- Add spice: Use spicy green chilies or add chopped jalapeños for heat.
- Make it cheesy: Add more shredded cheese inside the chimichangas for extra gooeyness.
- Storage: Store leftovers in an airtight container in the fridge for up to 3 days. Reheat in the oven for best results.