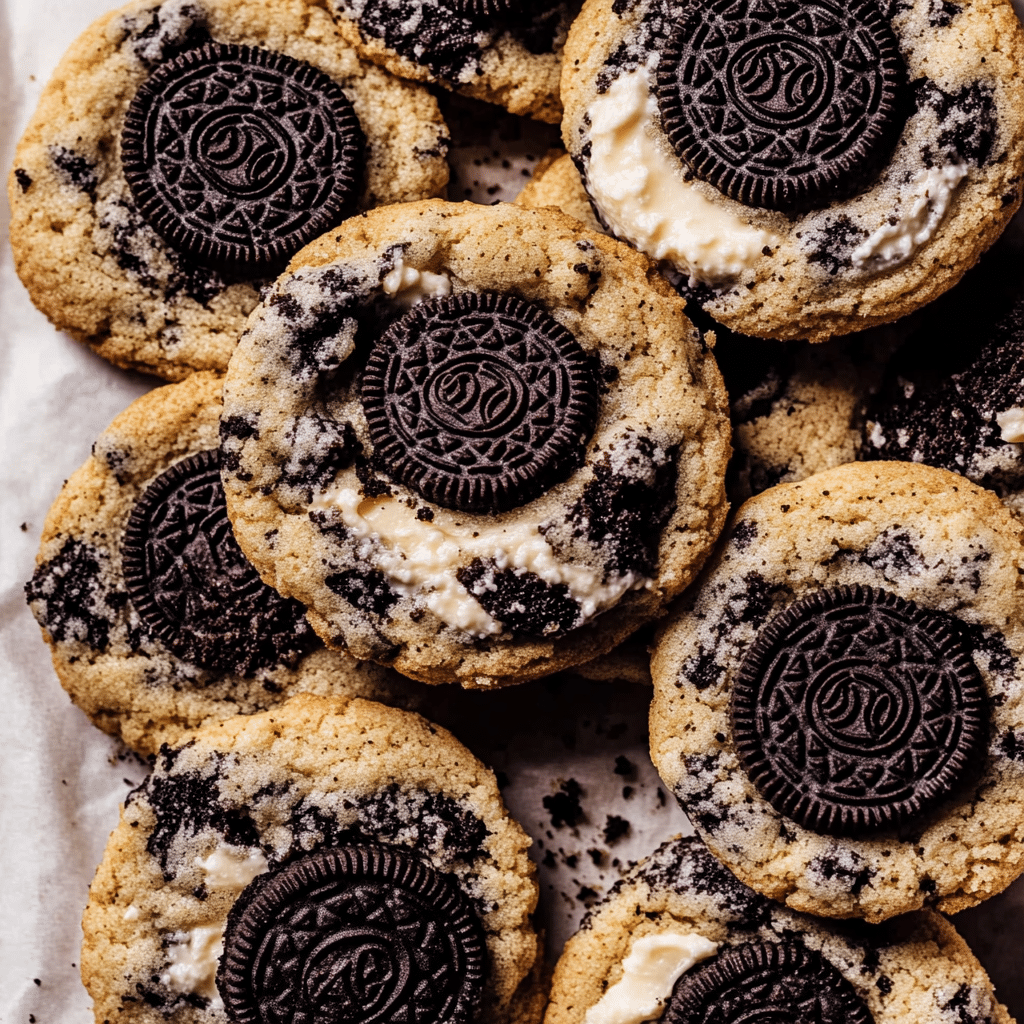
If you’re a fan of both Oreo cookies and cheesecake, then you’re in for a treat with these Oreo Cheesecake Cookies! Combining the creamy richness of cheesecake with the crispy, chocolatey crunch of Oreo cookies, this indulgent treat is a must-try for dessert lovers. Whether you’re baking for a special occasion or just craving something sweet, these cookies will satisfy your sweet tooth in the best way possible.
Why You’ll Love These Oreo Cheesecake Cookies
These Oreo Cheesecake Cookies are an incredible fusion of two beloved desserts. The soft, chewy cookie dough is studded with crushed Oreos, and each cookie is filled with a velvety cream cheese center, mimicking the texture of cheesecake. The combination of the tangy cream cheese filling and the chocolatey crunch from the Oreos creates a rich, decadent treat that everyone will love.
Ingredients You’ll Need
To make Oreo Cheesecake Cookies, you don’t need many ingredients, and most are pantry staples. Here’s what you’ll need:
- 1 cup butter, softened
- 1 cup granulated sugar
- 1 egg
- 2 tsp vanilla extract
- 2 cups all-purpose flour
- 1/2 tsp baking soda
- 1/2 tsp salt
- 1 cup crushed Oreos (about 8-10 cookies)
- 8 oz cream cheese, softened
- 1/4 cup powdered sugar
How to Make Oreo Cheesecake Cookies
Making Oreo Cheesecake Cookies is easy, and the results are simply delicious. Just follow these simple steps:
- Prepare the Cheesecake Filling:
- In a medium bowl, beat the softened cream cheese and powdered sugar together until smooth and creamy.
- Set the cheesecake filling aside.
- Make the Cookie Dough:
- Preheat your oven to 350°F (175°C) and line a baking sheet with parchment paper.
- In a large bowl, beat the softened butter and granulated sugar together until light and fluffy.
- Add the egg and vanilla extract, and continue mixing until fully incorporated.
- In a separate bowl, whisk together the flour, baking soda, and salt. Gradually add the dry ingredients to the wet mixture, mixing until the dough comes together.
- Fold in the crushed Oreos, making sure they are evenly distributed throughout the dough.
- Assemble the Cookies:
- Scoop out tablespoon-sized portions of cookie dough and flatten them slightly.
- Place about a teaspoon of the cheesecake filling in the center of each dough ball.
- Carefully fold the edges of the cookie dough over the filling to seal it inside. Roll the dough into a ball again and place it on the prepared baking sheet.
- Bake the Cookies:
- Bake the cookies in the preheated oven for 10-12 minutes, or until the edges are golden brown.
- Let the cookies cool on the baking sheet for 5 minutes before transferring them to a wire rack to cool completely.
Tips for Perfect Oreo Cheesecake Cookies
- Use room temperature ingredients: Make sure your butter, cream cheese, and egg are at room temperature before you start baking. This helps create a smoother dough and filling.
- Don’t overmix the dough: When you add the flour, mix until just combined to avoid tough cookies.
- Chill the dough: If the dough feels too soft, chill it in the fridge for 30 minutes before baking. This will make it easier to handle and help the cookies hold their shape during baking.
- Use regular Oreos: For the best texture and flavor, stick with classic Oreos instead of variations like double stuff or flavored Oreos.
Variations to Try
While this recipe is fantastic as-is, you can customize it to fit your taste. Here are a few fun ideas:
- Add chocolate chips: Mix in some mini chocolate chips for extra sweetness and texture.
- Use different cookies: If you want to change things up, try using other cookies, such as Golden Oreos or even chocolate chip cookies, in place of the Oreos.
- Make mini cookies: For bite-sized treats, scoop out smaller portions of dough and reduce the baking time by a few minutes.
Serving Suggestions
These Oreo Cheesecake Cookies are perfect on their own, but here are some ideas for serving:
- Serve with milk: There’s nothing better than dipping these cookies into a glass of cold milk.
- Pair with ice cream: Serve a scoop of vanilla or chocolate ice cream alongside these cookies for a fun dessert combination.
- Pack them for lunch: These cookies make a great snack for school or work lunches.
Conclusion
Oreo Cheesecake Cookies are a delightful dessert that brings together the best of both worlds—cheesecake and Oreos. With their rich, creamy filling and chewy, chocolatey exterior, they are sure to be a hit at any gathering. Easy to make and even easier to eat, these cookies are a must-try for any Oreo lover. Bake a batch today and indulge in a treat that’s sure to become a favorite!
Serving and Storage Tips for Oreo Cheesecake Cookies
Serving Tips:
- Chill Before Serving: After baking, let the cookies cool on a wire rack. You can chill them in the refrigerator for 15-30 minutes for a firmer texture, which helps highlight the cream cheese filling even more.
- Pair with a Beverage: Oreo Cheesecake Cookies pair wonderfully with a cold glass of milk or a warm cup of coffee. For something more indulgent, serve them with a scoop of vanilla ice cream or whipped cream on top.
- Presentation Ideas: For a fun twist, plate these cookies with a drizzle of chocolate or caramel sauce. You can also sprinkle some crushed Oreos on top for extra crunch and visual appeal.
- Serve at Room Temperature: If you’ve stored them in the fridge, let the cookies come to room temperature before serving. This will help enhance the flavor and make them extra soft.
Storage Tips:
- Keep Them Fresh: Store Oreo Cheesecake Cookies in an airtight container to keep them fresh for up to 5 days at room temperature. Make sure the container is sealed tightly to prevent them from drying out.
- Refrigerate the Cookies: Since the cookies contain cream cheese, it’s best to refrigerate them if you plan to keep them for longer than a few days. Store them in an airtight container in the fridge for up to 1 week.
- Freezing for Later: If you’d like to enjoy these cookies at a later time, you can freeze them! Place the cookies in a single layer on a baking sheet and freeze for 1-2 hours. Once frozen, transfer them to a zip-top bag or airtight container and store in the freezer for up to 3 months. To serve, let them thaw at room temperature for a few hours or warm them slightly in the oven.
- Avoid Sticking: To prevent the cookies from sticking together, you can place a layer of parchment paper or wax paper between each cookie when storing them. This will help maintain their shape and texture.
By following these serving and storage tips, you’ll ensure that your Oreo Cheesecake Cookies stay delicious and fresh, ready to be enjoyed anytime!
1. Can I use different cookies instead of Oreos?
While Oreos are a key ingredient in this recipe, you can experiment with other cookies. Golden Oreos or even chocolate chip cookies would work well, but keep in mind that the texture and flavor may change. Traditional Oreos add a perfect balance of crunch and chocolate flavor that pairs well with the creamy cheesecake filling.
2. Can I make the cheesecake filling ahead of time?
Yes! You can prepare the cheesecake filling a day in advance and store it in an airtight container in the fridge. Just make sure it’s at room temperature before using it to fill the cookies, as cold filling can be harder to work with.
3. How do I prevent the cookies from spreading too much while baking?
If you find that your cookies spread too much, try chilling the dough in the refrigerator for 30 minutes before baking. Chilled dough holds its shape better during baking, and this step can help achieve thicker, chewier cookies.
4. Can I freeze these Oreo Cheesecake Cookies?
Absolutely! Oreo Cheesecake Cookies freeze well. Simply place the cookies in a single layer on a baking sheet and freeze them for 1-2 hours. Then, transfer them to a freezer-safe bag or airtight container. They will stay fresh in the freezer for up to 3 months. Just thaw at room temperature before serving, or warm them slightly in the oven.

Oreo Cheesecake Cookies
- Prep Time: 15 minutes
- Cook Time: 12 minutes
- Total Time: 57 minutes
- Yield: 12 cookies 1x
- Category: Dessert
- Method: Baking
- Cuisine: American
- Diet: Vegetarian
Description
These Oreo Cheesecake Cookies are soft, creamy, and loaded with chunks of Oreo cookies. With a slight tang from the cream cheese and a sweet, buttery cookie base, they’re like mini bites of Oreo cheesecake in cookie form. Perfect for a unique and easy-to-make treat that everyone will love!
Ingredients
- 4 oz cream cheese, softened
- 1/2 cup unsalted butter, softened
- 3/4 cup granulated sugar
- 1 cup all-purpose flour
- 1/2 tsp vanilla extract
- 10–12 Oreo cookies, coarsely chopped
Instructions
Prepare the Cookie Dough:
- In a large mixing bowl, beat the softened cream cheese and butter until smooth and creamy.
- Add the granulated sugar and continue beating until light and fluffy.
- Mix in the vanilla extract.
- Gradually add the flour and mix until just combined, being careful not to overmix.
- Gently fold in the chopped Oreo cookies until evenly distributed in the dough.
2. Chill the Dough:
- Cover the dough and refrigerate for at least 30 minutes. This helps the cookies hold their shape while baking.
3. Bake the Cookies:
- Preheat your oven to 350°F (175°C). Line a baking sheet with parchment paper.
- Scoop about 1 1/2 tablespoons of dough for each cookie, rolling it into a ball and placing it on the prepared baking sheet. Space cookies about 2 inches apart.
- Bake for 10–12 minutes, or until the edges are set and the centers are just slightly soft.
- Let the cookies cool on the baking sheet for a few minutes, then transfer them to a wire rack to cool completely.
Notes
- For Extra Oreos: Press a few more Oreo pieces into the tops of the cookies right before baking.
- Store cookies in an airtight container in the refrigerator for up to 5 days for a cheesecake-like texture.

