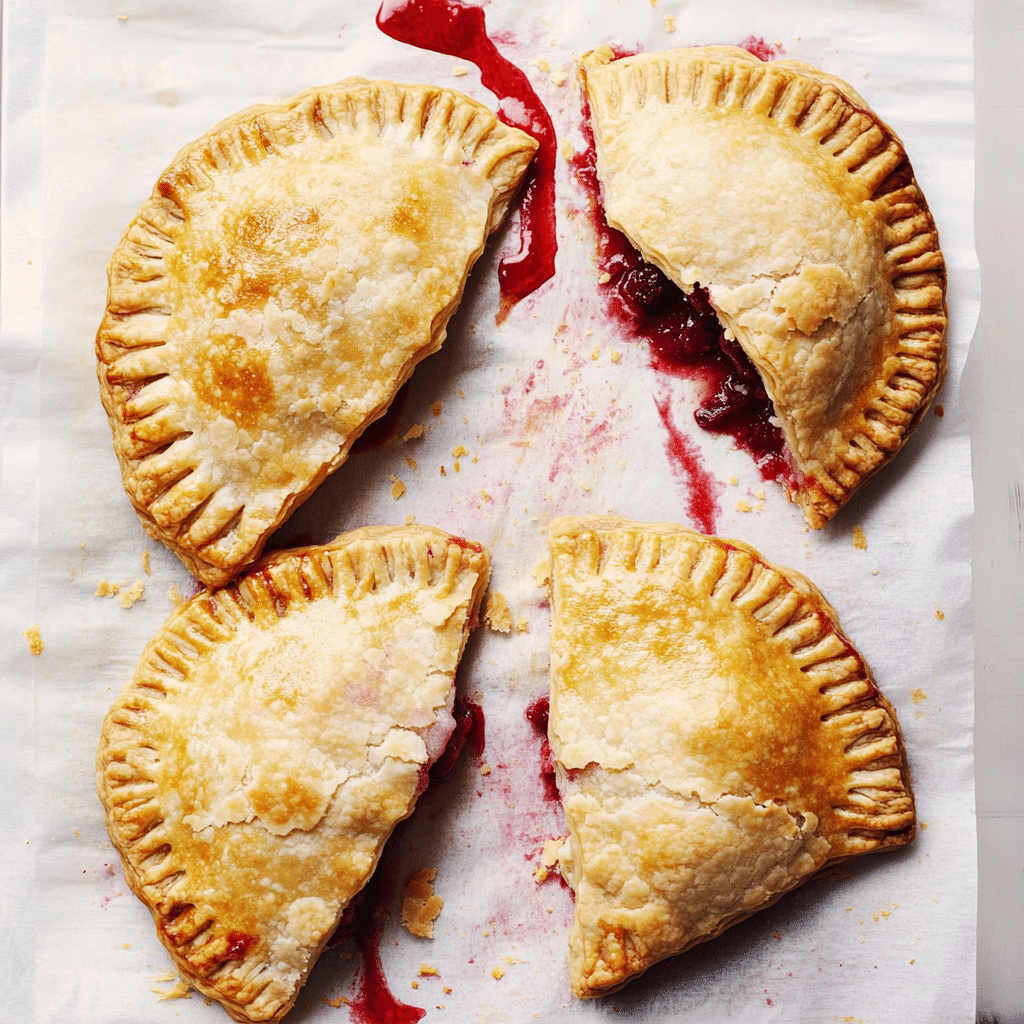
These Sour Cherry Hand Pies are flaky, golden pastries filled with a sweet-tart sour cherry filling, perfect for a handheld dessert or snack. Made with a buttery, flaky crust and a juicy cherry filling, these mini pies are great for picnics, holidays, or an easy treat on the go!
Why You’ll Love This Recipe
- Perfectly Portable – Easy to grab and eat with no utensils needed.
- Sweet & Tart Filling – Made with fresh or frozen sour cherries for the perfect balance.
- Flaky, Buttery Crust – A crisp, golden crust that pairs beautifully with the filling.
- Customizable – Try different fruit fillings, spices, or toppings.
- Make-Ahead Friendly – Store well for quick desserts throughout the week.
Ingredients
(Tip: You’ll find the full list of ingredients and measurements in the recipe card below.)
For the Pie Dough:
- All-purpose flour
- Unsalted butter (cold, cubed)
- Granulated sugar
- Salt
- Ice water
- Egg (for egg wash)
For the Sour Cherry Filling:
- Fresh or frozen sour cherries (pitted)
- Granulated sugar
- Cornstarch
- Lemon juice
- Vanilla extract
- Cinnamon (optional)
For Garnish (Optional):
- Coarse sugar (for a crunchy topping)
- Powdered sugar (for dusting)
- Simple glaze (powdered sugar + milk)
Directions
Step 1: Make the Pie Dough
- Mix Dry Ingredients – In a bowl, whisk together flour, sugar, and salt.
- Cut in Butter – Using a pastry cutter or food processor, cut the cold butter into the flour mixture until it resembles coarse crumbs.
- Add Ice Water – Slowly add ice water, 1 tablespoon at a time, mixing until the dough just comes together.
- Chill the Dough – Form into a disc, wrap in plastic wrap, and refrigerate for at least 30 minutes.
Step 2: Make the Sour Cherry Filling
- Cook the Cherries – In a saucepan, combine cherries, sugar, and lemon juice over medium heat.
- Thicken the Filling – Stir in cornstarch and cook until the mixture thickens. Remove from heat and let cool completely.
Step 3: Assemble the Hand Pies
- Roll Out Dough – On a floured surface, roll out the chilled dough to about ⅛-inch thick.
- Cut Shapes – Use a round cutter or a knife to cut out circles or rectangles for the pies.
- Fill & Seal – Spoon a small amount of cherry filling onto half of the cut-outs. Place another piece of dough on top and crimp the edges with a fork.
- Egg Wash & Vent – Brush the tops with egg wash and cut small slits for steam to escape.
Step 4: Bake the Hand Pies
- Preheat Oven – Set to 375°F (190°C) and line a baking sheet with parchment paper.
- Bake – Arrange pies on the baking sheet and bake for 20-25 minutes, or until golden brown.
- Cool & Serve – Let cool slightly before serving.
Step 5: Add Finishing Touches
- Dust with Powdered Sugar – Sprinkle for a simple finish.
- Drizzle with Glaze – Mix powdered sugar and milk for a light glaze.
- Serve Warm or Room Temperature – Enjoy fresh or store for later.
Servings and Timing
- Servings: 8-10 hand pies
- Prep Time: 30 minutes
- Cook Time: 25 minutes
- Chill Time: 30 minutes
Variations
- Chocolate Cherry Hand Pies – Add mini chocolate chips to the filling.
- Spiced Cherry Pies – Mix in nutmeg or cloves for a warm, cozy flavor.
- Vegan Option – Use plant-based butter and a non-dairy milk wash.
- Different Fruits – Swap cherries for blueberries, apples, or peaches.
Storage/Reheating
- Refrigeration: Store in an airtight container for up to 4 days.
- Freezing: Freeze unbaked pies and bake from frozen, adding 5 extra minutes.
- Reheating: Warm in the oven at 325°F (165°C) for 5-7 minutes.
FAQs
Can I use store-bought pie crust?
Yes! Pre-made dough saves time and still tastes great.
How do I keep my hand pies from leaking?
Seal the edges tightly and don’t overfill with fruit.
Can I make these ahead of time?
Yes! Assemble and refrigerate overnight before baking.
What’s the best way to make the crust extra flaky?
Use very cold butter and avoid overworking the dough.
Can I use canned cherry pie filling?
Yes, but homemade filling has a fresher, less processed taste.
How do I get a golden brown crust?
Brush with egg wash before baking for a beautiful golden finish.
Can I air-fry these?
Yes! Bake at 350°F (175°C) for 10-12 minutes in the air fryer.
How do I make the filling thicker?
Use extra cornstarch or let the filling cook longer to reduce excess liquid.
What’s the best way to transport these for a party?
Stack them in a box with parchment paper between layers.
Can I make mini versions of these?
Yes! Use a smaller cutter for bite-sized hand pies.
Conclusion
These Sour Cherry Hand Pies are the perfect balance of sweet and tart with a crisp, golden crust. Whether you enjoy them as a snack, dessert, or on-the-go treat, they’re sure to impress. Try this recipe today and enjoy homemade, bakery-style hand pies anytime!
Print
Sour Cherry Hand Pies
- Prep Time: 20 minutes
- Chill Time: 40 minutes
- Cook Time: 30 minutes
- Total Time: 1 hour 30 minutes
- Yield: 12 hand pies 1x
- Category: Dessert
- Method: Baking or Frying
- Cuisine: American
Description
These Sour Cherry Hand Pies are golden, flaky pastries filled with sweet-tart cherry filling, making them perfect for a grab-and-go dessert! They’re easy to make and can be baked or fried for a deliciously crispy finish.
Ingredients
For the Pie Dough:
- 2 1/2 cups all-purpose flour
- 1 tablespoon granulated sugar
- 1 teaspoon salt
- 1 cup (226g) unsalted butter, cold and cubed
- 6 tablespoons ice water
For the Sour Cherry Filling:
- 2 cups pitted sour cherries (fresh or frozen)
- 1/2 cup granulated sugar
- 1 tablespoon cornstarch
- 1 tablespoon lemon juice
- 1/2 teaspoon vanilla extract
For Assembly:
- 1 large egg, beaten (for egg wash)
- 1 tablespoon milk
- 2 tablespoons coarse sugar (for sprinkling)
Instructions
Step 1: Make the Pie Dough
- In a large bowl, whisk together flour, sugar, and salt.
- Cut in the cold butter using a pastry cutter or your fingers until the mixture resembles coarse crumbs.
- Slowly add ice water, 1 tablespoon at a time, mixing until the dough just comes together.
- Divide the dough in half, shape into discs, wrap in plastic, and chill for 30 minutes.
Step 2: Make the Sour Cherry Filling
- In a saucepan over medium heat, combine cherries, sugar, and lemon juice.
- Cook for 5 minutes, stirring occasionally, until the cherries start to release juice.
- In a small bowl, mix cornstarch with 1 tablespoon water, then stir into the cherries.
- Cook for 2-3 more minutes, until thickened. Remove from heat, stir in vanilla extract, and let cool.
Step 3: Roll and Cut the Dough
- On a lightly floured surface, roll out the chilled dough to ⅛-inch thickness.
- Use a 3-4 inch round cutter (or a knife) to cut out circles or rectangles.
- Place cutouts on a baking sheet lined with parchment paper and chill for 10 minutes.
Step 4: Assemble the Hand Pies
- Spoon 1-2 teaspoons of cherry filling onto half of the dough rounds.
- Brush the edges with egg wash (whisked egg + milk) and place another dough round on top.
- Press the edges with a fork to seal and cut small slits on top for venting.
- Brush tops with more egg wash and sprinkle with coarse sugar.
Step 5: Bake or Fry
To Bake:
- Preheat oven to 375°F (190°C).
- Bake for 18-22 minutes, until golden brown.
To Fry:
- Heat 2 inches of oil in a deep pan to 350°F (175°C).
- Fry pies for 1-2 minutes per side, until golden and crispy. Drain on paper towels.
Step 6: Cool & Serve
- Let the pies cool slightly before serving.
- Optional: Drizzle with powdered sugar glaze for extra sweetness!
Notes
- No fresh cherries? Use frozen or canned sour cherries, drained.
- Make-Ahead: Freeze unbaked pies for up to 2 months and bake from frozen.
- Extra Flavor: Add a pinch of cinnamon or almond extract to the filling.

